Administrators: Schedule Meetings for Active Mentorships
- Context
- Schedule a Meeting for Active Mentorships
- Follow-Up on Meeting Invitations
- Cancel or Reschedule a Meeting
Context
Introducing an exciting new feature in the virtual mentoring platform: the power for program administrators to seamlessly schedule meetings on behalf of mentors and mentees, effortlessly pushing these appointments into their shared calendar. This game-changing capability streamlines coordination, ensuring mentorship engagements happen smoothly and without any scheduling hiccups.
Dive into this article to discover how to utilize this new feature for your mentoring program administration and enhance the overall mentorship experience.
1- Schedule a Meeting for Active Mentorships
Program administrators can perform the following steps to schedule a meeting on behalf of active mentorships:
1.2 Within your admin dashboard, access the "Relationships" tile, which is positioned on the second row of the dashboard.
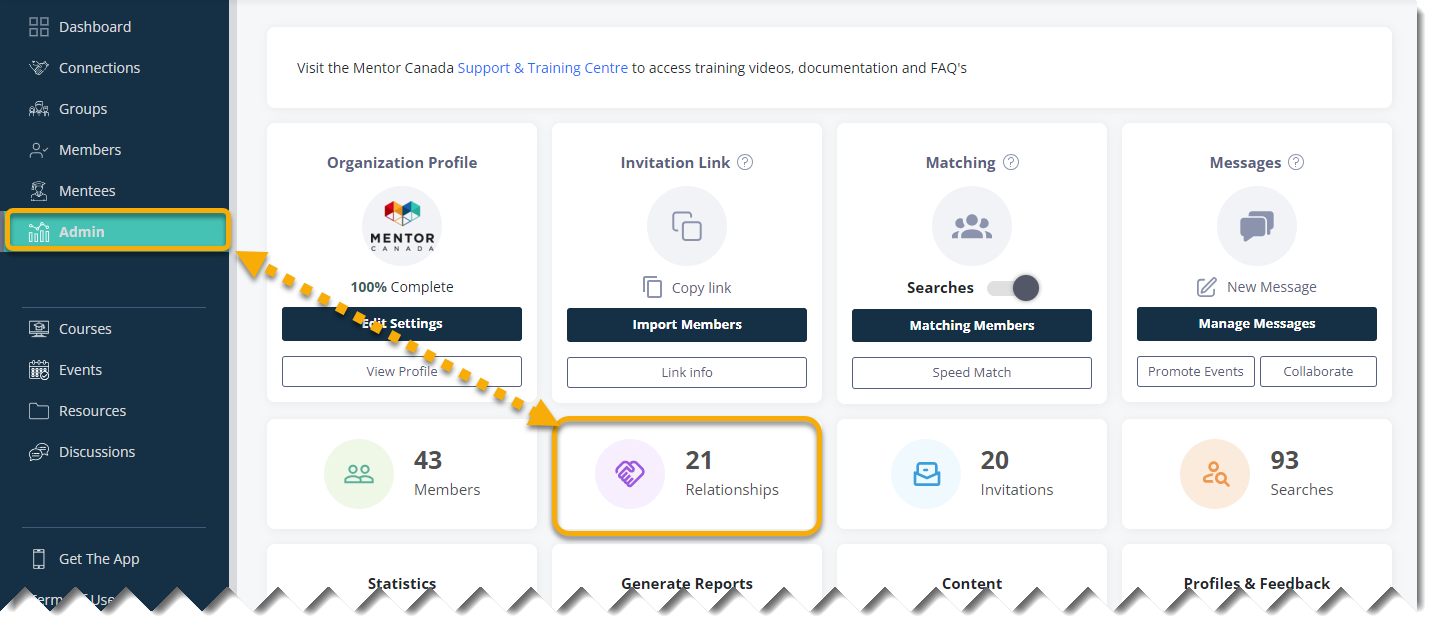
1.3 On the Relationships page, click the "Matched" tab to access information about current and active mentoring relationships.

1.4 Locate the specific mentorship for which you wish to schedule a mentoring meeting or recurring meetings.
Note: Please note that you can only book meetings for one mentorship at a time.

1.5 To proceed, scroll to the right until you find the Book Meeting button, then click on it.

Note: To locate the Book Meeting button, you can either scroll to the bottom of the page to access the horizontal scroll bar or consider reducing the zoom level in your web browser.
1.6 This action will open the calendar booking screen. Here, you can select various meeting details, including duration and meeting type.

Note: It's important to note that the available meeting type options are determined by the permissions you have previously configured. For more information on configuring meeting type permissions, please refer to this article: Meeting Type Settings
1.7 Indicate whether the meeting is recurring or leave this field blank if you are scheduling a one-time meeting.

1.8 Choose a date and time from the calendar and click Send Request.

Important: Ensure that both the mentor and mentee have set up their availability in advance for optimal booking efficiency. For instructions on how mentors and mentees can set their availability, refer to this article: Mentors & Mentees Onboarding Essentials
1.9 After sending the request, mentors and mentees will receive email notifications and mobile app notifications (if they have downloaded the mobile app). These notifications will inform them of the meeting request, and they will have the option to accept or decline it.
2 - Follow-Up on Meeting Invitations
After a program administrator has scheduled a meeting on behalf of a mentoring match, it's important to keep track of the invitation status, including whether it has been accepted, declined, or remains unacknowledged.
To check the status of sent invitations, follow these steps:
2.0 Start by accessing your admin dashboard. You can do this by clicking on the "Admin" tab located on the left-hand side of the screen.
2.1 Within the admin dashboard, locate and click on the "Relationships" tile, positioned on the second row of the dashboard.


2.3. On this screen, you'll find all meeting invitations between mentorships, accompanied by an attendance status tracker.

2.3.1. To adjust the order of meeting dates, simply click on the "Date" column title to toggle between newest and oldest.

2.3.2. If you're searching for a specific mentorship, utilize the "Search Name" field by typing the name of the mentor or mentee.

2.4 Decoding Invitation Statuses for Attendees:
- A list of meeting attendees will be displayed, along with status indicators:
- A green checkmark indicates they have accepted the invitation.
- A red "X" signifies that the invitation has been declined.
- A question mark (?) indicates that they have not yet accepted the invitation.

2.5 If you'd like to reach out to mentors and mentees who haven't yet responded to an upcoming meeting invitation, you can utilize the messaging feature for this purpose. For additional information on how to use this feature, please consult this article: Send Messages to Mentors & Mentees.
3 - Cancel or Reschedule a Meeting
In the following section, we'll guide you through the straightforward process of canceling or rescheduling meetings on behalf of a mentorship. To make adjustments to a mentorship's meeting schedule, adhere to these steps:
3.0 Start by accessing your admin dashboard. You can do this by clicking on the "Admin" tab located on the left-hand side of the screen.
3.1 Within the admin dashboard, locate and click on the "Relationships" tile, positioned on the second row of the dashboard.
3.2 On the Relationships page, select the "Matched" tab to gain access to information about current and active mentoring relationships.
3.3 Find the specific mentorship for which you have scheduled a mentoring meeting.
3.4 Click on Details under the "Mentoring Relationship" column for the selected mentorship.

3.5 This will take you to the Relationship Dashboard page. Locate the "Schedule Meetings" tile and click on View.

Note: The placement of the "Schedule Meetings" tile may vary on the Relationship Dashboard depending on your program's configuration. To learn more about configuring the Relationship Dashboard, refer to this article: Relationship Dashboard.
3.6 A window will open, displaying information about upcoming and past meetings. Ensure you are on the "Upcoming Meetings" tab and locate the meeting you scheduled, if there are multiple listings.

3.7 Towards the bottom of the section that displays meeting details, located just beneath the meeting location, you'll find the options to either "Cancel" or "Reschedule" the meeting. Simply click on the desired action.

3.7.1 When you choose "Cancel," a dialogue box will appear, prompting you to confirm the cancellation. Click OK to confirm or Cancel to dismiss the meeting cancellation.

3.7.2 Opting for "Reschedule" will lead you to a calendar where you can select a new date and time slot. Make your selection and then click Apply.

3.8 In both scenarios, both the mentor and mentee will receive email notifications and mobile app alerts (if they have downloaded the mobile app) to inform them of the cancellation or schedule change.
If you have questions or need further support, please contact our Support Team: support@mentoringcanada.ca