Custom Dashboard Widgets
Context
The virtual mentoring platform offers program administrators the ability to add a custom widget to the first row of the dashboard. This widget provides several functions, including linking to external websites, sharing brief announcements, integrating surveys, and displaying pictures. It serves as a versatile tool to enhance communication, engagement, and personalization within the mentoring program.
1- Create a Custom Widget
1.0 To include a custom widget on the dashboard, you will need to create the widget first. Access your administrator dashboard by clicking the "Admin" tab on the left-hand side of the page.
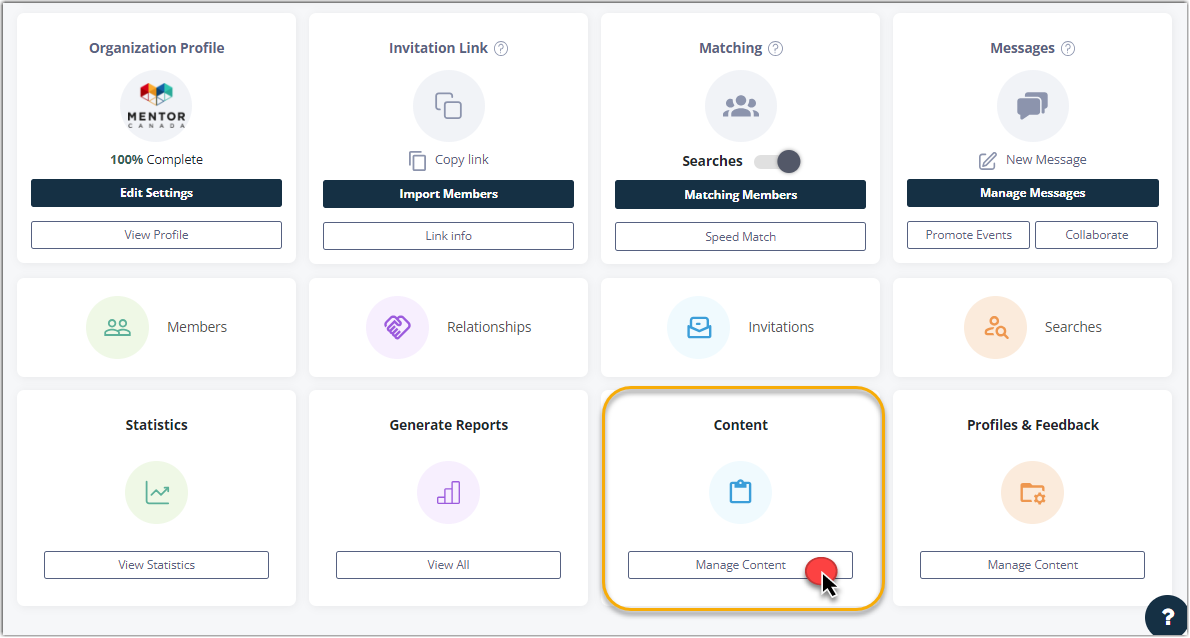
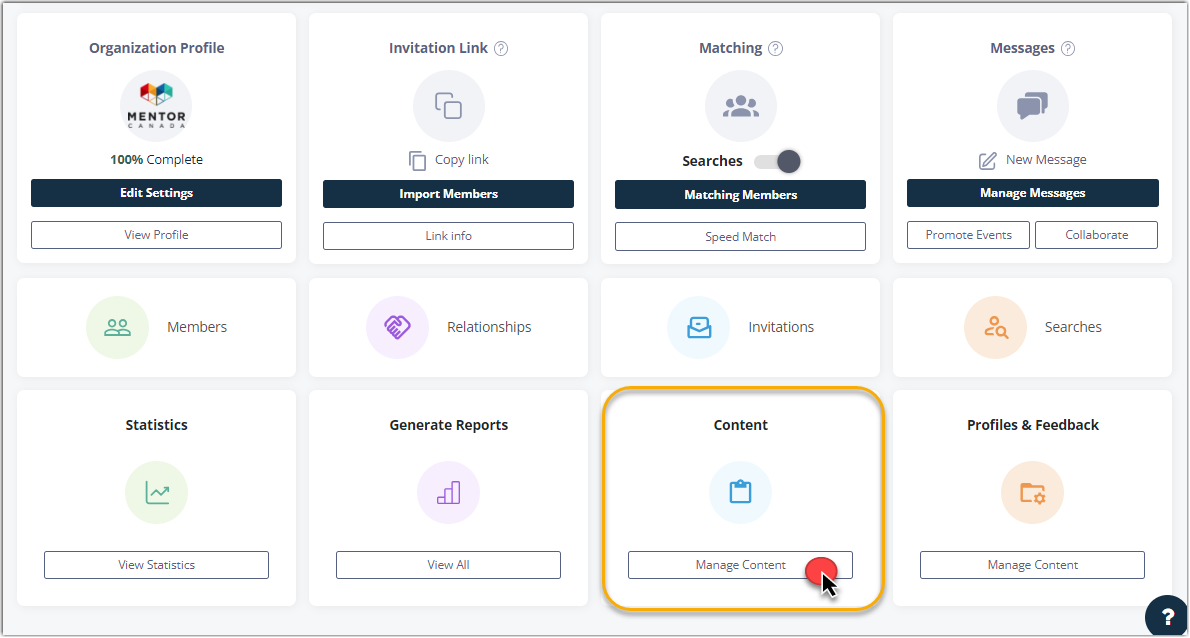
1.1 From the administrator dashboard, navigate to the "Content" tile located on the third row, and click on "Manage Content" to access the corresponding section.
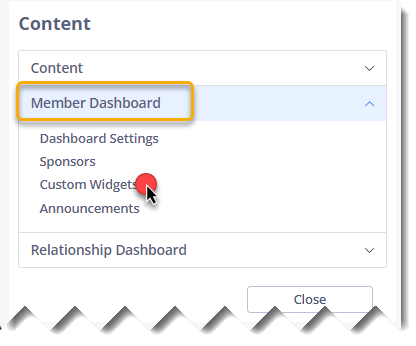
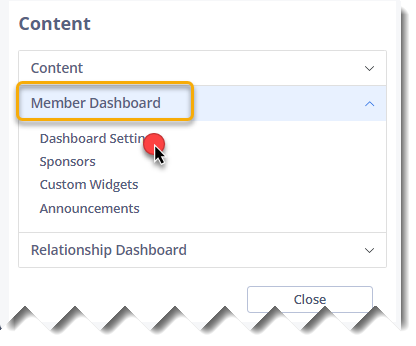
1.1.1 A new dialog box will appear. Expand the selections by clicking on "Member Dashboard" and subsequently choose "Custom Widgets."
1.2 From the "Custom Widgets" tab click Create a Custom Widget.
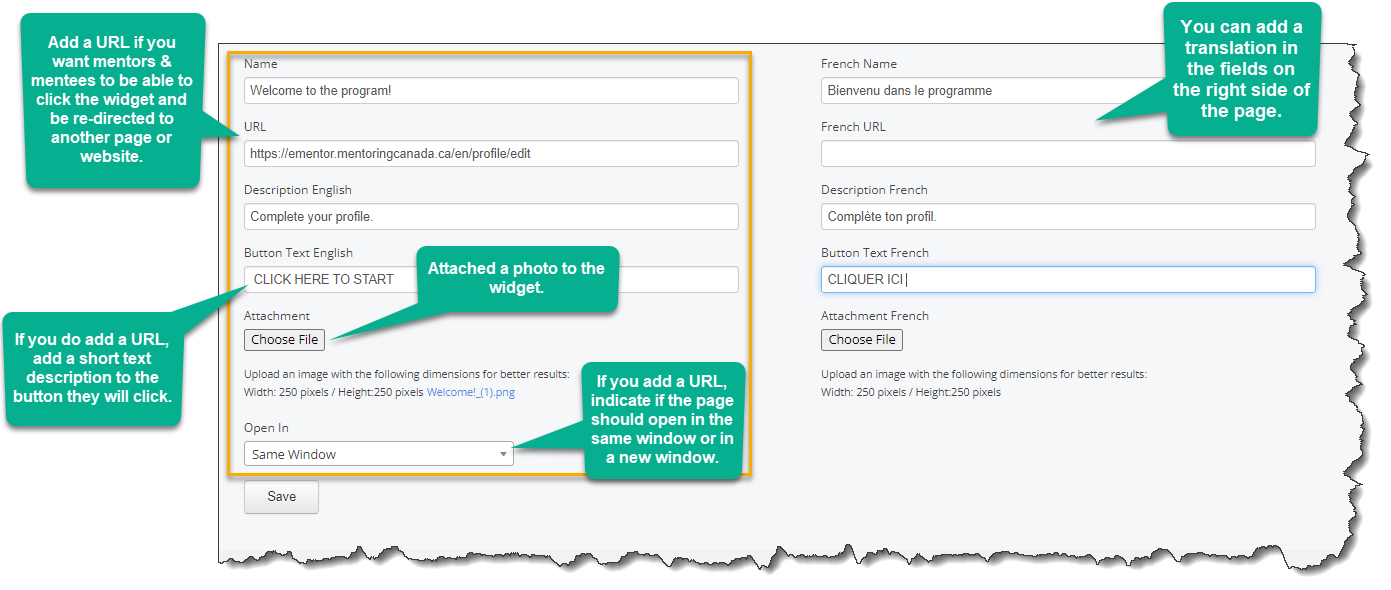
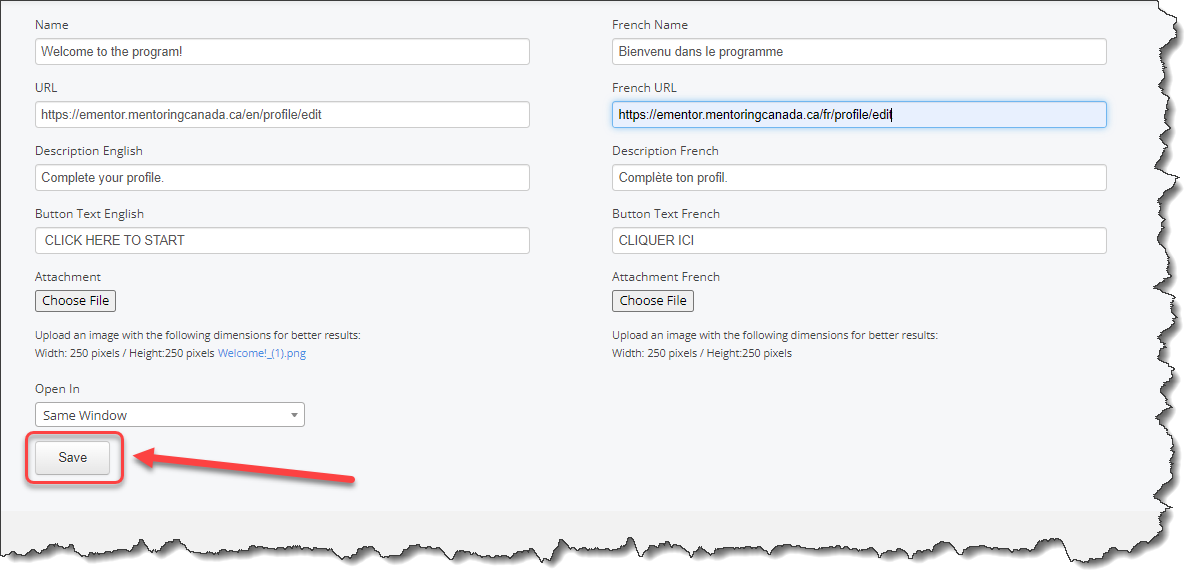
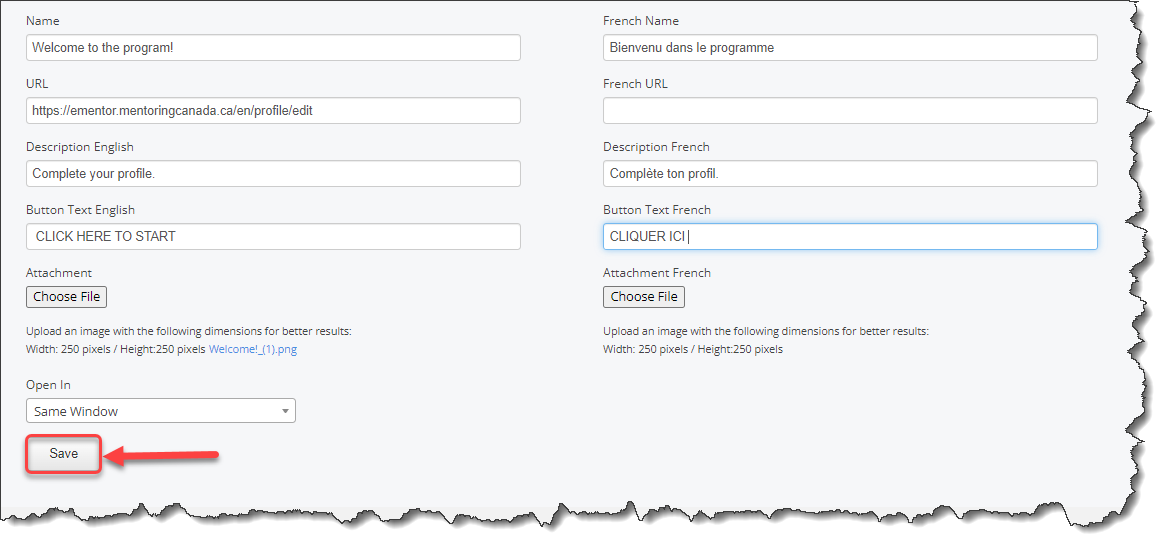
1.3 Complete each field.
1.4 Click Save
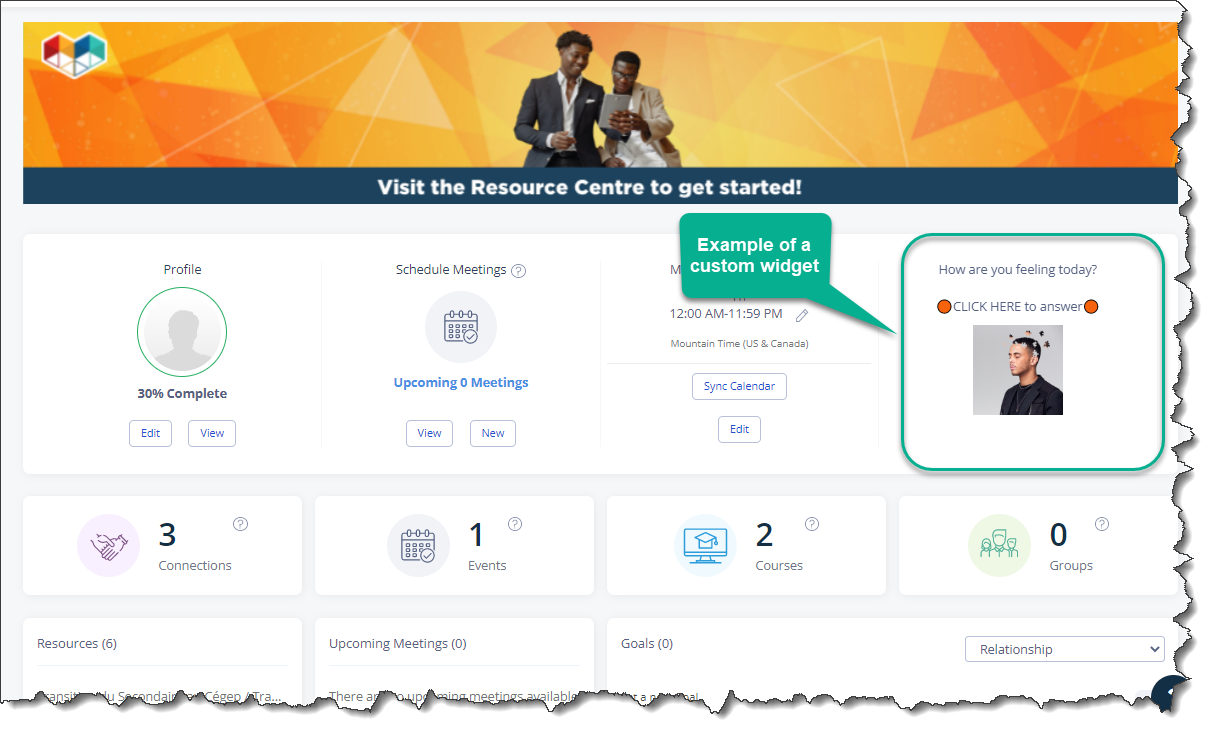
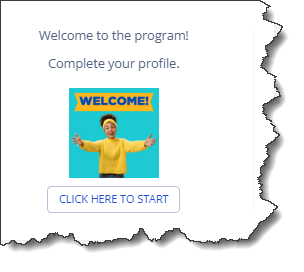
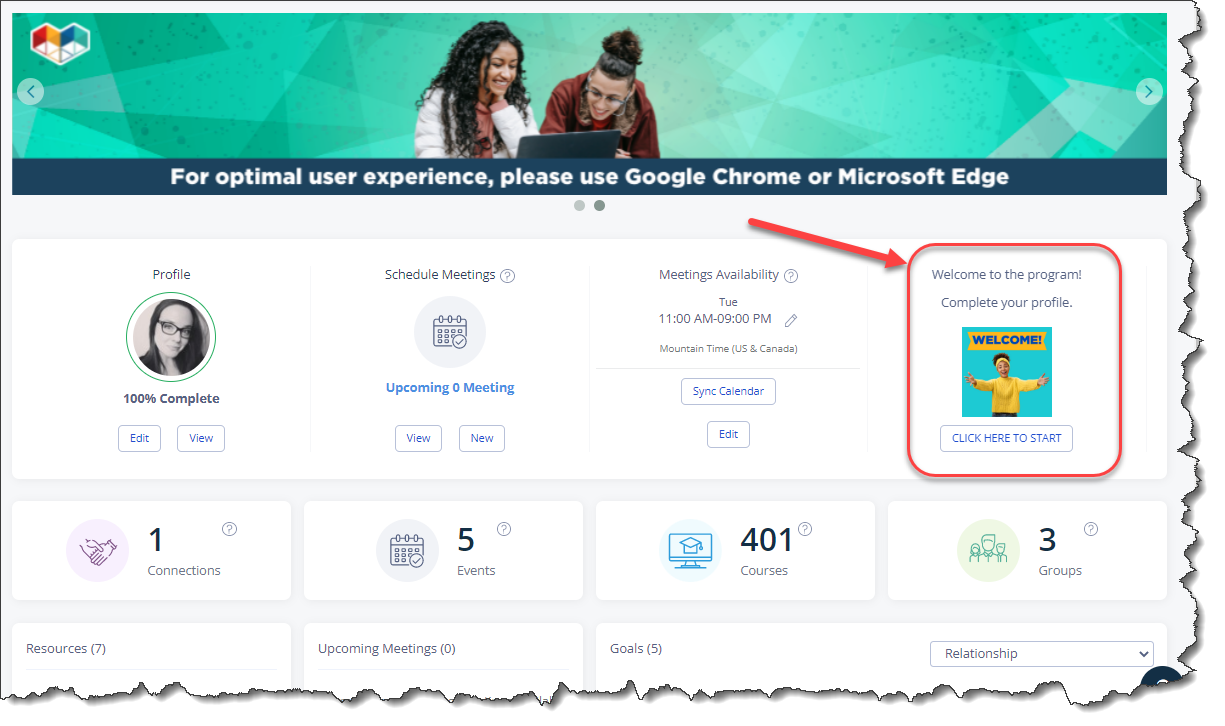
Keep the name, description and text button short so that it fits and displays properly on the dashboard. Long sentences will be cut off. See example below.
2 - Add a Custom Widget to the Dashboard
Now that you have created a custom widget, you need to add it to the dashboard.
2.0 From the administrator dashboard, navigate to the "Content" tile located on the third row, and click on "Manage Content" to access the corresponding section.
2.1 A new dialog box will appear. Expand the selections by clicking on "Member Dashboard" and subsequently choose "Dashboard Settings."
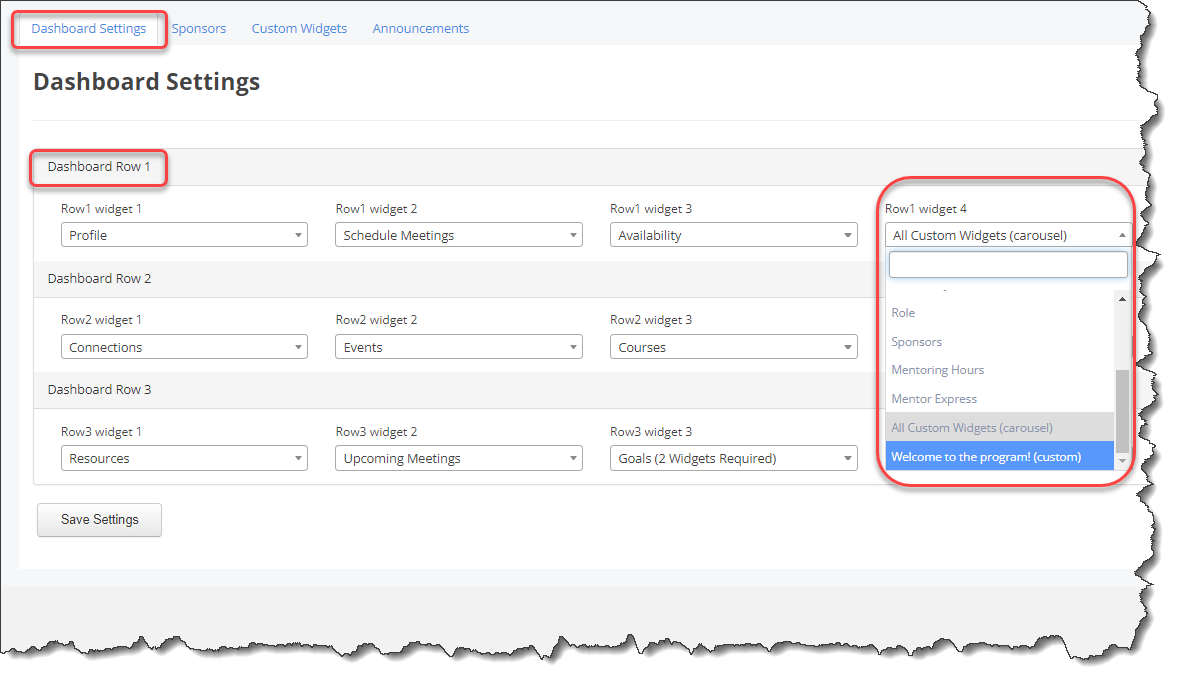
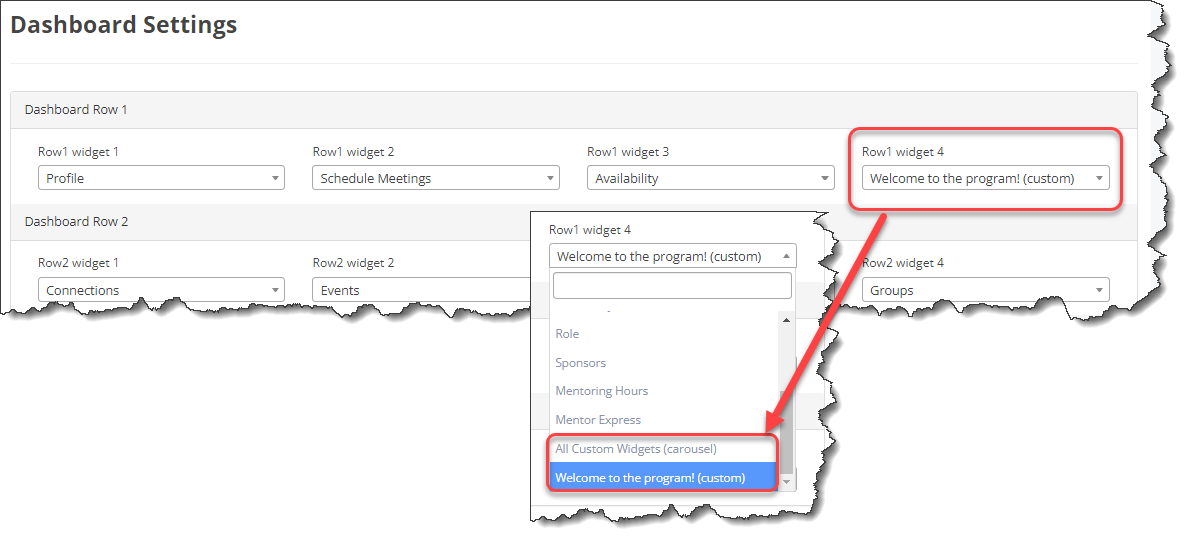
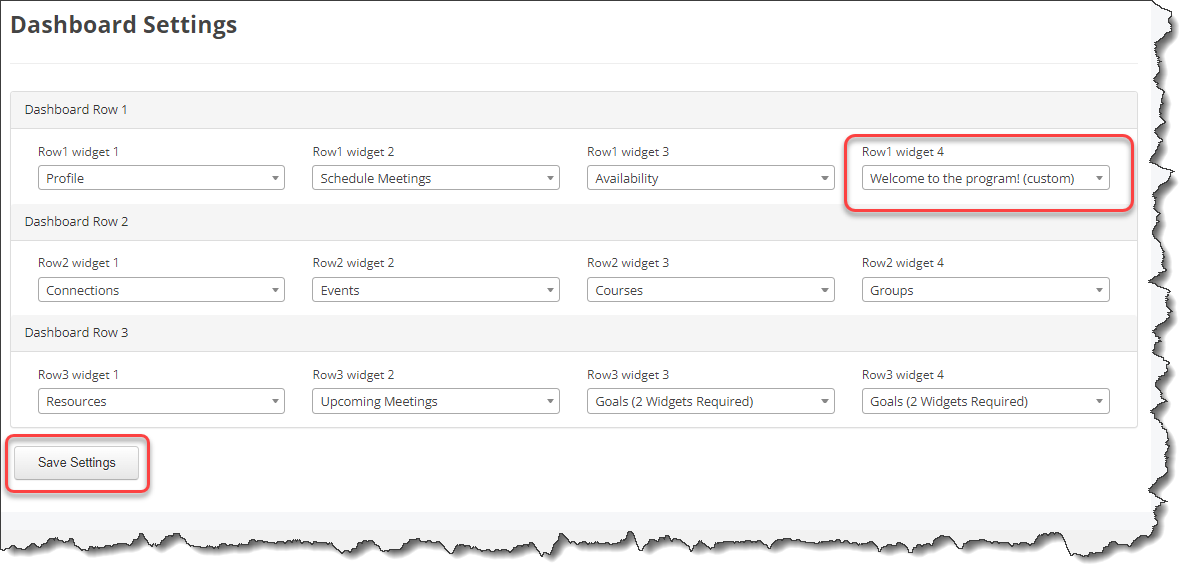
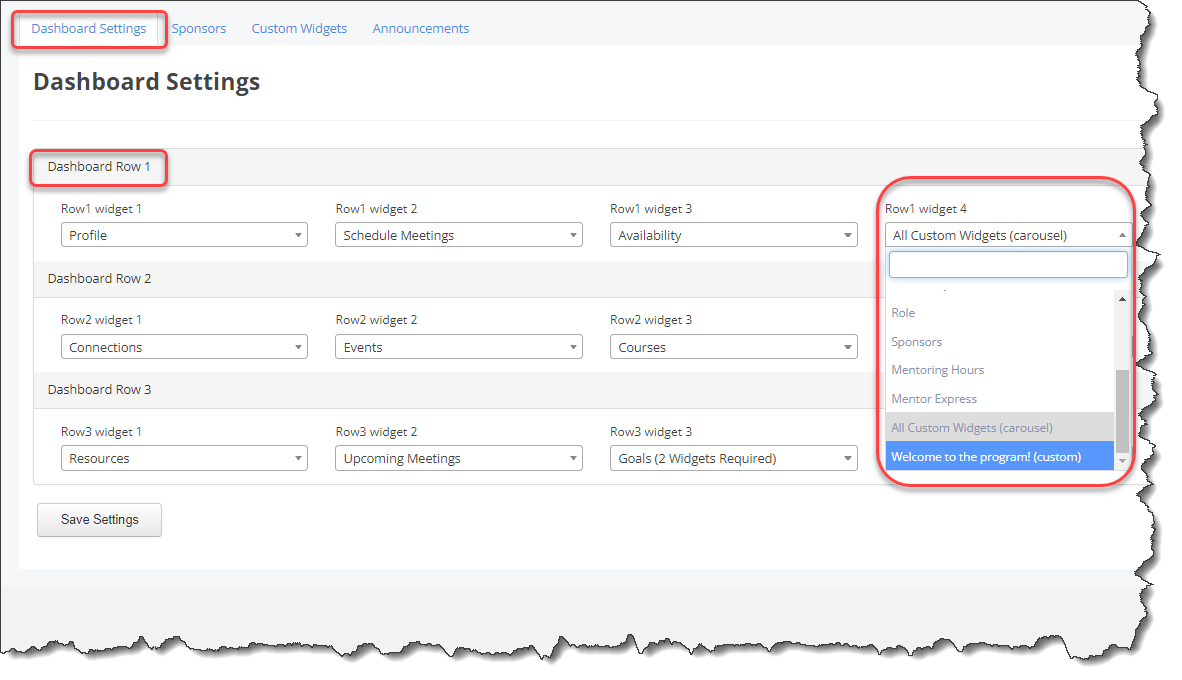
2.2 From the "Dashboard Settings" tab, select a widget placement in "Row 1" as the custom widgets can only be added to Row 1.
2.2.1 Then click the box to open the drop-down menu.
2.3 Select one of the custom widgets or "All Custom Widgets".
Note: From the drop-down menu, custom widgets are displayed by their title followed by "(custom)".
2.4 Click Save Settings.
Voilà! The new custom widget is posted on your mentors and mentees' dashboard.
Note: If you selected "All Custom widgets" in dashboard settings, they will automatically display as a carousel and alternate on the dashboard.
3- Edit or Delete a Custom Widget
Edit a Custom Widget
3.0 From the administrator dashboard, navigate to the "Content" tile located on the third row, and click on "Manage Content" to access the corresponding section.
3.1 A new dialog box will appear. Expand the selections by clicking on "Member Dashboard" and subsequently choose "Custom Widgets."
3.2 From the "Custom Widgets" tab click on Edit beside the custom widget you wish to modify.
3.3 Make your modifications and click Save.
Delete a Custom Widget
3.4 To delete a custom widget, from the administrator dashboard, navigate to the "Content" tile located on the third row, and click on "Manage Content" to access the corresponding section.
3.4.1 A new dialog box will appear. Expand the selections by clicking on "Member Dashboard" and subsequently choose "Custom Widgets."
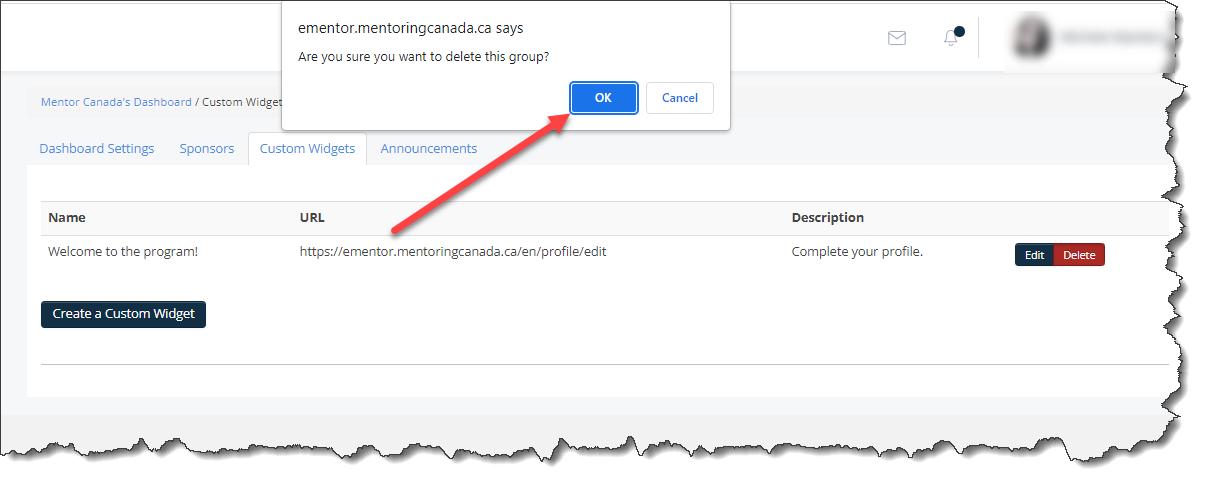
3.5 From the "Custom Widgets" tab click on Delete beside the custom widget you wish to delete.
3.6 You will be asked to confirm, click OK.
Remove a Custom Widget
Removing a custom widget will not delete the widget, it will still be available for future use but will not appear on the dashboard.
3.7 From the administrator dashboard, navigate to the "Content" tile located on the third row, and click on "Manage Content" to access the corresponding section.
3.7.1 A new dialog box will appear. Expand the selections by clicking on "Member Dashboard" and subsequently choose "Dashboard Settings."
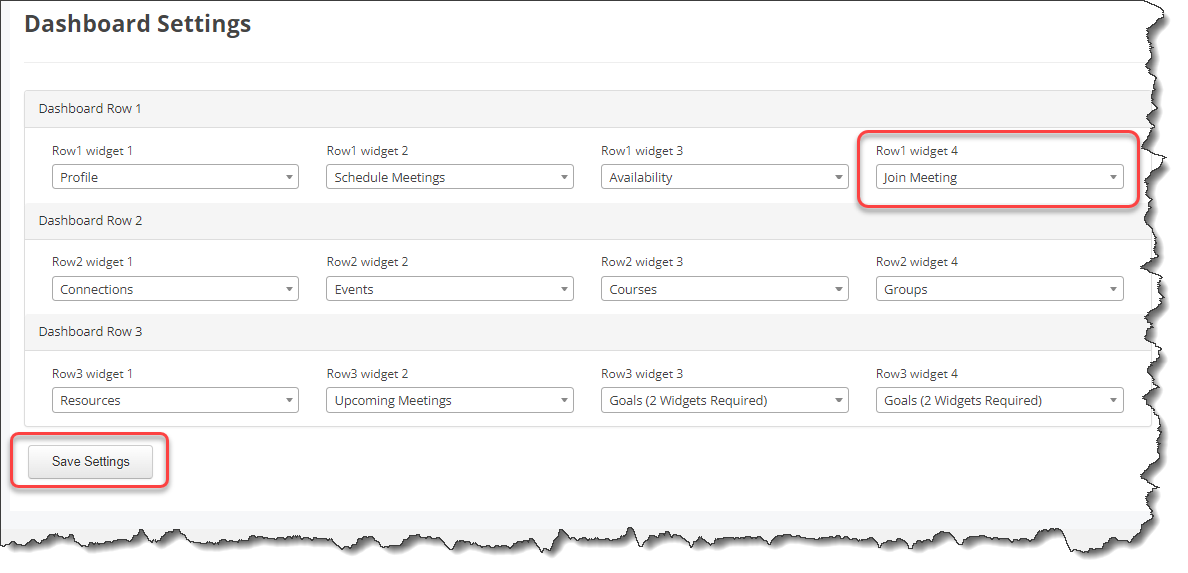
3.8 From the "Dashboard Settings" tab, find your current custom widget placement in "Row 1" and click the box to open the drop-down menu.
3.9 Select another option instead of the custom widget and click Save Settings.
If you have questions or need further support, please contact our Support Team: support@mentoringcanada.ca

