Create and Send Surveys
Context
Within the virtual mentoring platform, there is a survey feature available for gathering valuable insights from mentors and mentees participating in your program. This feature serves as a powerful tool to collect feedback and evaluate the effectiveness of your mentoring initiatives. Additionally, the survey feature can be leveraged to create quizzes specifically designed for mentoring activities within the dedicated "Courses" section. By incorporating surveys into your program, you can gather essential data, enhance engagement, and ensure a more comprehensive understanding of the mentoring experience.
Step 1 - Create a Survey
1.0 Click the “Admin” tab on the left-hand side of the platform.
1.1 From the administrator dashboard, navigate to the "Profiles & Feedback" tile located on the third row, and click on "Manage Content" to access the corresponding section.
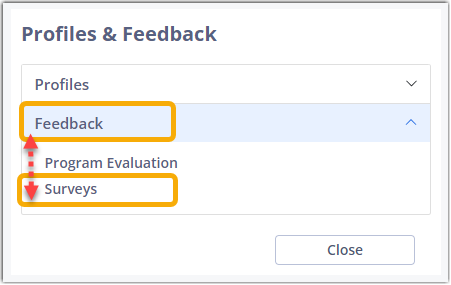
1.1.1 A new dialog box will appear. Expand the selections by clicking on "Feedback" and subsequently choose "Surveys".
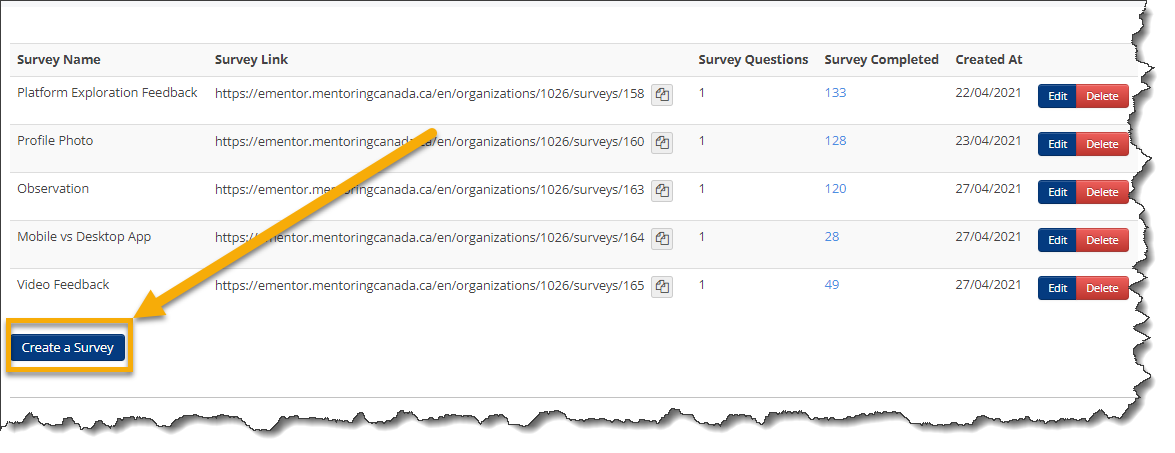
1.2 There will be existing surveys on the following page. They are the surveys used as quizzes in the "Platform Orientation" provided course. Click on Create a Survey.
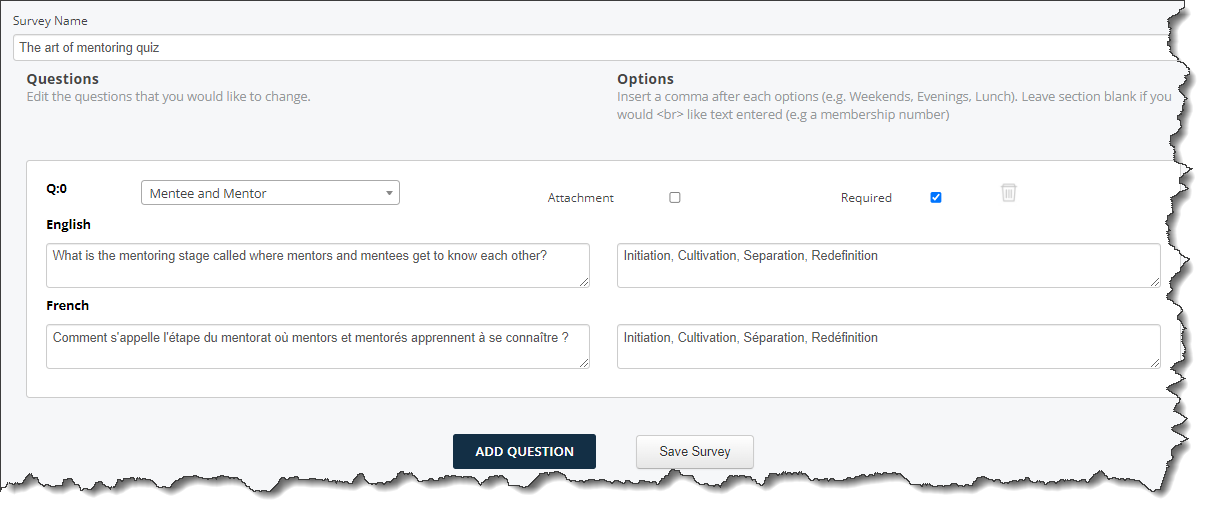
1.3 Give your survey a title in the "Survey Name" field.
1.3.1 At the top of the page you can also check a box to accept multiple responses for the same survey. Uncheck to allow only one response per participant.
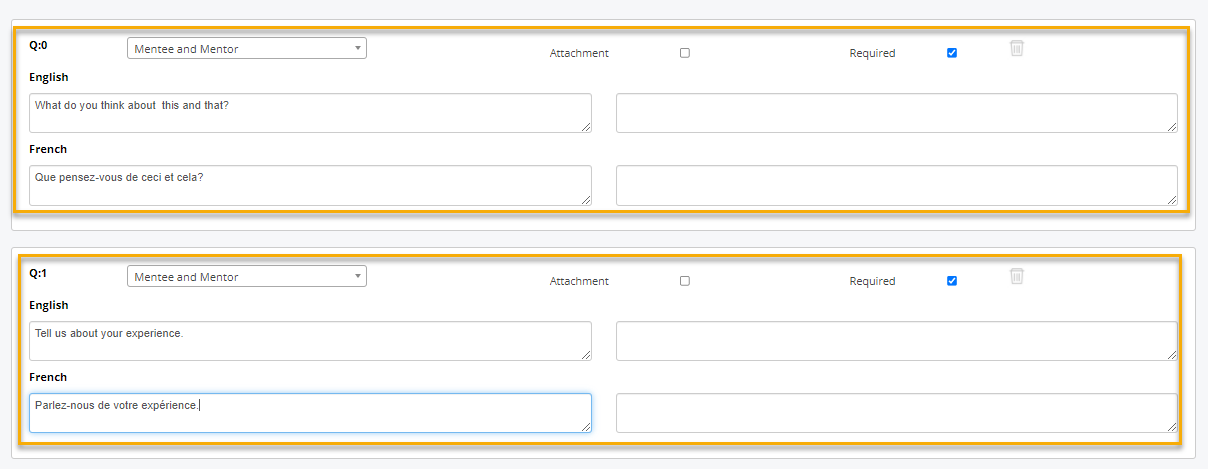
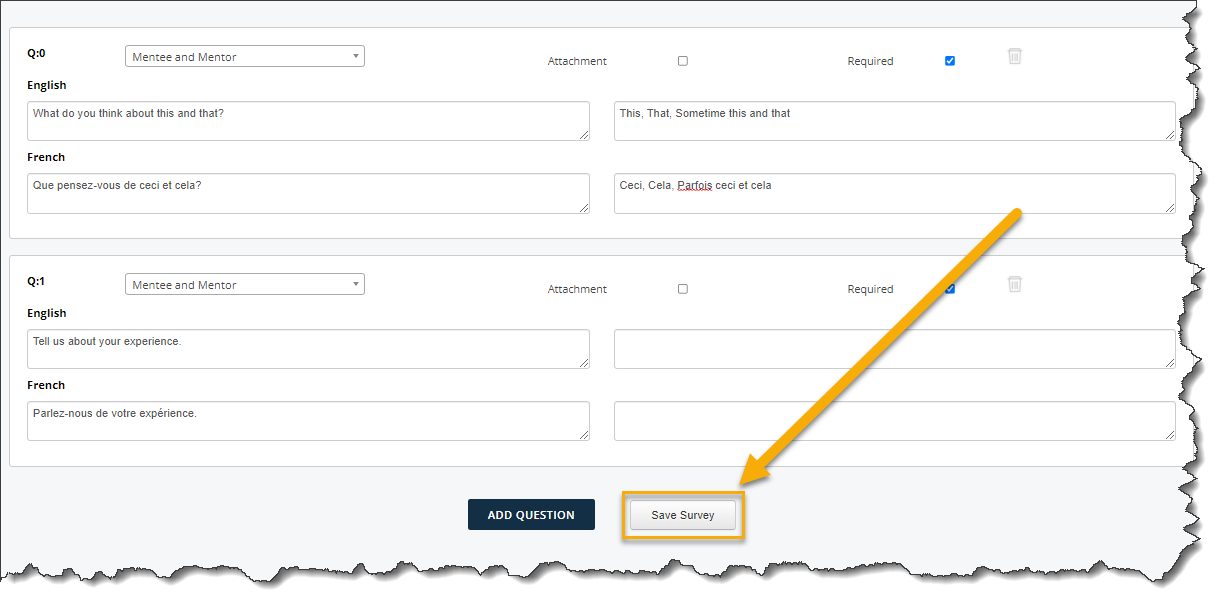
1.4 Start creating your survey questions. Each rectangle is meant for one survey question.
1.4.1 The system defaults to 5 questions. To add more, scroll down and click ADD QUESTION.
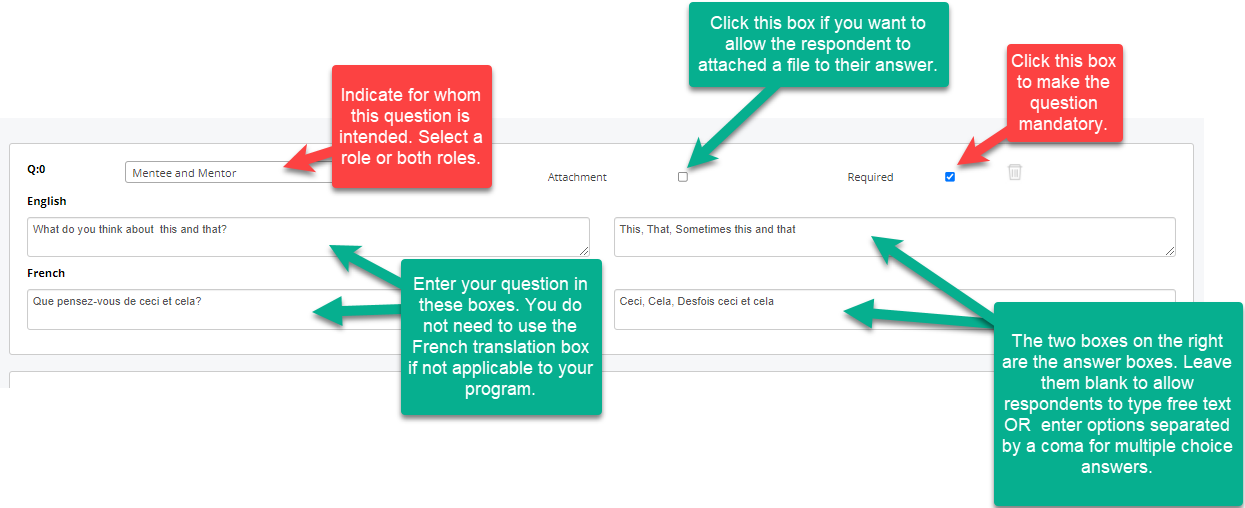
1.5 Here are some pointers on how to create each survey question.
1.6 Once you have created all your questions, click on Save Survey at the bottom of the page.
Step 2 - Email the Survey
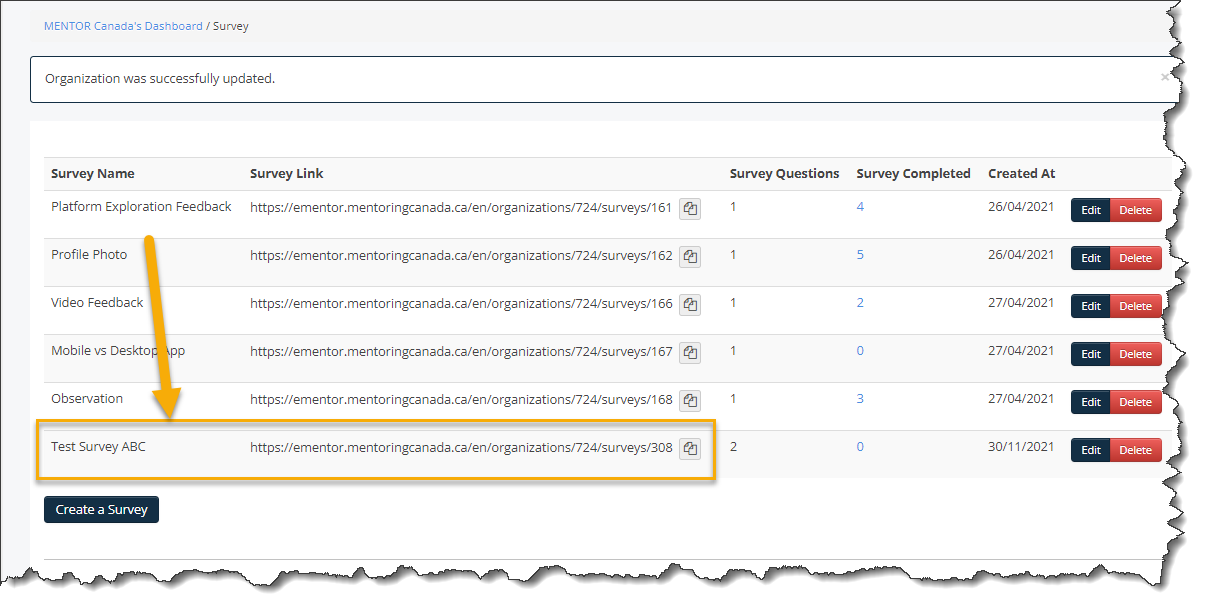
2.0 Upon saving the survey, the program administrator will be automatically redirected to the main survey page. Here, the recently created survey will be displayed as the most recent addition at the bottom of the survey list.
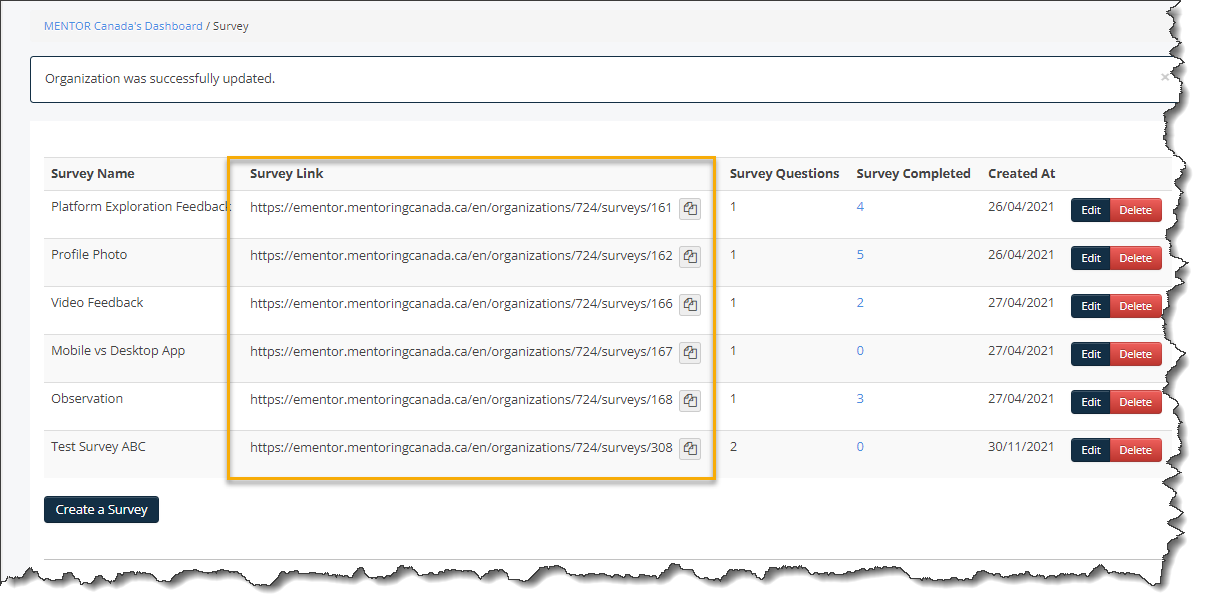
2.1 For every survey created, the system will generate a distinct survey link. This link is intended to be shared with mentors and mentees participating in the program. By accessing this link, they will be able to view and respond to the survey accordingly.
2.2 Click the copy icon next to the survey link to copy the system generated link.
2.3 Click the "Admin" tab on the left-hand side of the page to return to the administrator's dashboard.
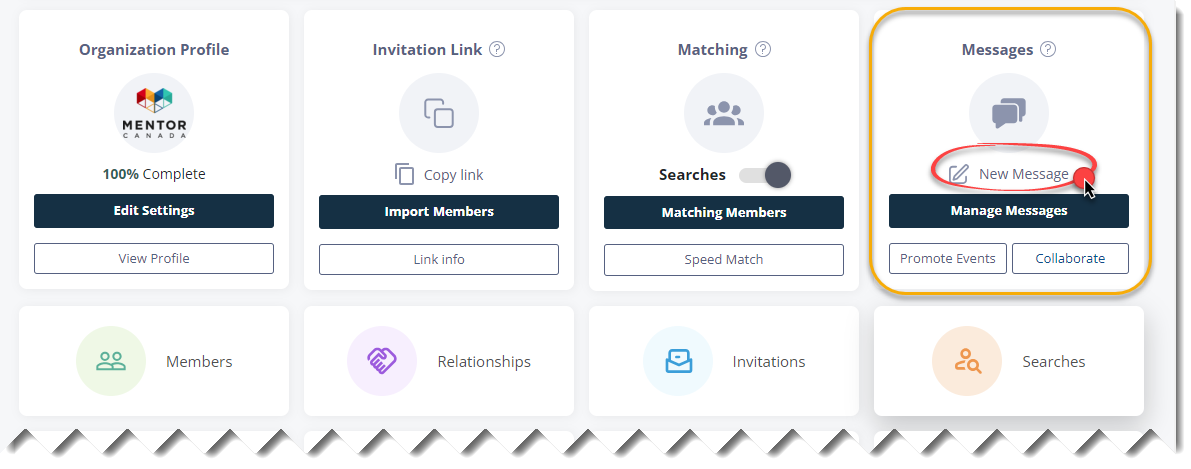
2.4 From the administrator dashboard, navigate to the "Messages" tile located on the first row, and click on "New Message" to access the corresponding section.
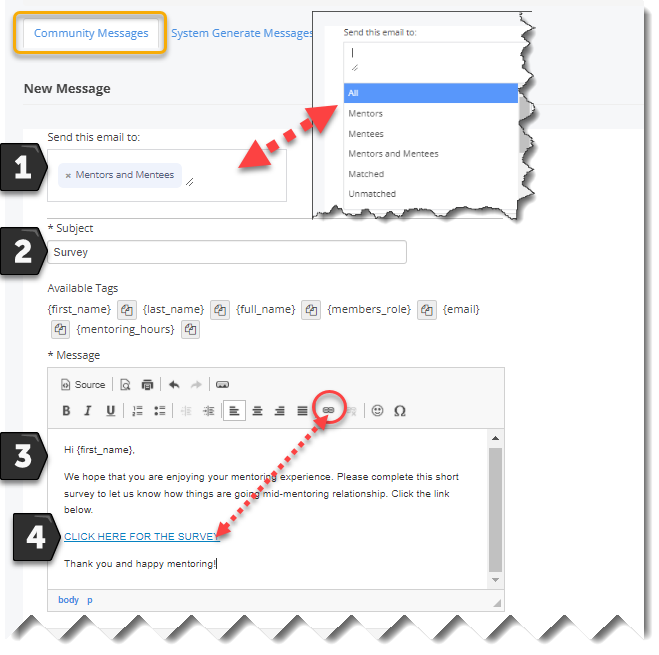
2.5 From the "Community Messages" tab, compose the email:
1) Select the recipients
2) Enter a Subject Line
3) Type email content
4) Include the survey link by clicking on the link icon. This is where you want to paste the survey link you copied in step 2.2
Note: Access to survey links is restricted to current users of the virtual mentoring platform. Only those who are actively registered and logged into the platform can open and participate in the surveys.
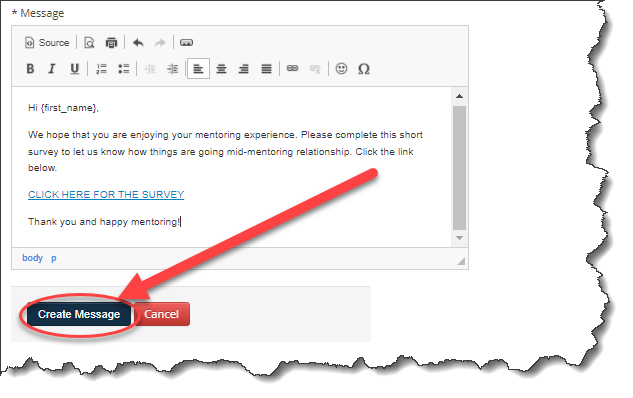
2.6 Click Create Message.
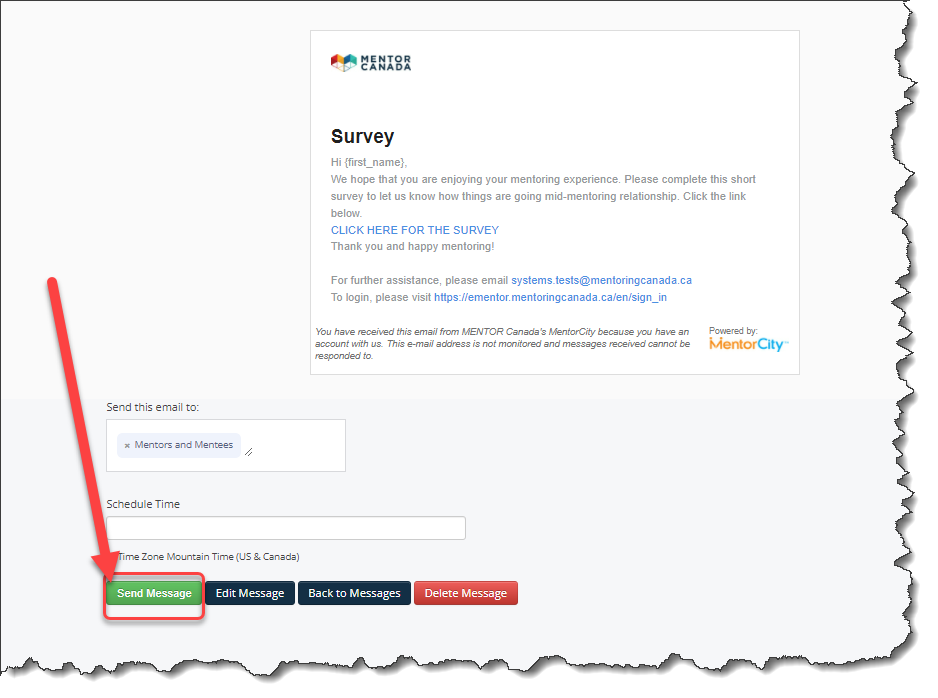
2.7 The next page displays a preview of the email. If you are satisfied with the email preview, click Send Message.
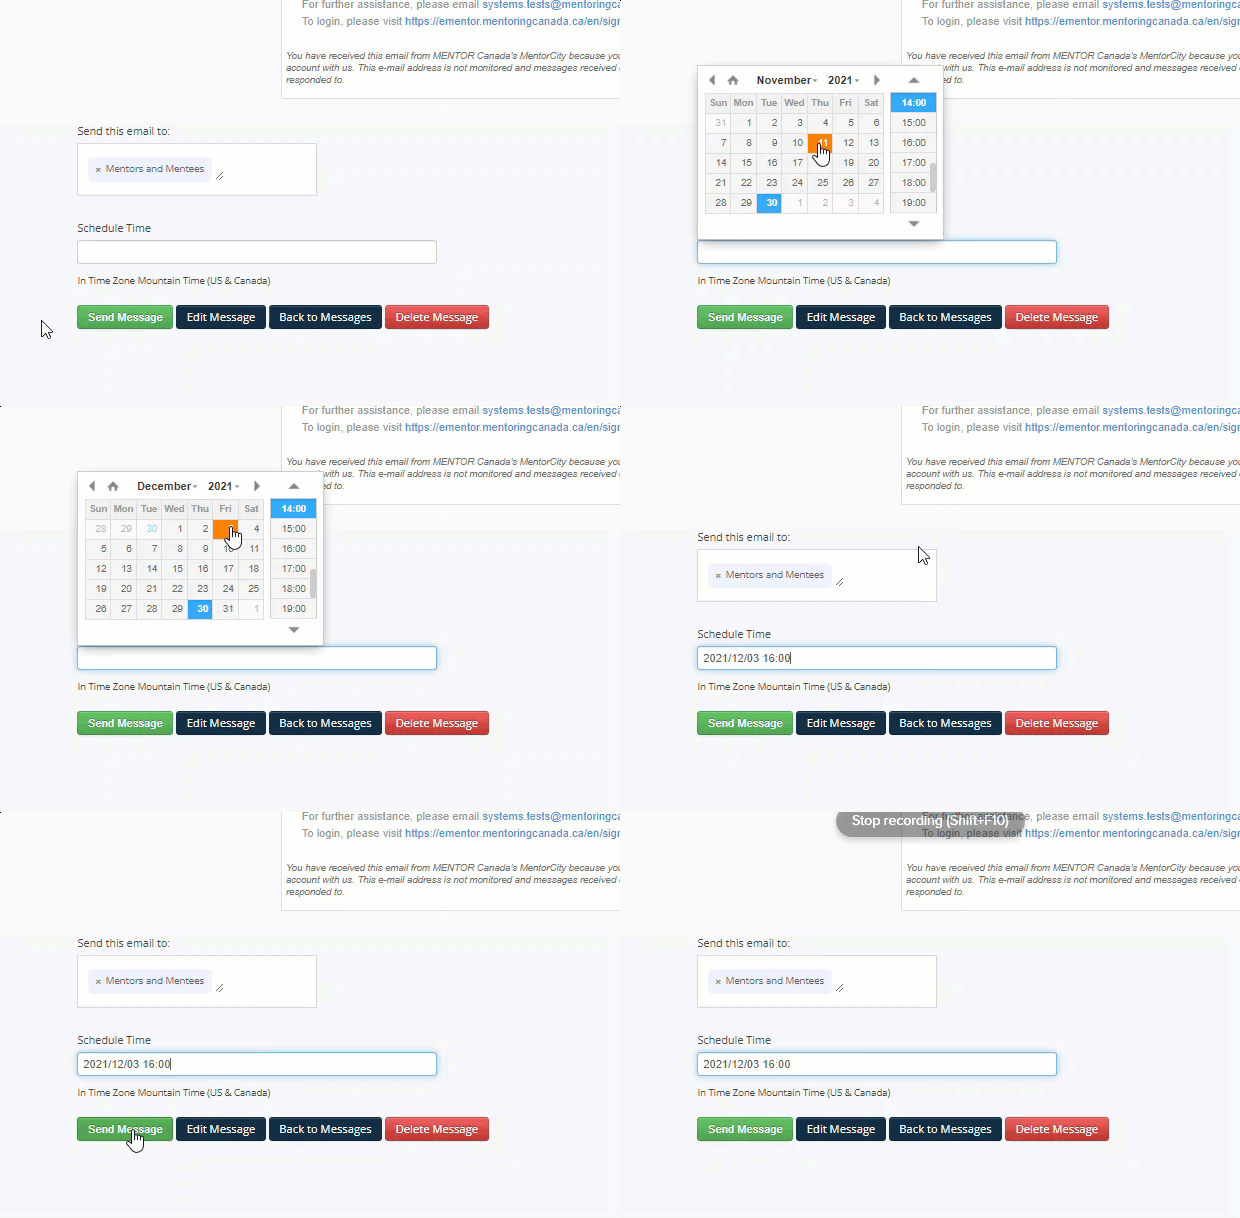
Note: You can also schedule the email to go out automatically at a specified day and time by clicking the "Schedule Time" field and then clicking Send Message.
Step 3 - Modify or Delete a Survey
3.0 Return to the administrator's dashboard by clicking on the "Admin" tab on the left-hand side of the platform.
3.1 From the administrator dashboard, navigate to the "Profiles & Feedback" tile located on the third row, and click on "Manage Content" to access the corresponding section.
3.1.1 A new dialog box will appear. Expand the selections by clicking on "Feedback" and subsequently choose "Surveys".
3.2 Locate the survey that requires a modification or a deletion, then click on Edit or Delete.
3.3 For a modification, make the required changes and click Save Survey
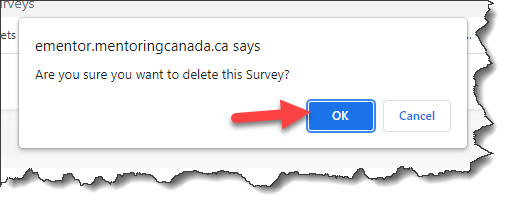
3.4 For a deletion, after clicking on Delete, click OK on the pop-up window to confirm the deletion.
Step 4 - Make a Quiz Survey
Surveys can be built has quizzes and added to mentoring activities within courses. However, because this is not a real quiz functionality, it will not provide scores. Program administrators can still review the answers from the administrator's dashboard to assess the level of understanding of each person taking the quiz.
4.0 Create a survey as thought in steps 1.0 to 1.6 above and build your survey questions as quiz questions. Click Save Survey.
4.1 Go back to your administrator's dashboard and navigate to the "Content" tile located on the third row, and click on "Manage Content" to access the corresponding section.
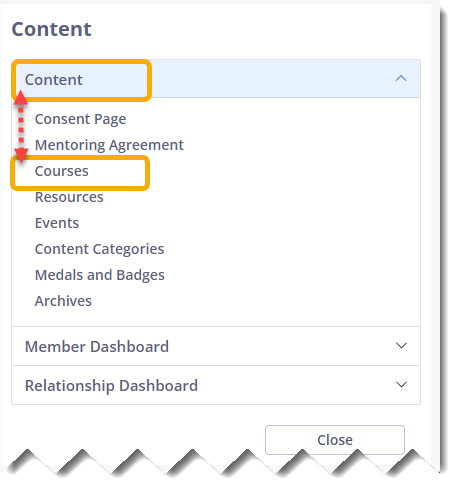
4.1.1 A new dialog box will appear. Expand the selections by clicking on "Content" and subsequently choose "Courses".
4.2 Access the courses' modules by clicking on the module number under the "Modules" column.
4.3 Click "Edit" next to the applicable module.
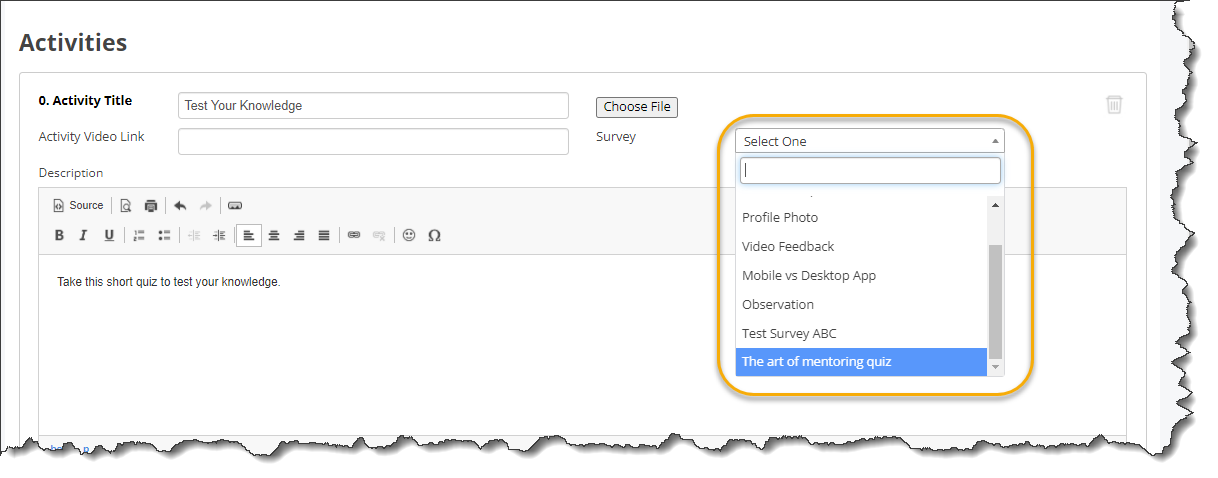
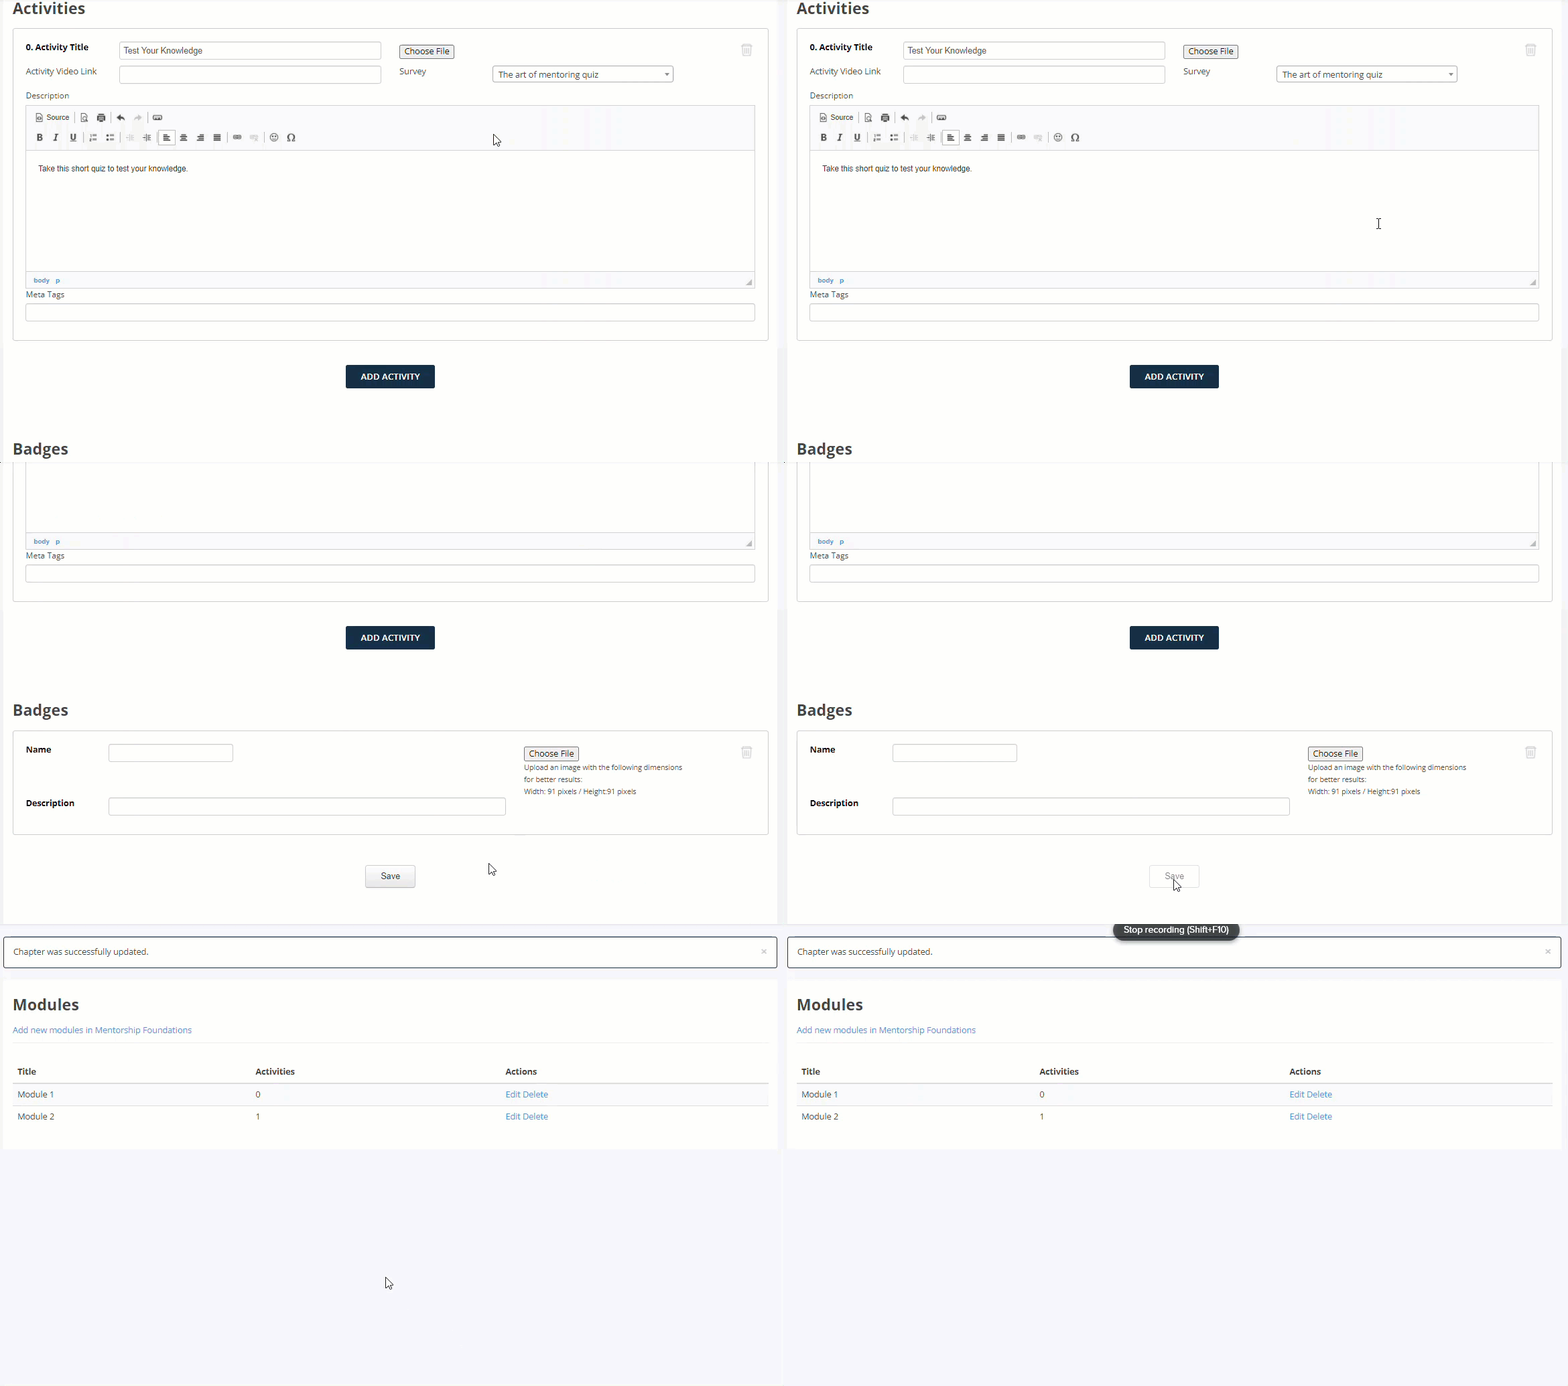
4.4 Add the quiz to the desired activity by selecting the newly created survey (quiz) from the Survey drop-down menu.
4.5 Click Save at the bottom of the page.
4.6 Test the quiz by clicking on "Courses" from the left-hand side menu and then accessing the activity containing the quiz.
Step 5 - View Survey Results
The survey results are displayed in two locations on the platform; under the "Reports" section and under the "Surveys" tab.
Surveys' tab
5.0 To view survey results, access your administrator's dashboard by clicking on the "Admin" tab.
5.1 From the administrator dashboard, navigate to the "Profiles & Feedback" tile located on the third row, and click on "Manage Content" to access the corresponding section.
5.1.1 A new dialog box will appear. Expand the selections by clicking on "Feedback" and subsequently choose "Surveys".
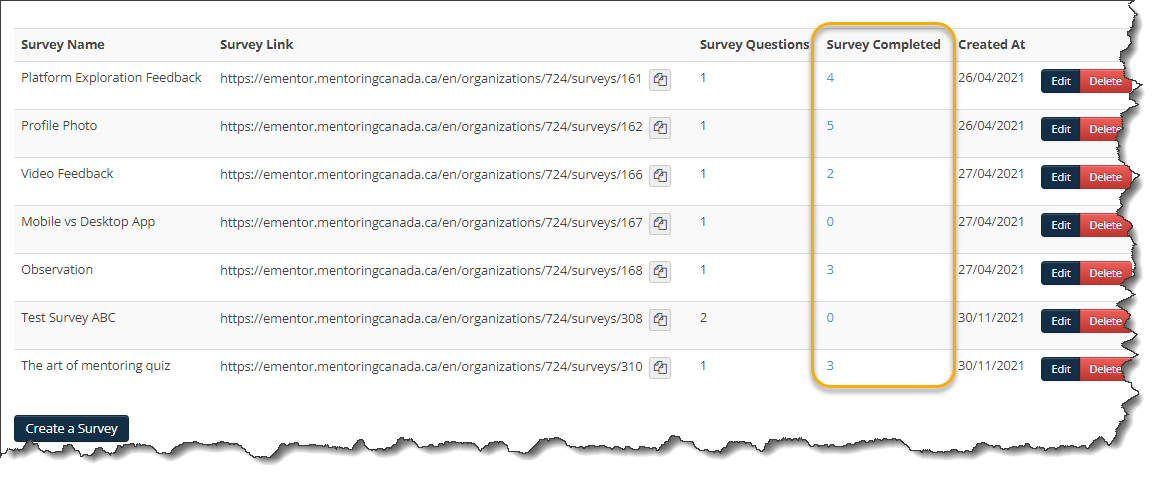
5.2 Click on the number listed under the "Survey Completed" column which match with the applicable survey.
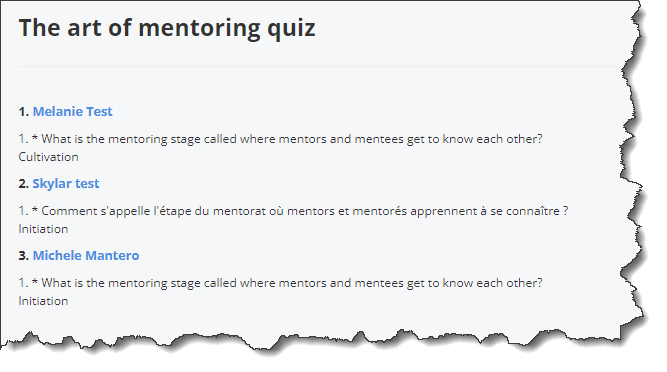
5.3 The following page will display the mentors and mentees' names along with their answers for each survey question.
Reports
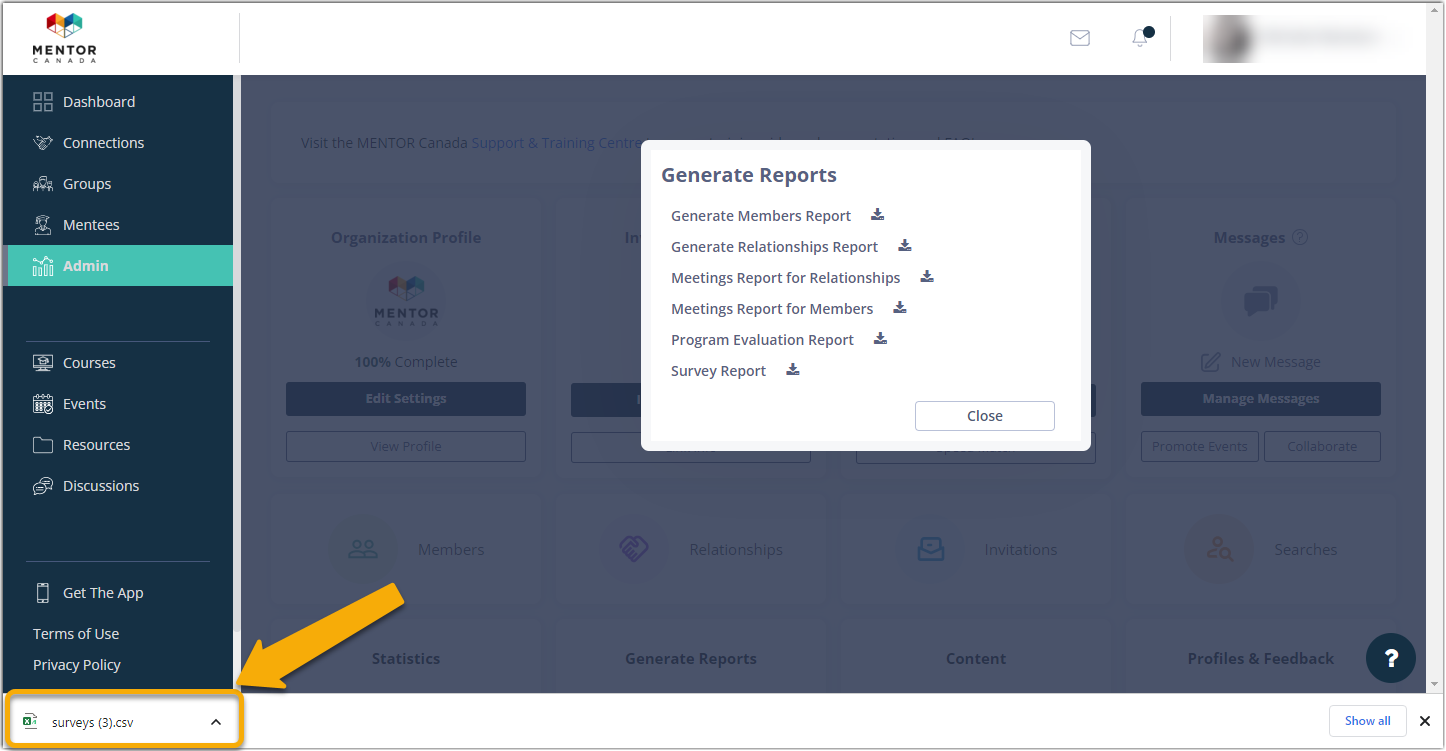
5.4 From the administrator dashboard, navigate to the "Generate Reports" tile located on the third row, and click on "View All" to access the corresponding section.
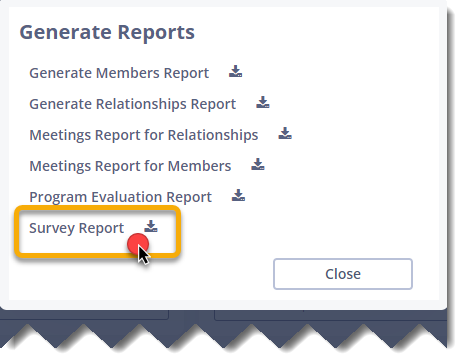
5.4.1 A new dialog box will appear. Click on "Survey Report".
5.5 The system will generate a report as a CSV file at the bottom of the page. Open the document to see the answers for each participant.
If you have questions or need further support, please contact our Support Team: support@mentoringcanada.ca


