Mentors & Mentees Onboarding Essentials
This article aims to provide support for the training and onboarding of mentors and mentees in the virtual mentoring platform. Feel free to share this article and the included attachment with mentors and mentees who will join your program on the virtual mentoring platform.
CLICK HERE to download the Mentors & Mentees Onboarding Essentials Handout.
1. Register & Download the Mobile App
2. Login
3. Complete Your Profile
4. Set Your Availability
5. Get familiar with the different sections of the platform
6. Once you have been matched, review your mentorship match profile
7. Book your First Mentoring Meeting
8. Complete the Mentoring Agreement
9. Establish Goals for your Mentorship
10. Connect & Communicate Regularly
1 - Register & Download the Mobile App
The program administrator will invite you to join their program on the virtual mentoring platform using one of the two following methods:
- Invitation Link: Click the invitation link provided by the program administrator to register.
- MentorCity Email: Click the link in the MentorCity email and connect using the credentials provided.
Download the MentorCity App on the App Store ![]() or Google Play
or Google Play ![]()
Look for this logo when searching for the mobile app : 
2 - Login
To connect to the platform visit:
- Desktop/Browser App: https://ementor.mentoringcanada.ca/en/sign_in
Bookmark this link so that you can easily connect to the platform going forward. - Mobile/Tablet App: Click the MentorCity logo on your mobile device and click "Login" in the top-right hand corner.

3 - Complete Your Profile
Complete your profile at 100% to ensure you are match with the most compatible person.
- Click your name in the top right-hand corner to bring up a drop-down menu. Click Edit Profile.
OR
- If a profile shortcut is provided by your program on the Dashboard, click
Editon the profile shortcut.

4 - Set Your Availability
It is important that you set up your availability to ensure that you and your mentoring match are able to book meetings at days and times that works for both of you. It is possible to set up your availability from the Connections tab or from the Dashboard.
Connections
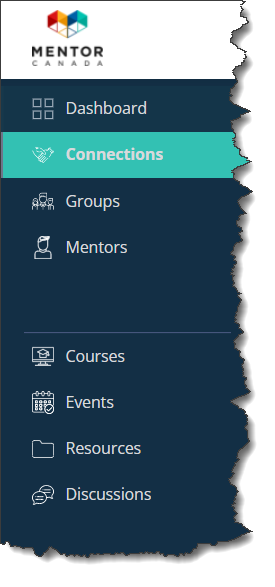
1. Click Connections

2. Click on your mentoring match name

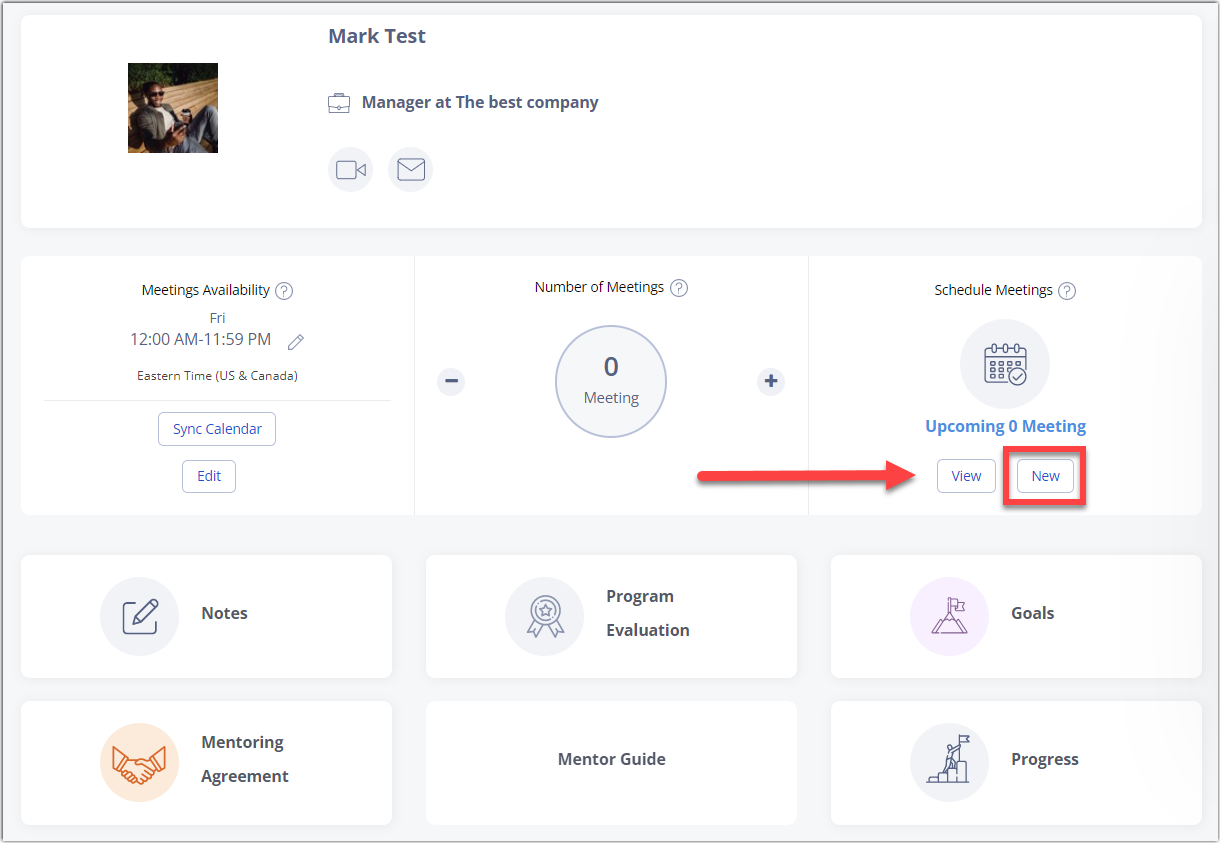
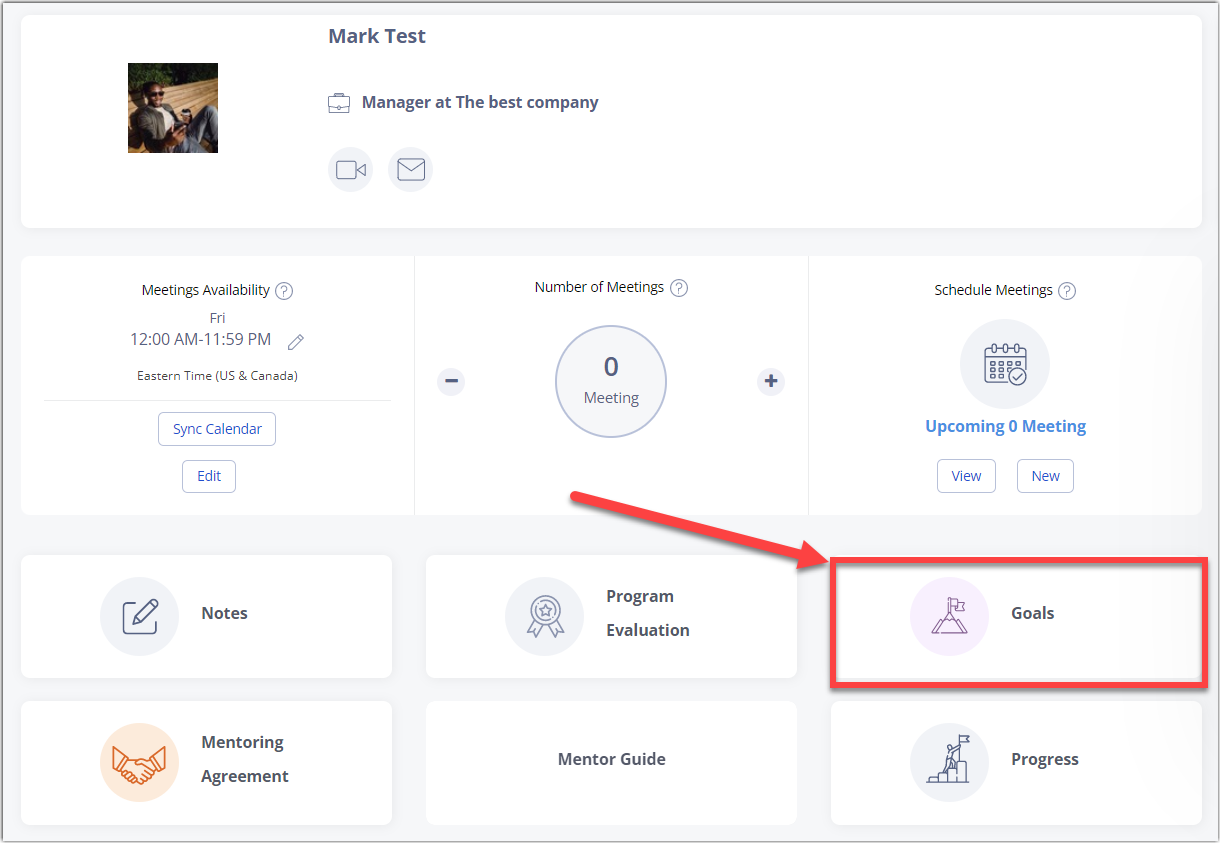
3. Find the "Meeting Availability" widget on the first row of the relationship dashboard and click Edit or the pen icon.
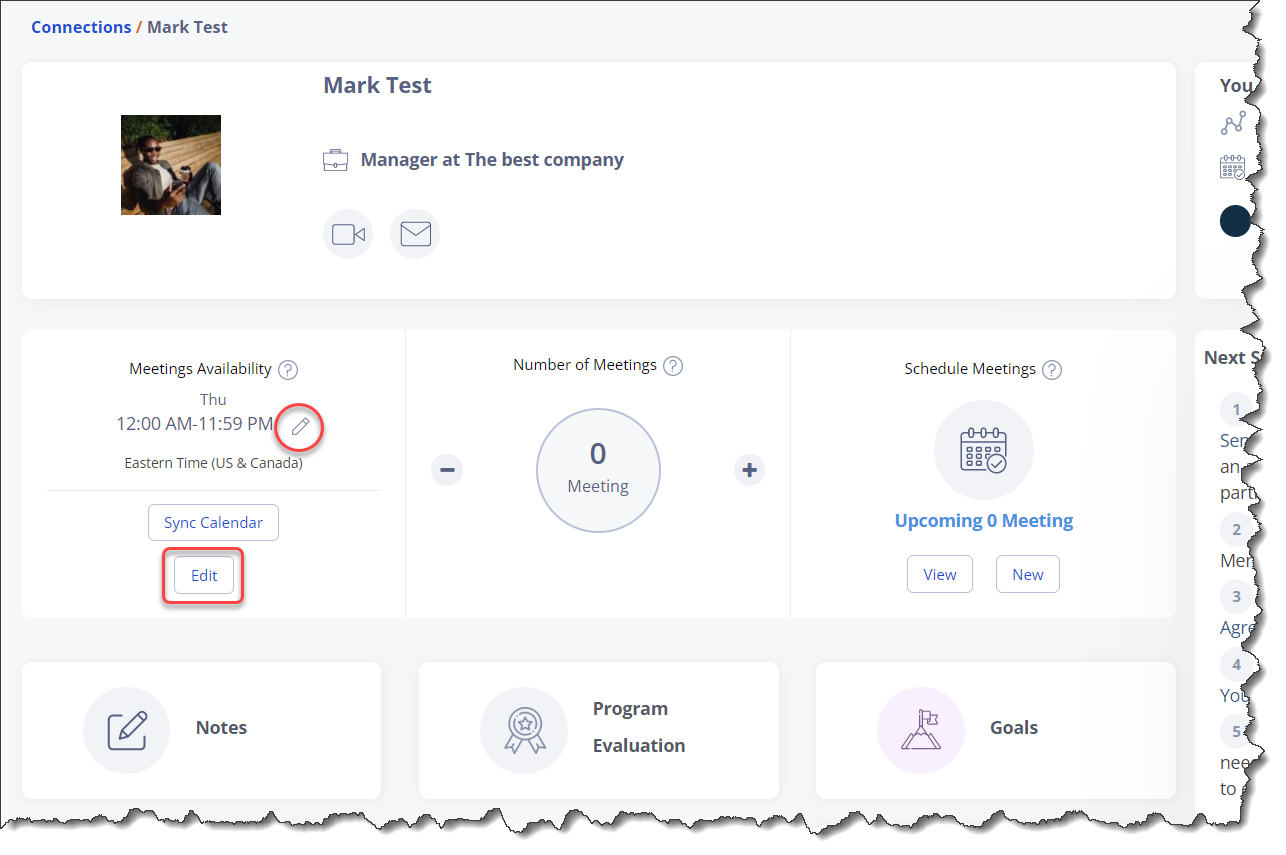
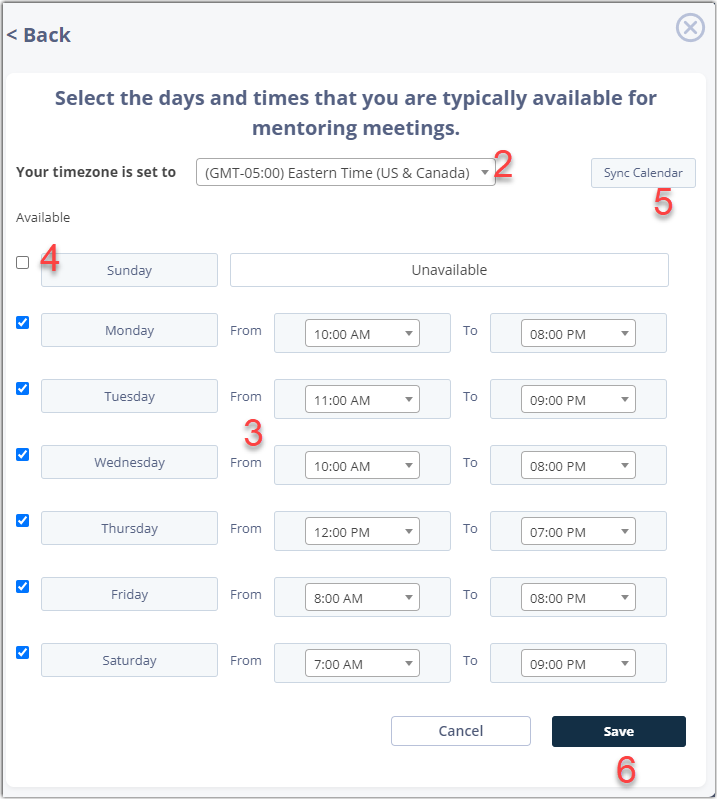
4. Select your time zone.
5. Enter your availability window for each day of the week.
6. If you are completely unavailable for a day of the week, uncheck the box under the "Available" column for that specific day.
7. Optional: Click Sync Calendar to sync your Outlook or Google Calendar and reflect additional availability.
8. Click Save

Dashboard
You can set up your availability from the Dashboard as long as your program provided you with a Meetings Availability shortcut. If provided, the Meetings Availability shortcut can be located anywhere on the first row of your Dashboard.
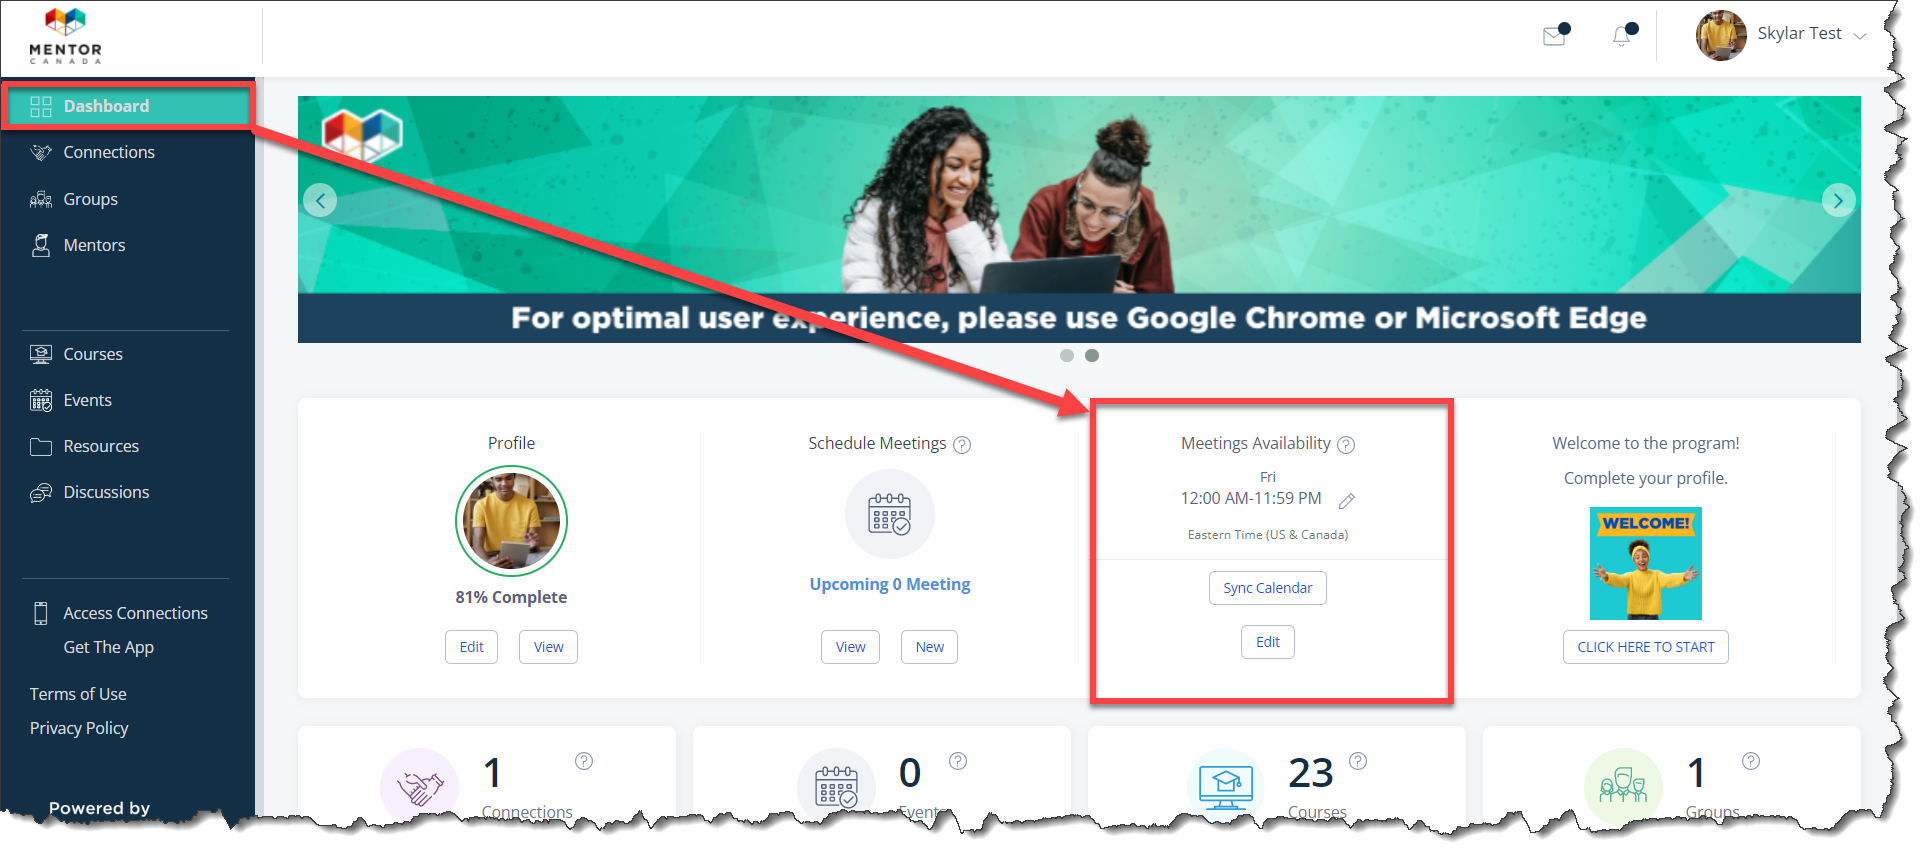
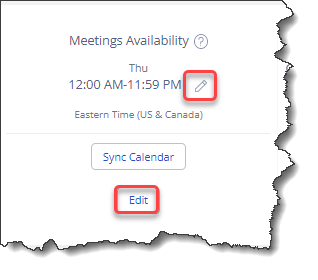
1. Click Edit or the pen icon under the Meetings Availability shortcut.
2. Select your time zone.
3. Enter your availability window for each day of the week.
4. If you are completely unavailable for a day of the week, uncheck the box under the "Available" column for that specific day.
5. Optional: Click Sync Calendar to sync your Outlook or Google Calendar and reflect additional availability.
6. Click Save
5 - Get familiar with the different sections of the platform
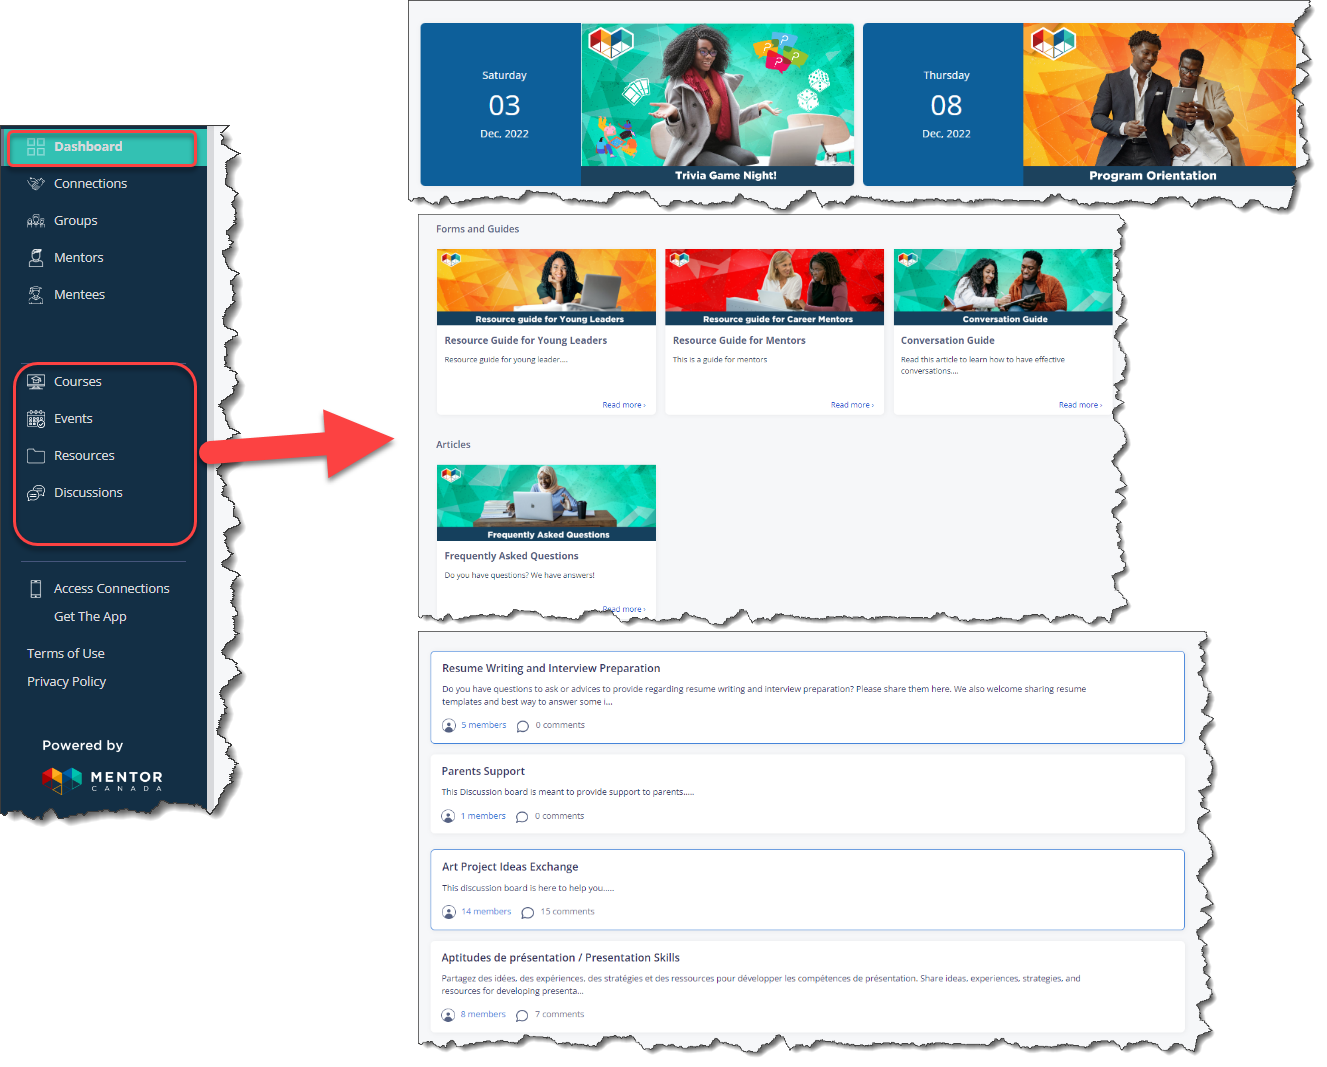
Visit the Dashboard, Courses, Events, Resources & Discussions sections to learn more about what your program has to offer.
6 - Once you have been matched, review your mentorship match profile
Your program will either match you with a mentor or mentee or allow you to self-initiate a match. This information will be provided by the program administrator. Nonetheless, once you have been matched, it is recommended to review your mentoring match profile prior to your first meeting.
1. Click Connections.

2. Click the name of your mentoring match.

3. Click their name.


7 - Book your First Mentoring Meeting
It is possible to book meetings from the Connections tab or from the Dashboard.
Connections
1. Click Connections

2. Click on your mentoring match name

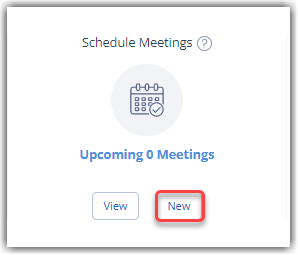
3. Click New under the Schedule Meetings widget which can be located anywhere on the first row of the dashboard.
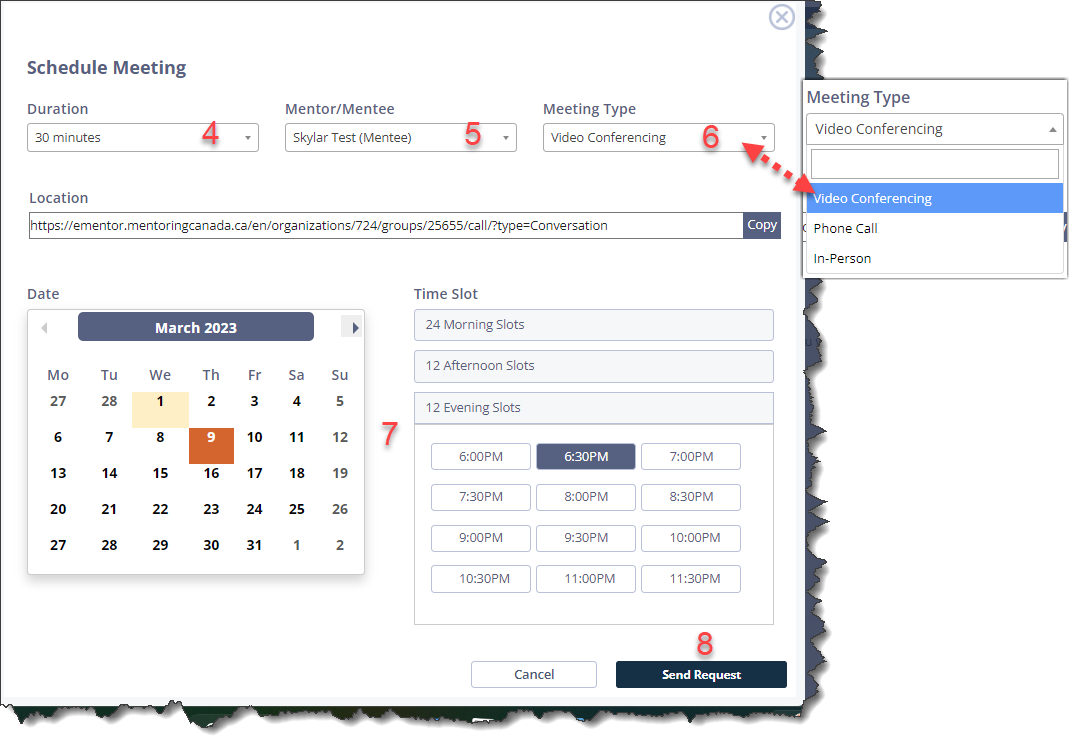
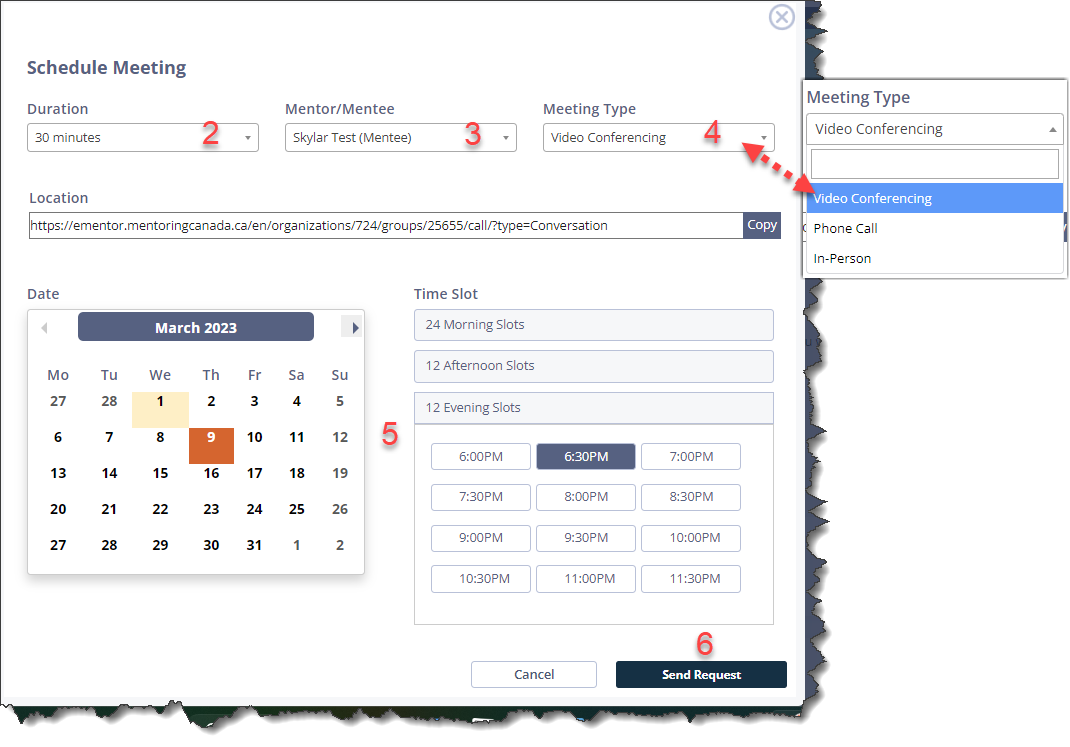
4. Select a meeting duration
5. Select the name of your mentoring match from the drop-down menu
6. Select a meeting type from the drop-down menu. The meeting types offered may vary based on your program policies.
7. Select a date and time slot from the calendar
8. Click Send Request
Dashboard
You can book meetings from the Dashboard as long as your program provided you with a Schedule Meetings shortcut. If provided, the Schedule Meetings shortcut can be located anywhere on the first row of your Dashboard.

1. Click New under the Schedule Meetings dashboard shortcut
2. Select a meeting duration
3. Select the name of your mentoring match from the drop-down menu
4. Select a meeting type from the drop-down menu. The meeting types offered may vary based on your program policies.
5. Select a date and time slot from the calendar
6. Click Send Request
8 - Complete the Mentoring Agreement
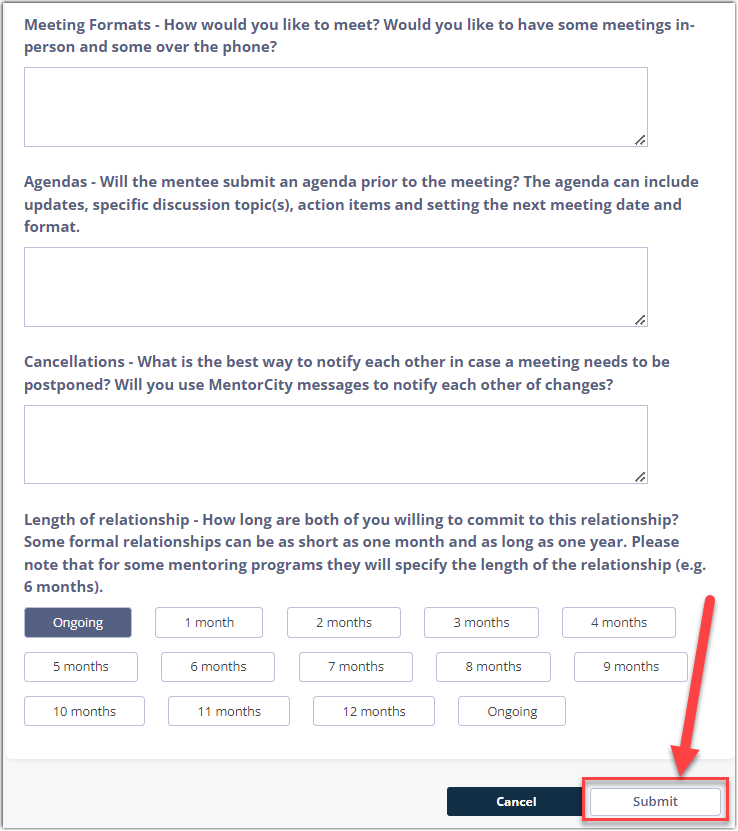
It is important to complete a mentoring agreement at the start of the mentoring relationship. The mentoring agreement sets the mentorship expectations such as the frequency of the meetings, how to handle cancellations, confidentiality etc...
Connections
1. Click Connections

2. Click on your mentoring match name

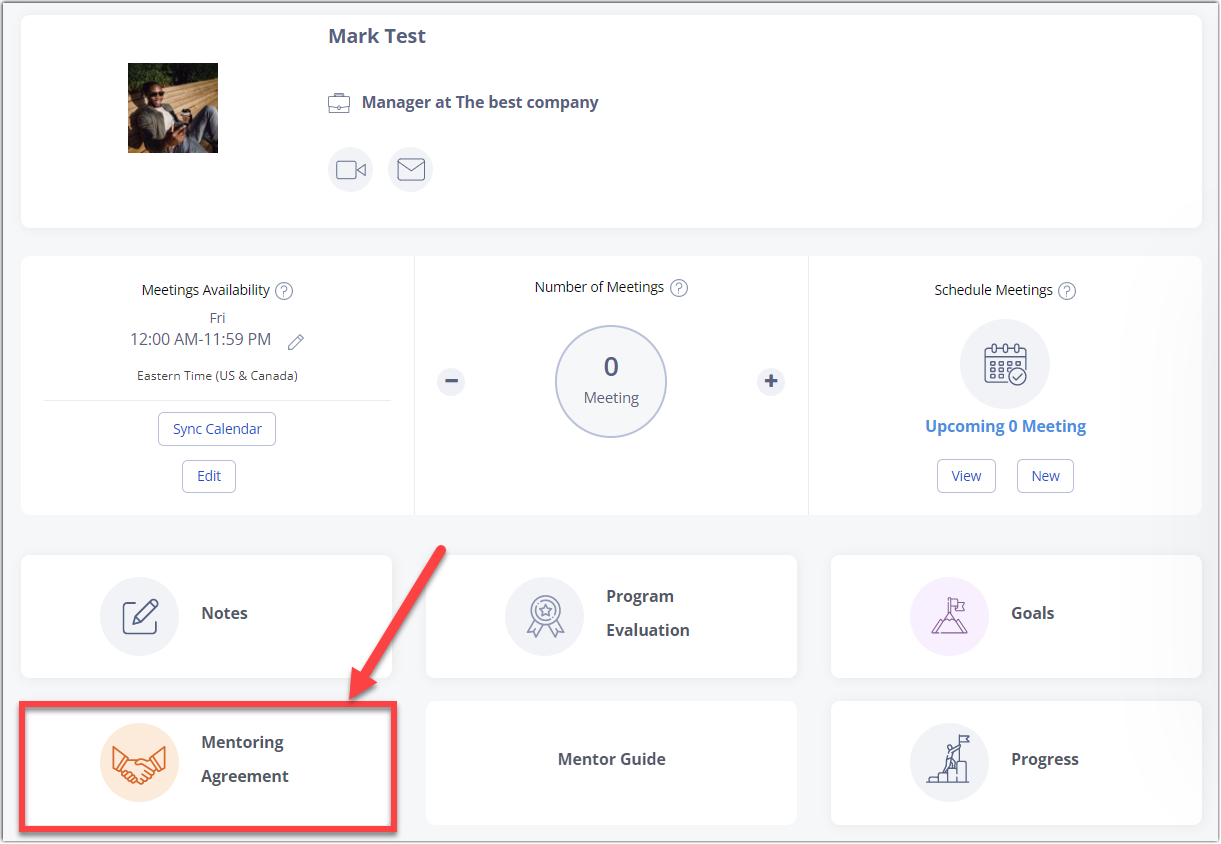
3. Click Mentoring Agreement on the relationship dashboard which can be located anywhere on the second or third row of the dashboard.
4. Complete each section of the mentoring agreement. As long as one person in the mentorship completes it, the answers will be captured on their mentoring match profile as well.

5. Click Submit
9 - Establish Goals for your Mentorship
It is possible to establish goals from the Connections tab or from the Dashboard.
Connections
1. Click Connections
2. Click on your mentoring match name

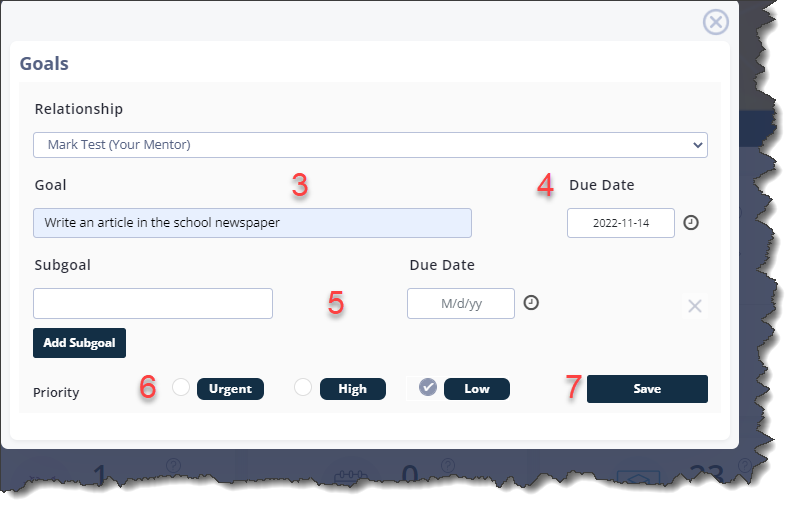
3. Click Goals on the relationship dashboard which can be located anywhere on the second or third row of the dashboard.
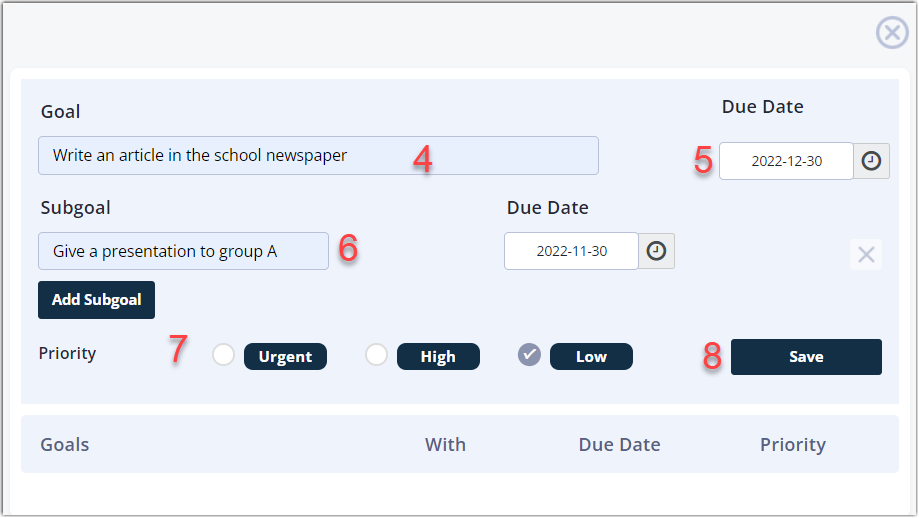
4. Enter your goal
5. Optional: Enter a due date
6. Optional: Enter a subgoal and due date for the subgoal.
7. Optional: Select a priority for this goal.
8. Click Save
Dashboard
You can establish goals from the Dashboard as long as your program provided you with a Goals shortcut. If provided, the Goals shortcut can be located anywhere on the third row of your Dashboard.

1. Click + under the GOALS dashboard shortcut
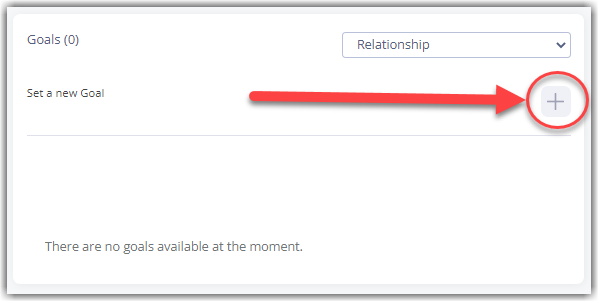
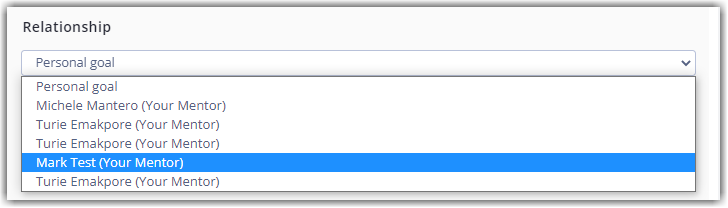
2. Indicate if the goal is personal (only you can see it) or within the mentorship by selecting the name of your mentoring match from the drop-down list. This is something you can only do when establishing goals from the Dashboard.
3. Enter your goal
4. Optional: Enter a due date
5. Optional: Enter a subgoal and due date for the subgoal.
6. Optional: Select a priority for this goal.
7. Click Save
10 - Connect & Communicate Regularly
The system will send you email notifications and/or mobile notifications when there are new activities on the platform.


However, don't forget to connect to the platform regularly to respond to your mentor or mentee's message and accept their meeting invitations.
Make sure you communicate on a regular basis with with your mentoring match using the Send Message feature.
Send a Message
1. Click Connections

2. Click Message under your mentoring match name.
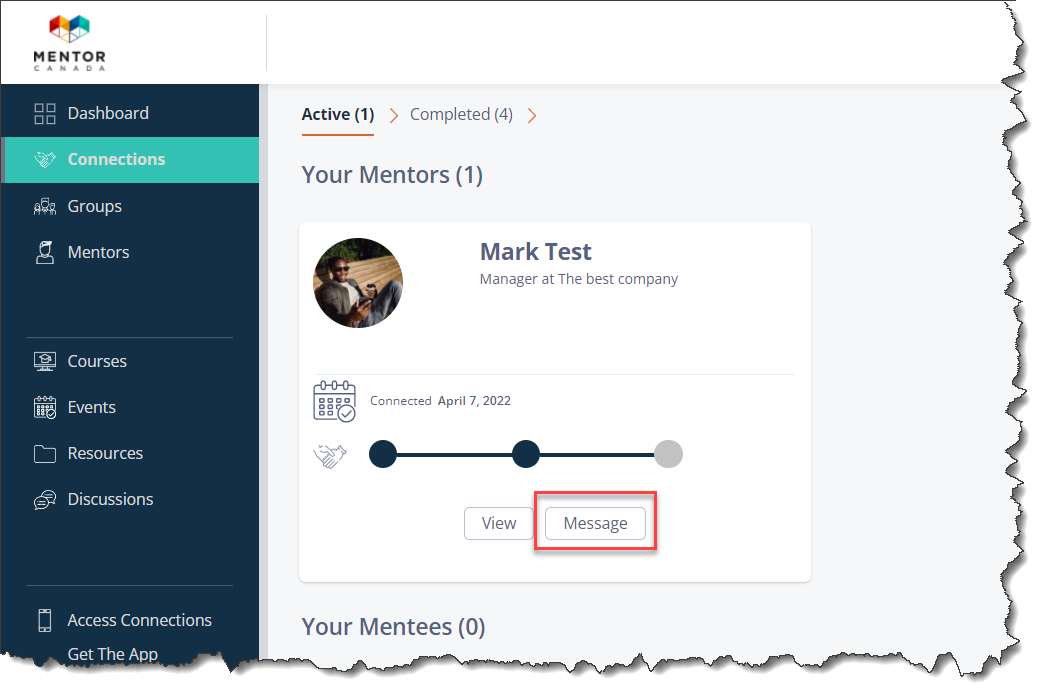
3. Write your message and click the send icon.

View all Communications
To view all messages and communications received from different areas of the platform (private messages, groups and discussion posts) click on the envelop icon at the top of the page. You can also respond to messages from here.

If you have questions or need further support, please contact our Support Team: support@mentoringcanada.ca