Customize Mentors/Mentees Profile Fields & Drop-down Menus
- Context
- Define Sections & Fields to Display
- Create Custom Profile Fields
- Define your Fields Drop-Down Menus
- Create or Update the Competencies (self-evaluation)
Context
The virtual mentoring platform includes pre-defined fields and drop-down menus within the mentors' and mentees' profiles. Program administrators have the flexibility to customize and select the specific sections and fields that appear on these profiles. This allows for a tailored and personalized experience for mentors and mentees.
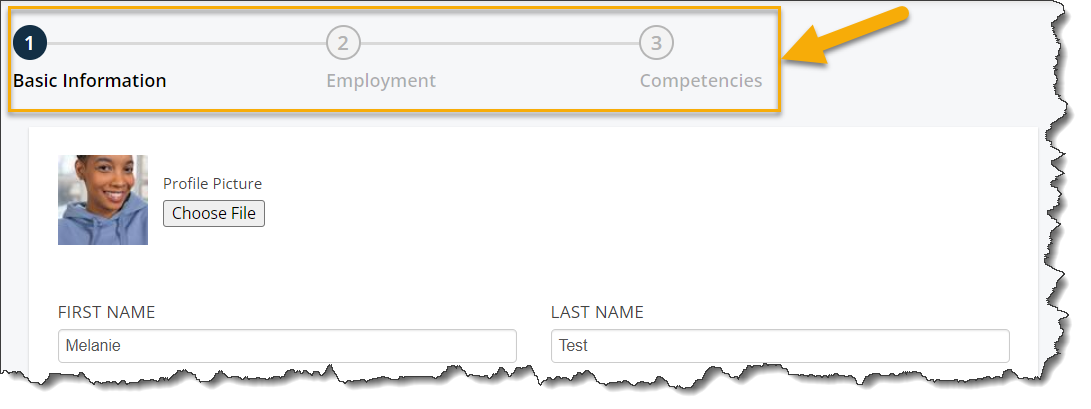
The profile is composed of three sections:
1. Basic (mandatory section that cannot be hidden however fields on this section can be hidden or customized)
2. Employment
3. Competencies
It is also important to note that the following fields are utilize by the system algorithm as matching criteria to provide the most accurate match recommendations:
- Competencies (Competencies)
- Specialized Skills/Development Areas (Basic)
- Industries (Employment)
- Job function (Employment)
- Language (Basic)
- Meeting Locations (Basic)
Step 1 – Define Sections & Fields to Display
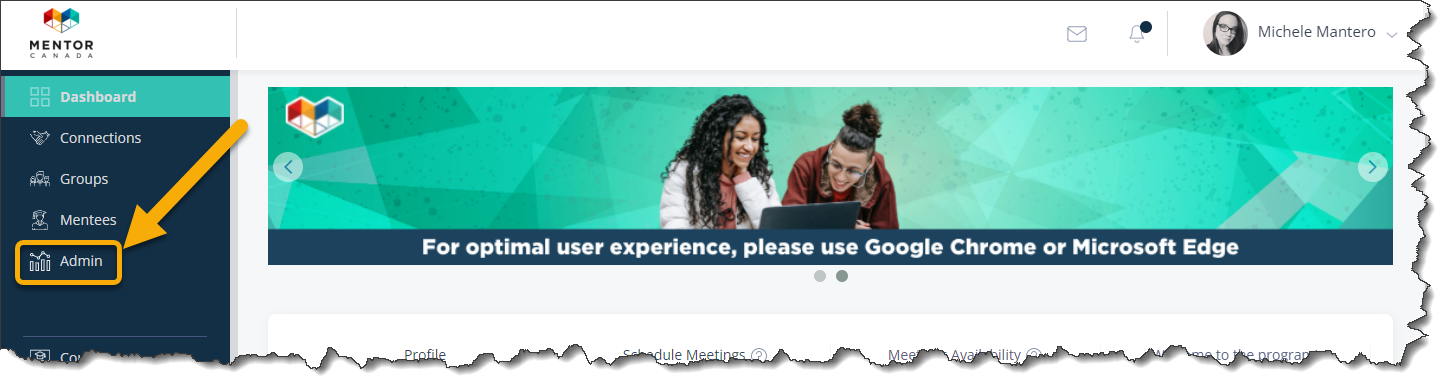
1.0 Click the “Admin” tab on the left-hand side of the platform.

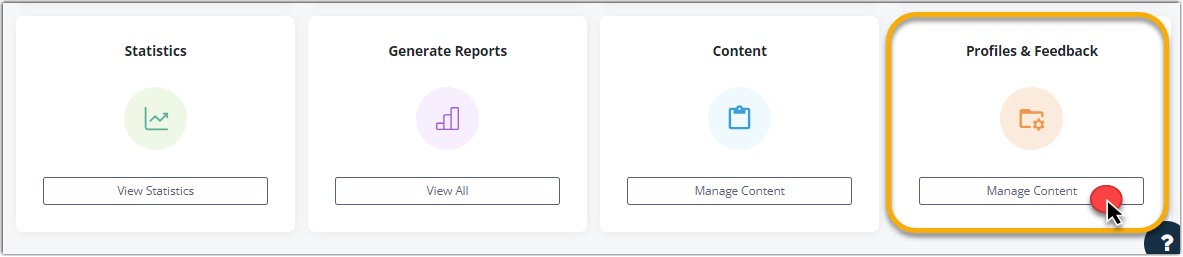
1.1 From the administrator dashboard, navigate to the "Profiles & Feedback" tile located on the third row, and click on "Manage Content" to access the corresponding section.
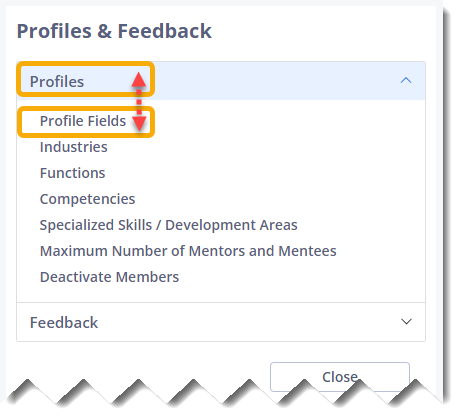
1.1.1 A new dialog box will appear. Expand the selections by clicking on "Profiles" and subsequently choose "Profile Fields"
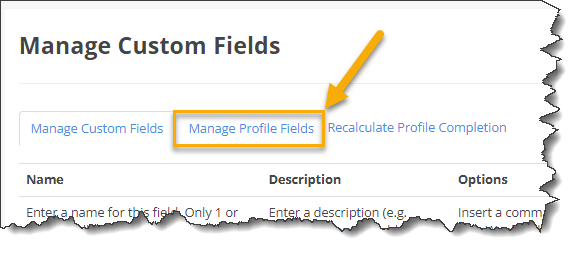
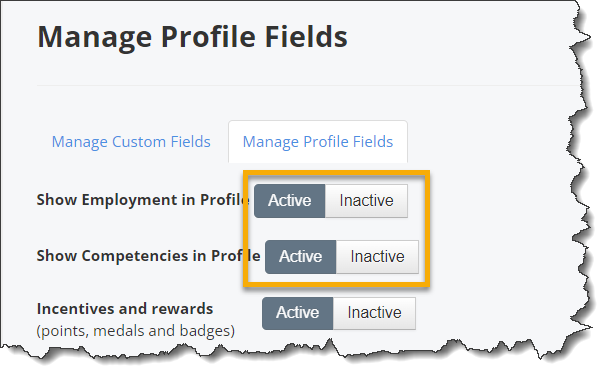
1.2 Click the “Manage Profile Fields” tab.
1.3 Click Active or Inactive for each section.
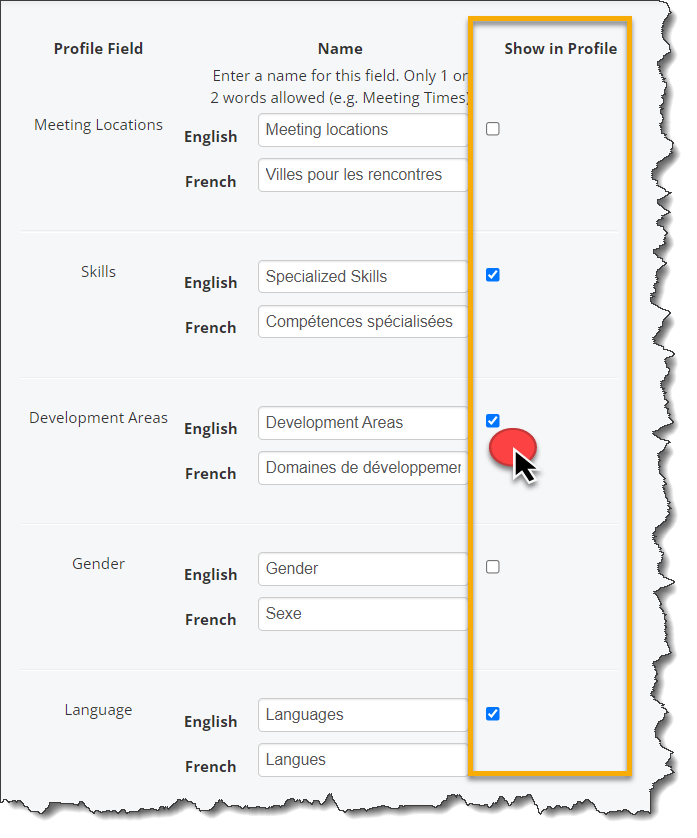
1.4 Check boxes under the “Show in Profile” column for each field you wish to display on your user’s profile. Leave the boxes unchecked to hide the field.
1.5 Click Update Fields

Step 2 – Create Custom Profile Fields
2.0 Click the “Admin” tab on the left-hand side of the platform.

2.1 From the administrator dashboard, navigate to the "Profiles & Feedback" tile located on the third row, and click on "Manage Content" to access the corresponding section.
2.1.1 A new dialog box will appear. Expand the selections by clicking on "Profiles" and subsequently choose "Profile Fields"
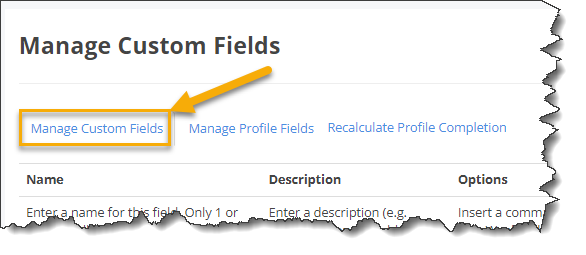
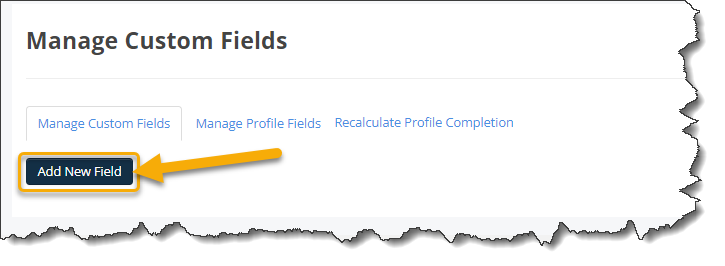
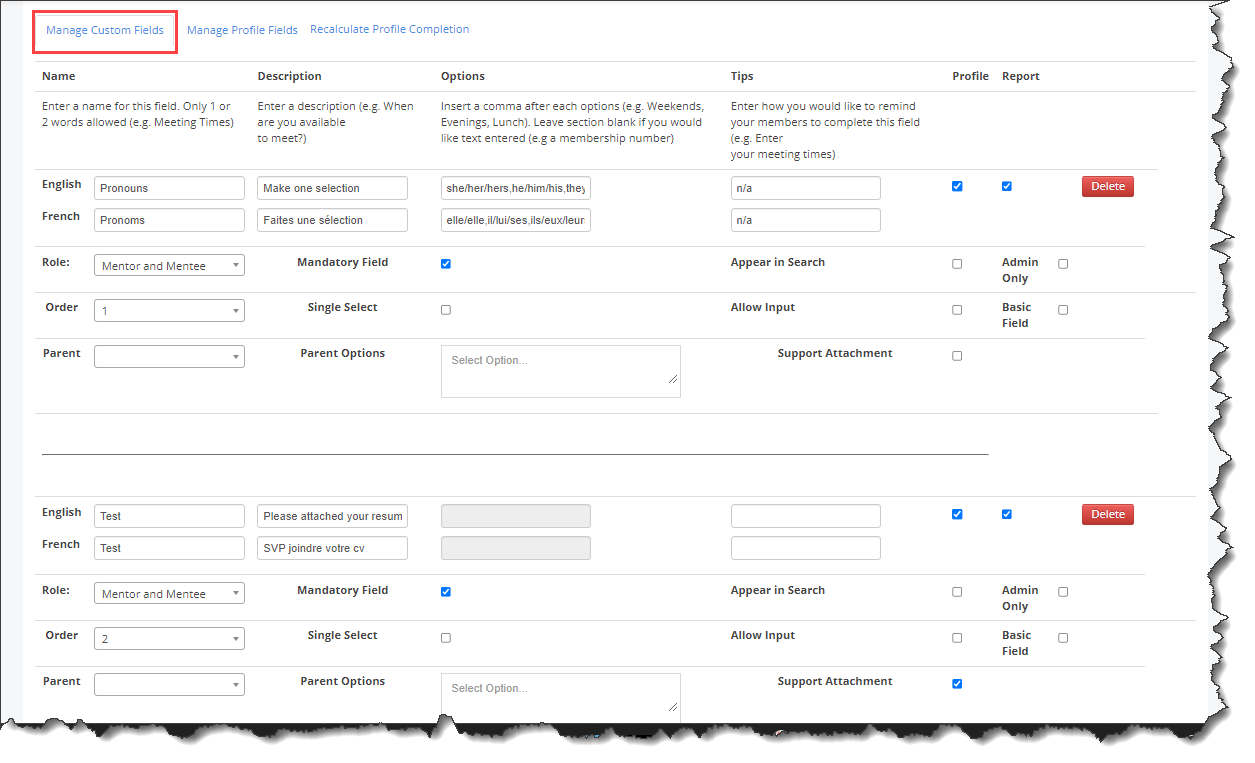
2.2 Click on “Manage Custom Fields”.
2.3 Click Add New Field
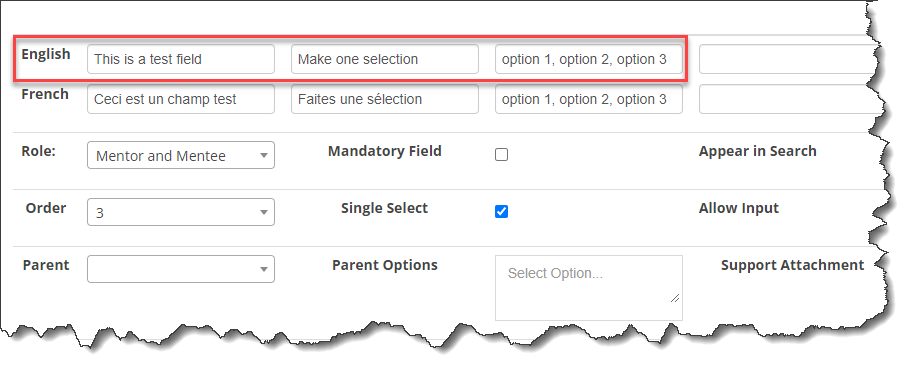
2.4 Create the new custom field by entering:
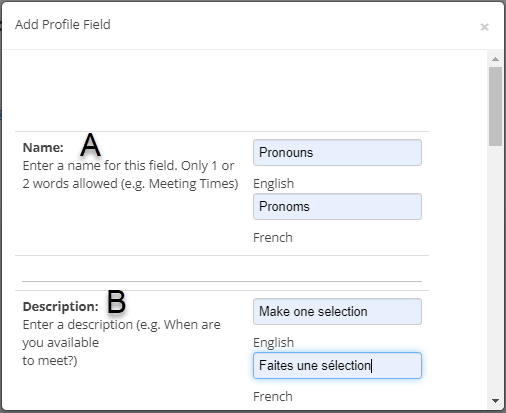
A) A Field Name
B) A Description, i.e. "Make one selection"
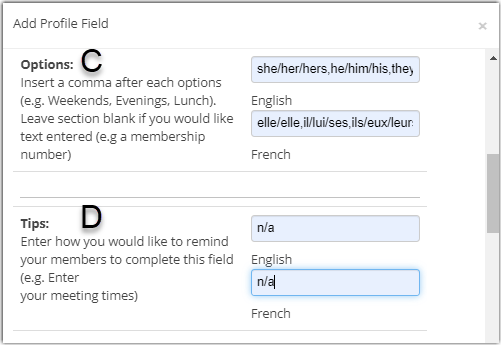
C) Options: Insert a comma after each options or leave blank if you would like text entered.
D) Tips: Enter instructions/tips on how you would like to your members to complete this field.
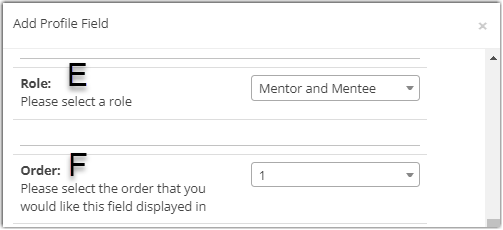
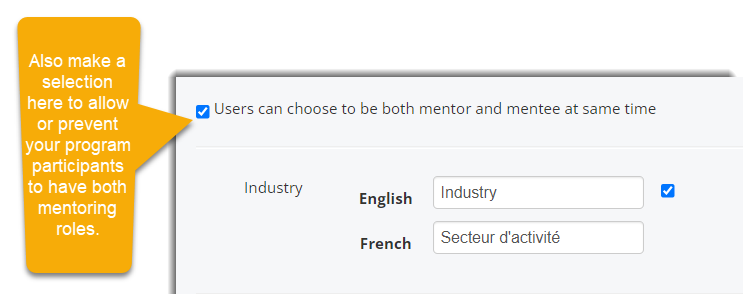
E) Role: Indicate which role will have access to this field.
F) Order: Select the order in which this field will be display if you create multiple custom fields.
2.5 Click the additional and optional selections to format the new field. (mandatory, include on report etc….)

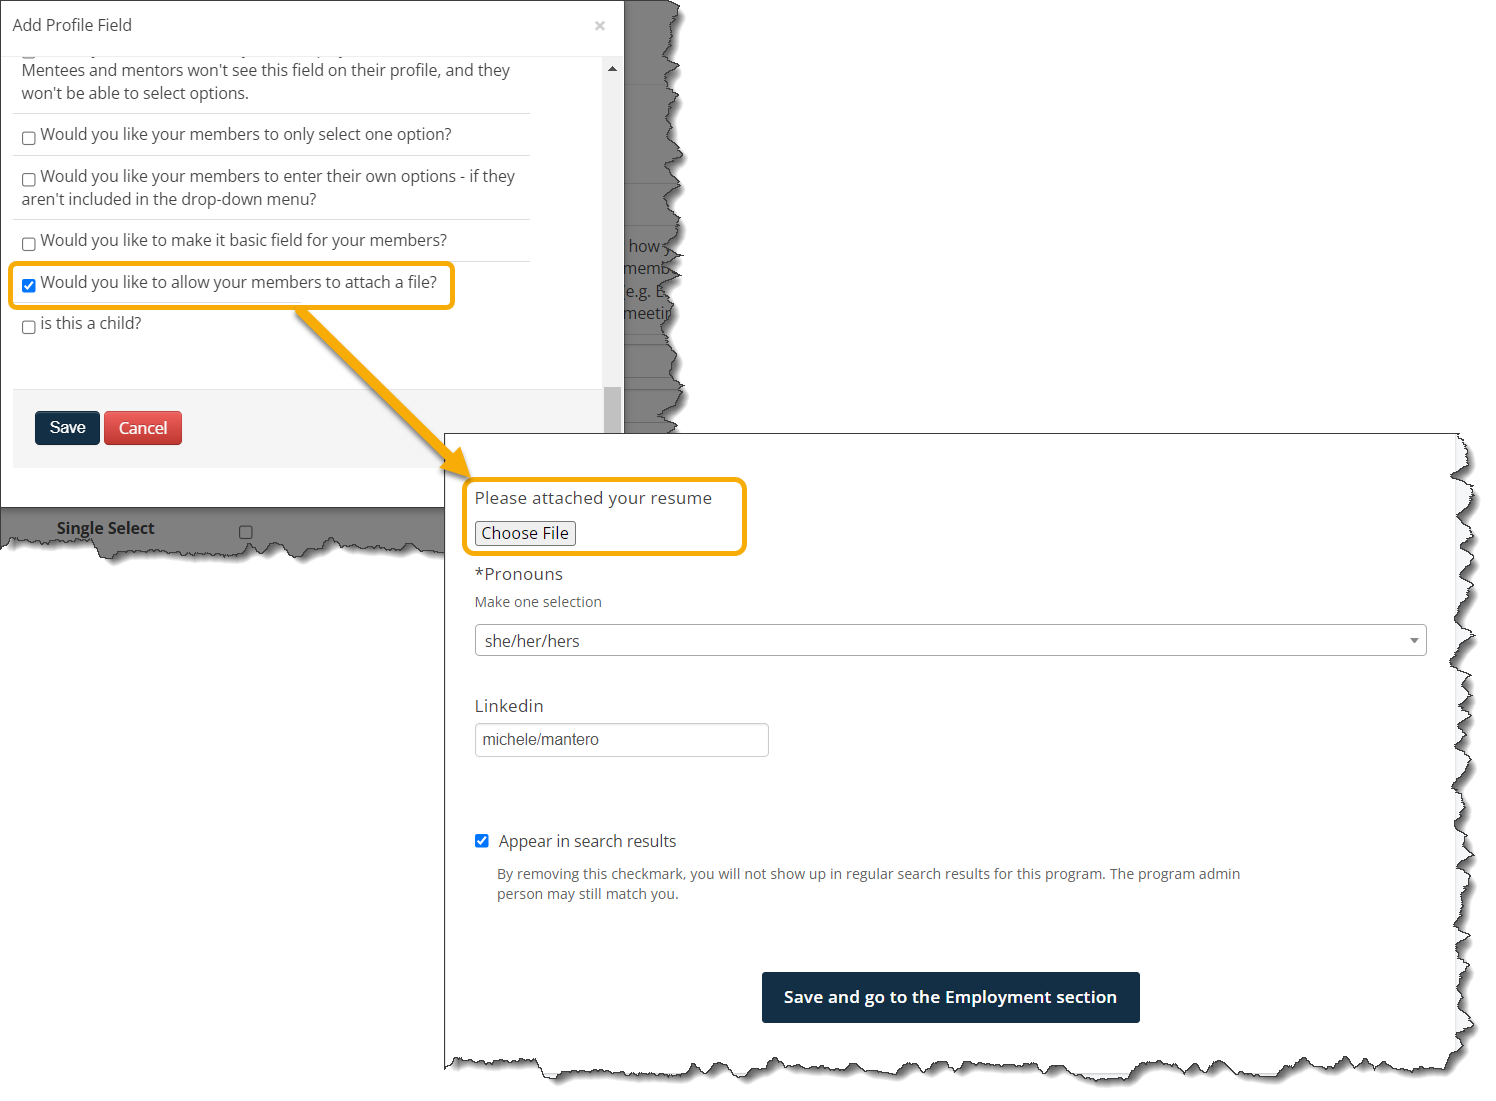
2.5.1 Optional: When creating a custom field, there is now an option to allow members to attach a file to the field. For instance, you could create a field with this option for mentors to attached their resume to their profile.
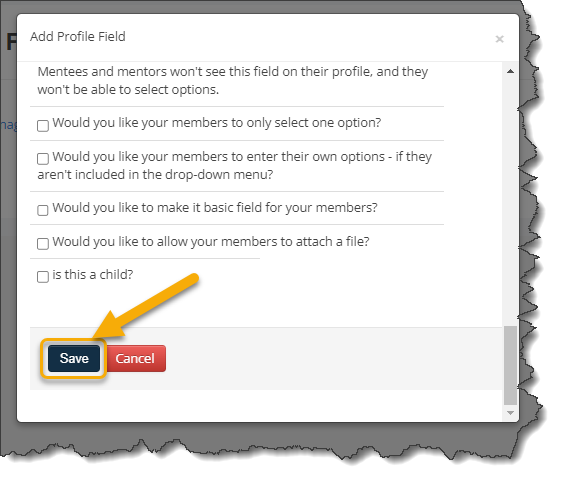
2.6 Click Save
2.6.1 The new field now appears under the "Manage Custom Fields" section. From here, you can make modifications to the custom field and click on Update Fields, or, add a new custom field by clicking on Add New Field.
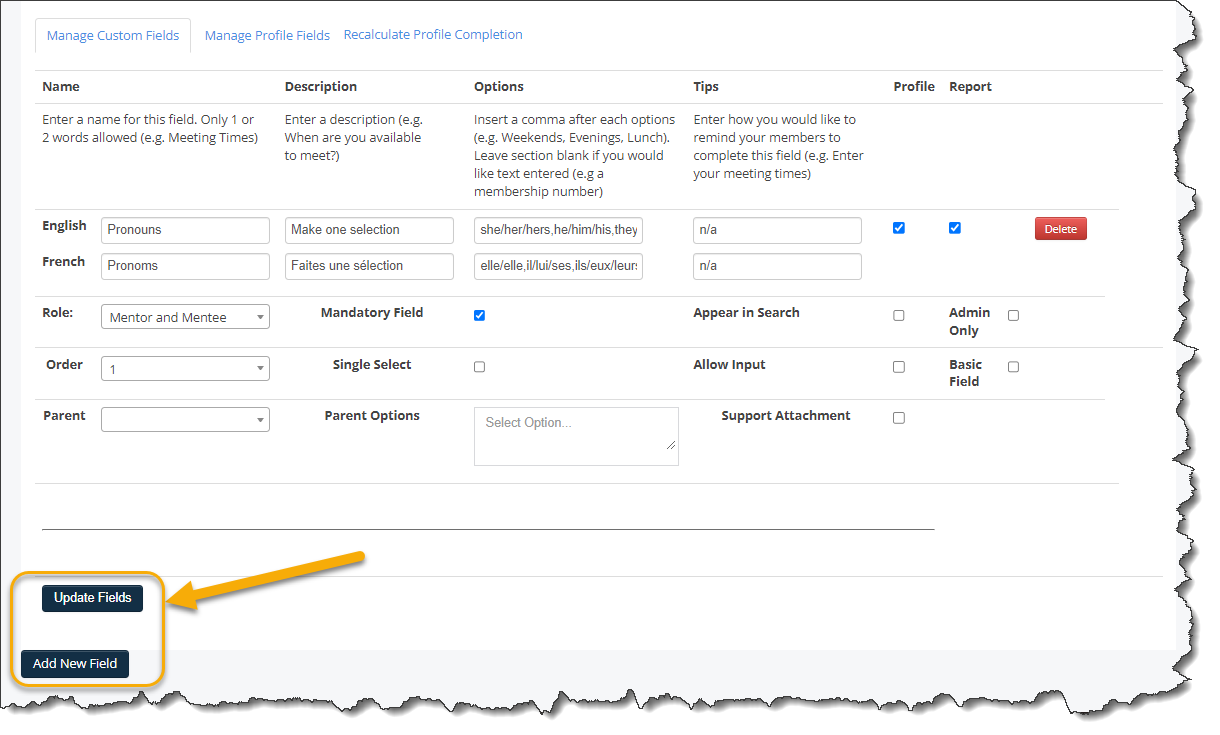
2.6.2 Voila! The new custom field is now display on your mentors and/or mentees' profile.

Delete/Change a Custom Profile Field
Delete
2.7 To delete a custom profile field, from the administrator dashboard, navigate to the "Profiles & Feedback" tile located on the third row, and click on "Manage Content" to access the corresponding section.
2.7.1 A new dialog box will appear. Expand the selections by clicking on "Profiles" and subsequently choose "Profile Fields"
2.7.2 You will be brought to the "Manage Custom Fields" tab where all your existing custom profile fields are displayed.
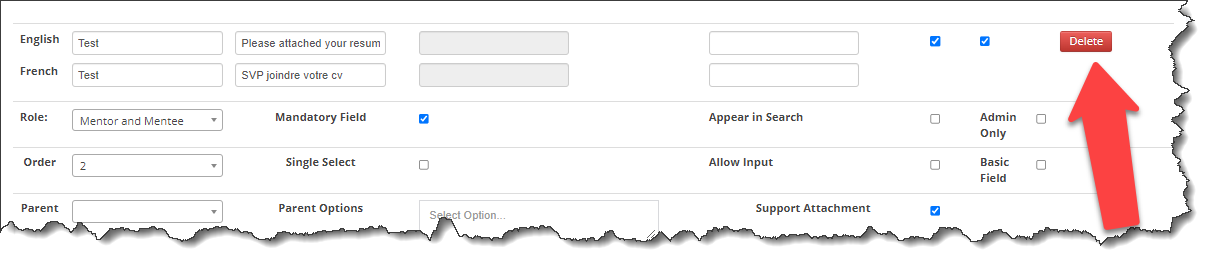
2.7.3 Find the custom field you want to delete and click Delete on the right-hand side of the page.
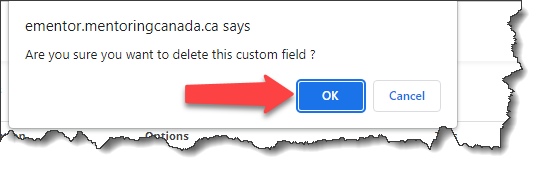
2.7.4 You will be ask to confirm, click OK.
Change
2.8 To modify a custom profile field, from the administrator dashboard, navigate to the "Profiles & Feedback" tile located on the third row, and click on "Manage Content" to access the corresponding section.
2.8.1 A new dialog box will appear. Expand the selections by clicking on "Profiles" and subsequently choose "Profile Fields"
2.8.2 You will be brought to the "Manage Custom Fields" tab where all your existing custom profile fields are displayed.

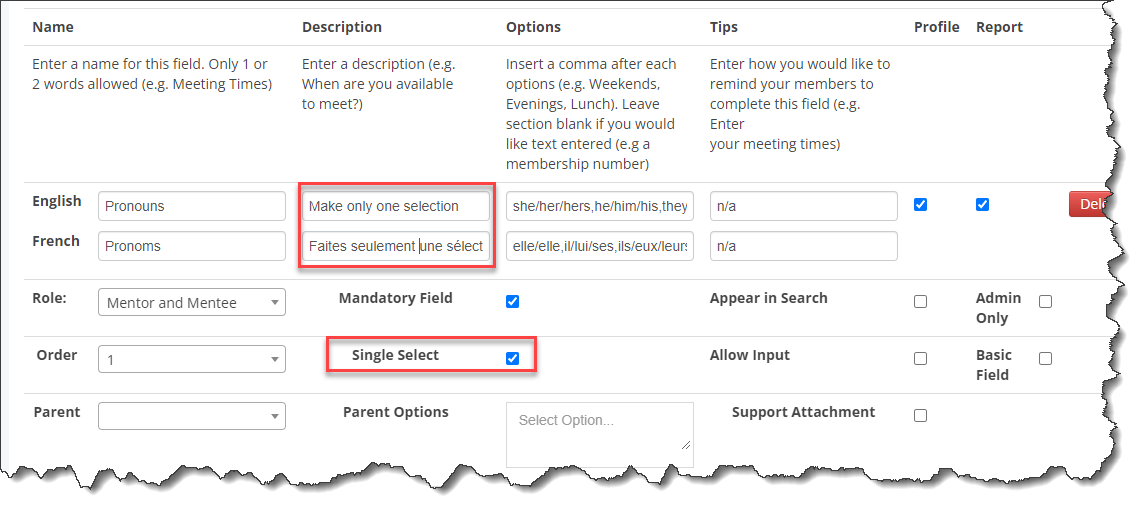
2.8.3 Modify any of the custom fields on this page. For example, if I wanted to make the "Pronouns" field a single select field, I would check the "Single Select" box on this page. I could also change the "Description" field by writing over the current description.
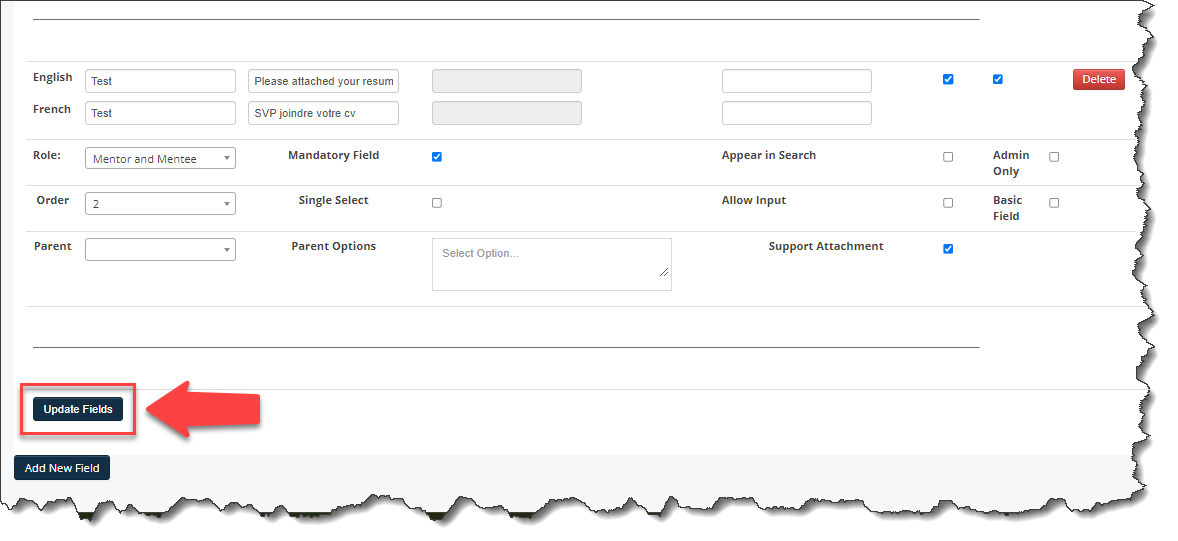
2.8.4 Scroll down to the bottom of the page and click Update Fields to save your changes.
Important: Multiple Choice Answers Field - Changing Listed Options: If you intend to modify the options listed in the "Options" field, it's important to note that such changes may impact the selections made in the profiles of existing mentors and mentees. Each option is associated with a specific sequence, and when modifications are made to the options that affect the sequence, the current selections in the mentor and mentee profiles will be automatically adjusted accordingly.
Example
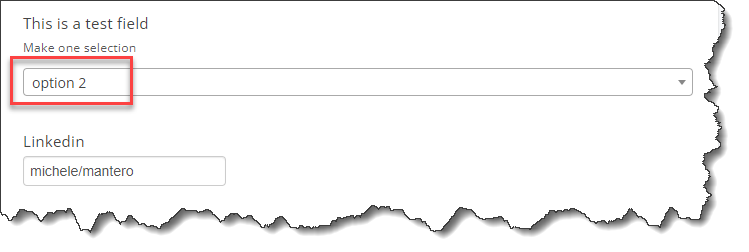
I created a Test field with the options of : Option 1, Option 2, Option 3.
On my profile, I selected "option 2" on the list which is the second option listed.
Now, I will go back to the administrator dashboard to modify the listed options.
I will add an option called "NEW" between "option 1" and "option 2". The "NEW" option becomes the second option listed and "option 2" becomes the third option listed.
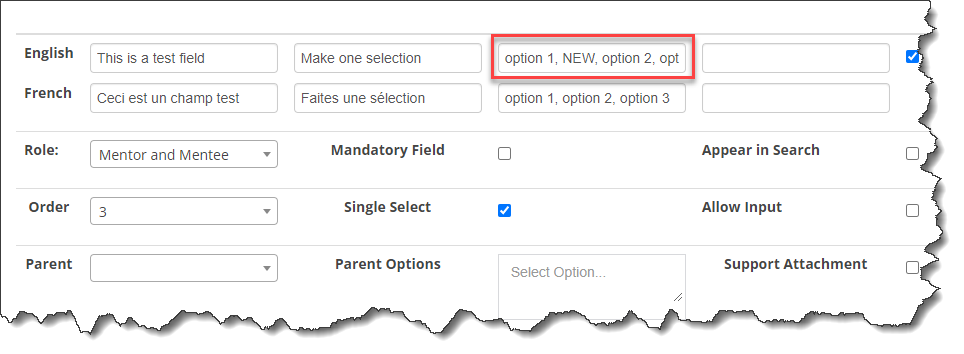
When I return to my profile, we can now see that my selection has been converted to "NEW".
The system matches the option with the sequence previously selected which was the second option listed. Thus, as per the changes made on the administrator dashboard, the second selection is now "NEW".

To prevent this from happening, when you create a new option, make sure to add it to the end of the current list.

In the event that you need to remove an existing option that would impact the sequence of selections, it is important to communicate this change to mentors and mentees. It is recommended to inform them that they should update the affected field accordingly. This can be done by making an announcement or sending out a mass communication to ensure that all relevant parties are aware of the necessary action they need to take.
Step 3 – Define your Fields Drop-Down Menus
The virtual mentoring platform offers a wide range of built-in fields that can be showcased on mentors' and mentees' profiles. Program administrators have the flexibility to modify the available options within certain built-in fields. This allows for greater customization and adaptability to meet the specific needs of the mentoring program.
Here is the list of built-in fields which allows program administrator to modify provided options:
Specialized Skills / Development Area (Basic section)
Industries (Employment section)
Functions (Employment section)
Competencies (Competencies section)
3.0 Click the “Admin” tab on the left-hand side of the platform.
3.1 From the administrator dashboard, navigate to the "Profiles & Feedback" tile located on the third row, and click on "Manage Content" to access the corresponding section.
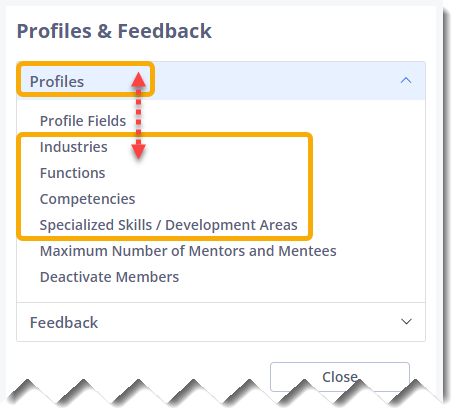
3.1.1 A new dialog box will appear. Expand the selections by clicking on "Profiles" and subsequently choose one of the field that requires modifications to the built-in options. In this example we will click on “Industries”. Refer to the highlighted section in the accompanying image to identify other fields that offer the ability to change the built-in options.
3.2 Click Delete for each option you do not wish to keep or simply type over to add a new option and their translation.

3.3 Click Add another industry located at the bottom of the page to add new options.

3.4 Click Update Industries to save your changes.

3.5 Follow the same steps 3.1 to 3.4 to modify the pre-built options of the “Functions” and “Specialized Skills/Development Areas” fields.
Step 4 – Create or Update the Competencies (self-evaluation)
Competencies can also be updated and the page where the update is done looks different from the one showed in the section above (step 3). However, the process is quite similar and intuitive.
4.0 Click the “Admin” tab on the left-hand side of the platform.

4.1 From the administrator dashboard, navigate to the "Profiles & Feedback" tile located on the third row, and click on "Manage Content" to access the corresponding section.
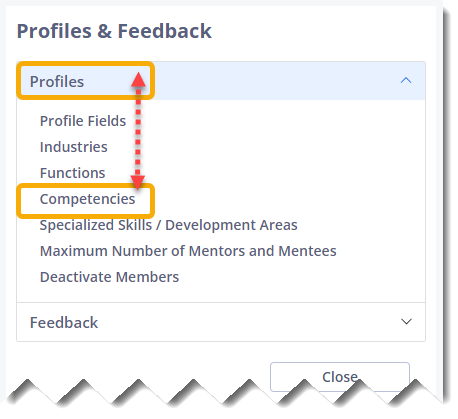
4.1.1 A new dialog box will appear. Expand the selections by clicking on "Profiles" and subsequently choose "Competencies"
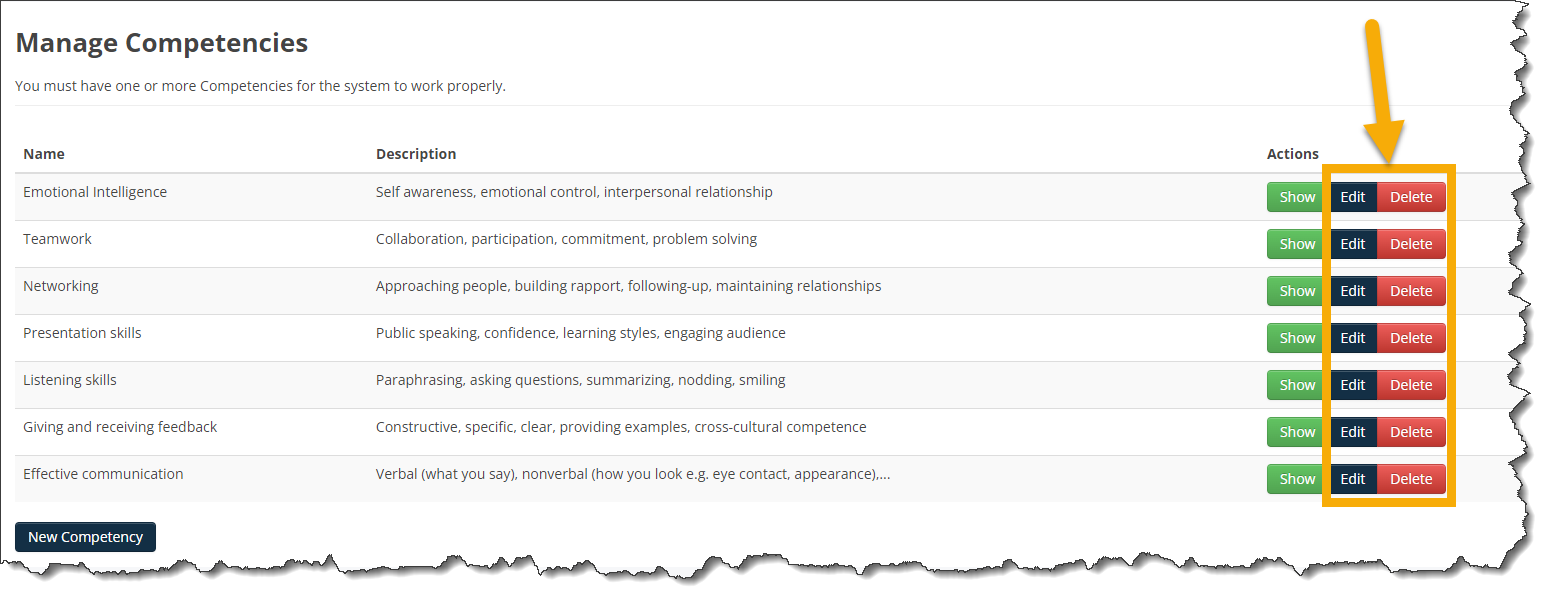
4.2 Click Edit or Delete under the “Action” column to modify or delete the built-in competencies.
4.3 If you are editing a current competencies, make the changes in the name and/or description and click Save.

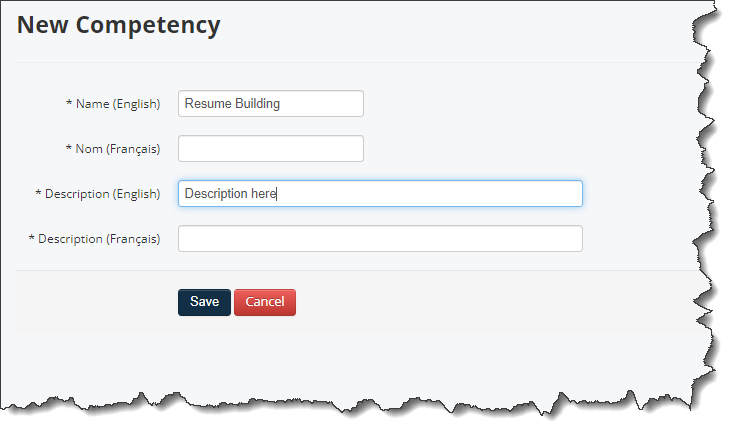
4.4 To add a new competency, click New Competency.

4.4.1 Enter the new competency and description, then click Save.
If you have questions or need further support, please contact our Support Team: support@mentoringcanada.ca