Create Additional Administrators
- Context
-
Create Program Administrators & Member/Relationship Administrators
-
Assign Mentors, Mentees and Relationships to a Member/Relationship Administrator
-
Engage with Mentors and Mentees as a Member/Relationship Administrator
Context
When access to the virtual mentoring platform is requested for the first time via the Mentor Connector, a program administrator is assigned to oversee the program. This initial program administrator is automatically designated as the main administrator, holding the highest access levels on the platform.
In this training article, we will guide you through the responsibilities and capabilities of the administrator role. We will explore how you can effectively utilize your elevated access levels to maximize the platform's potential and support the goals of your mentoring program.
There are 3 program administrator levels:

Administrators Access Levels
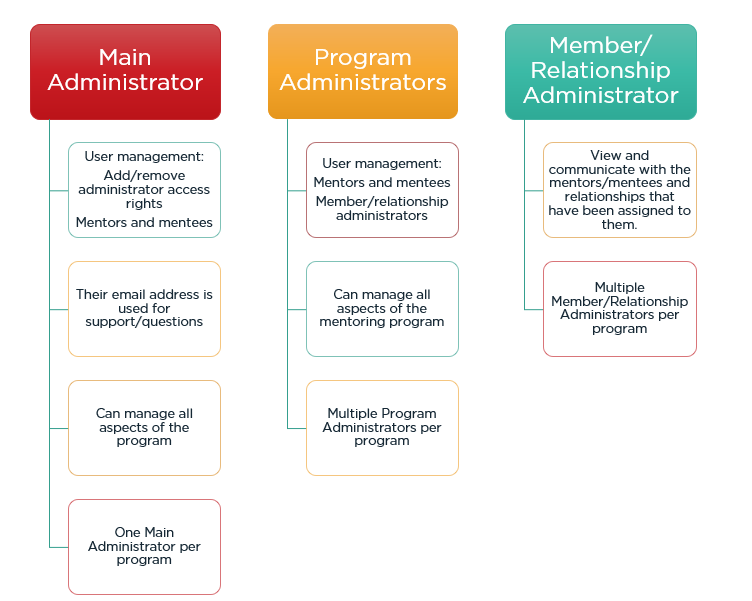
* Will be the recipient of mentors & mentees email replies (to system generated email messages) and they will also receive mentors & mentee's comments when sent from the platform (comments box on the dashboard).
The main administrator can be changed at any time. Email support@mentoringcanada.ca with the name and email address of the new main administrator.
Create Program Administrators & Member/Relationship Administrators
It is important to note that only the main administrator will be able to give administrator access rights to other users.
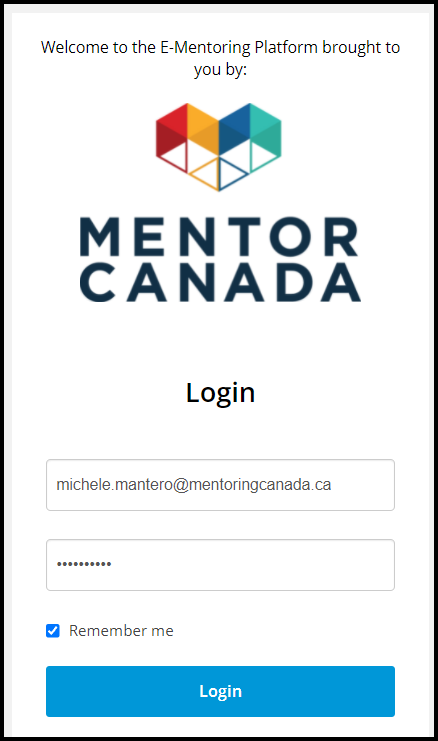
1. Go to the MentorCity login page https://ementor.mentoringcanada.ca
2. Enter your credentials and click Login.
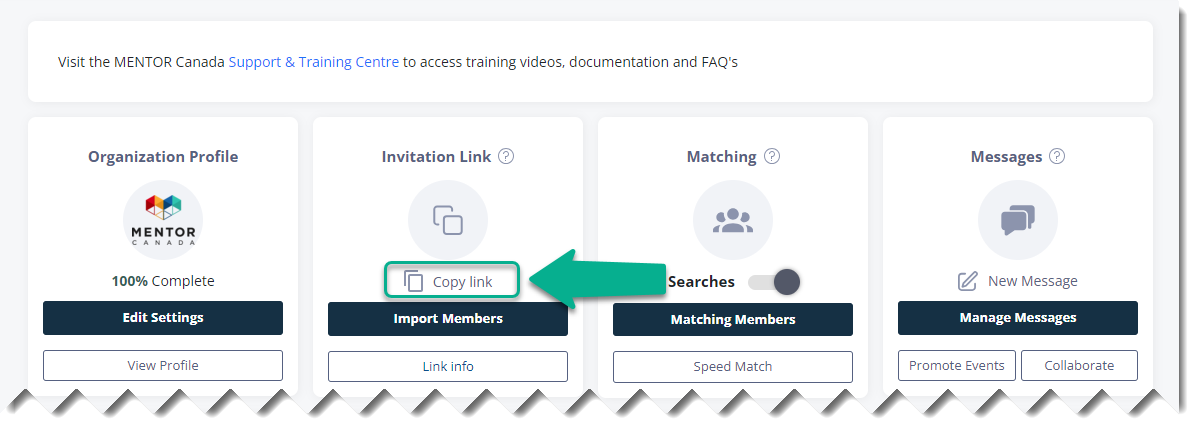
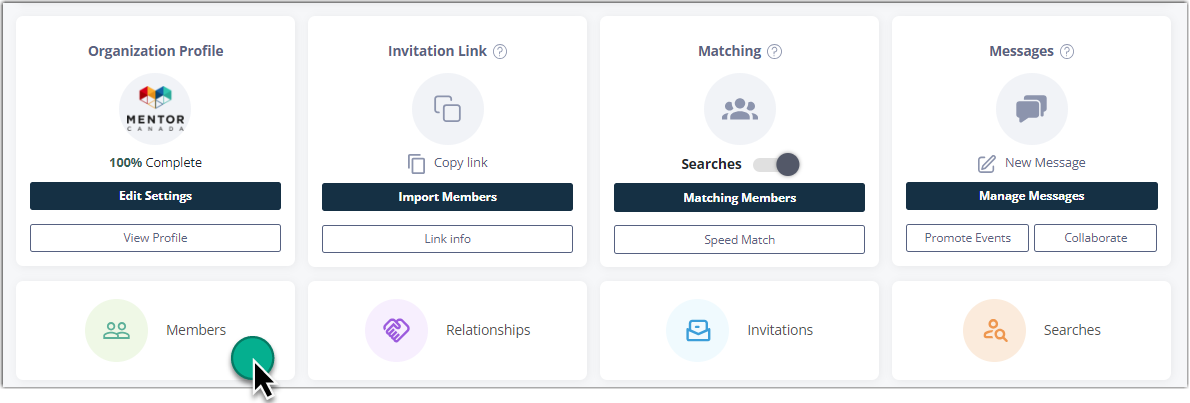
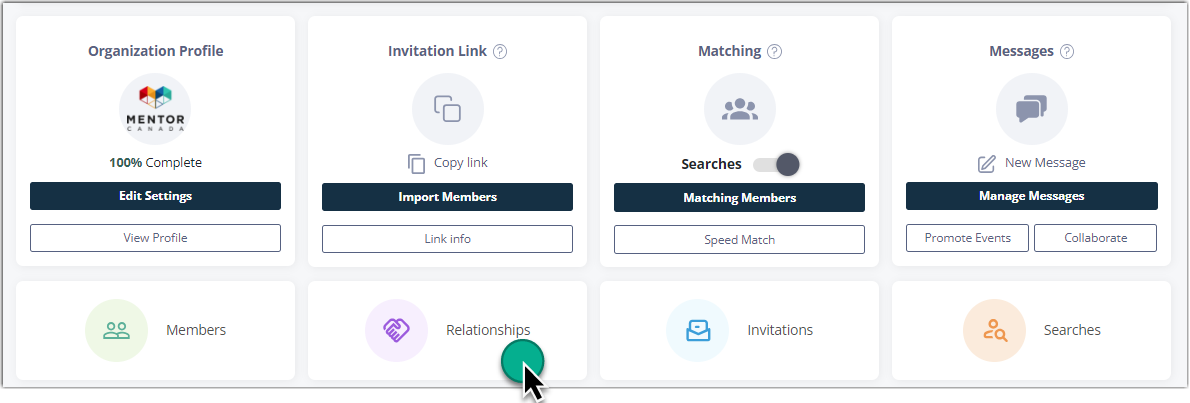
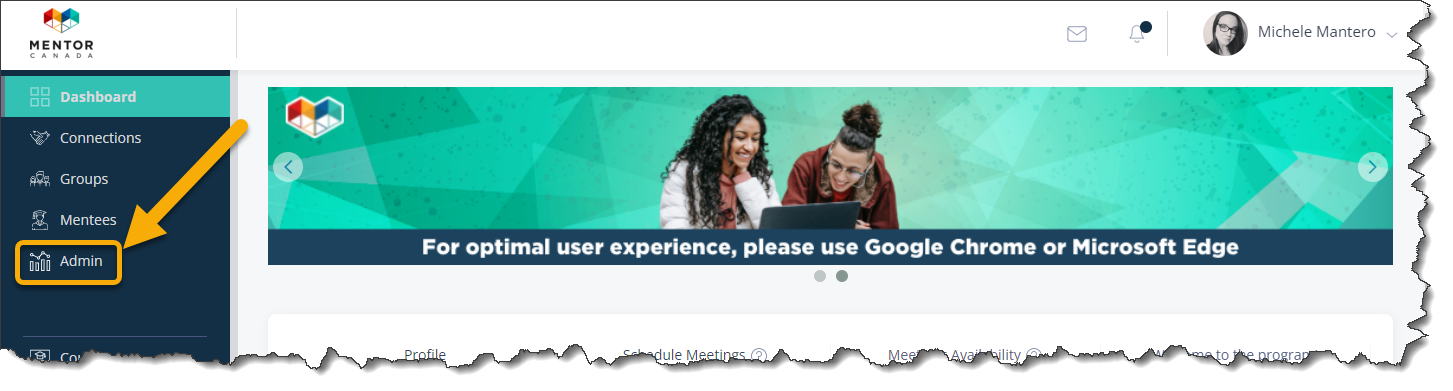
3. Click on the “Admin” tab on the left-hand side of the page.

4. Click "Copy Link" located under the "Invitation Link" tile on the first row of the admin dashboard.
5. Paste this link into an email and send it to the person who needs an administrator access so they can create an account.
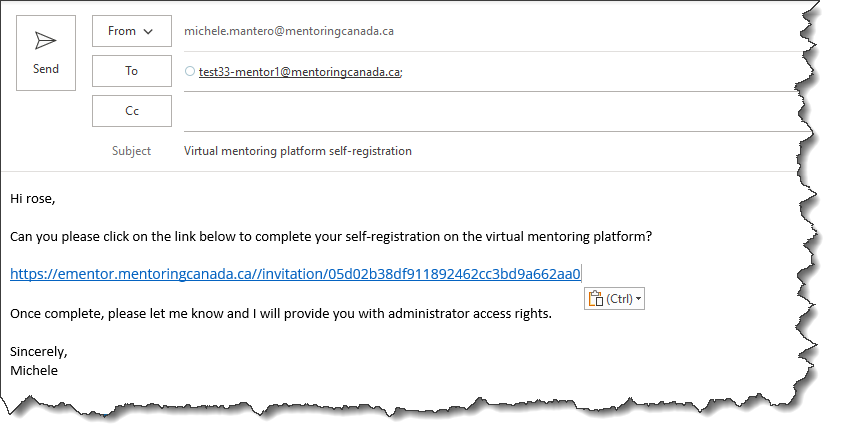
6. The individual completes the registration process.

7. Once the individual has created their account, the main administrator clicks on the “Admin” tab.

8. Click "Edit Settings" located under the "Organization Profile" tile on the first row of the admin dashboard.
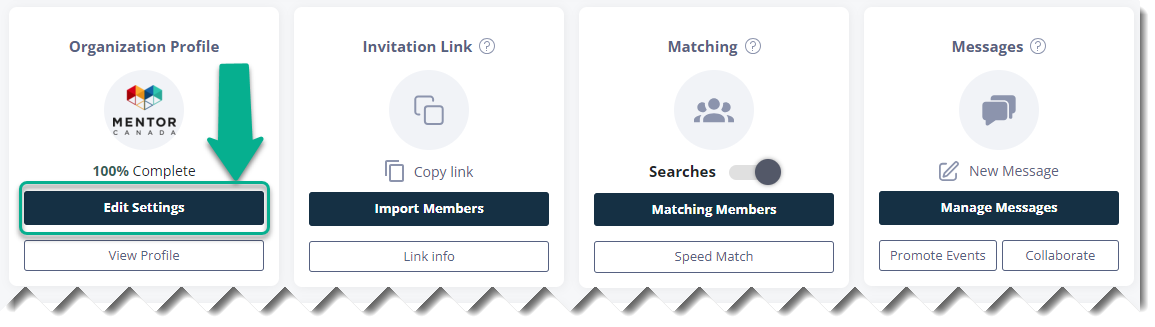
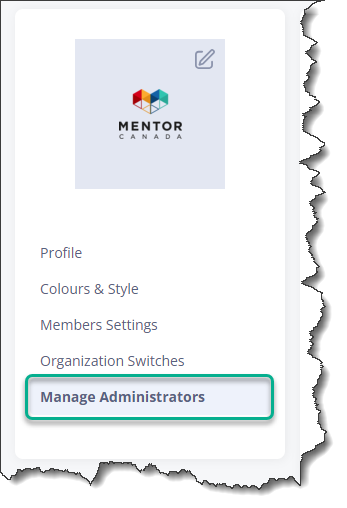
9. On the left-hand side of the page, click on "Manage Administrators."
10. Find the newly registered user in the user list and click the member's role field next to their name. This action will open a drop-down menu where you can select the appropriate administrator role for the user.
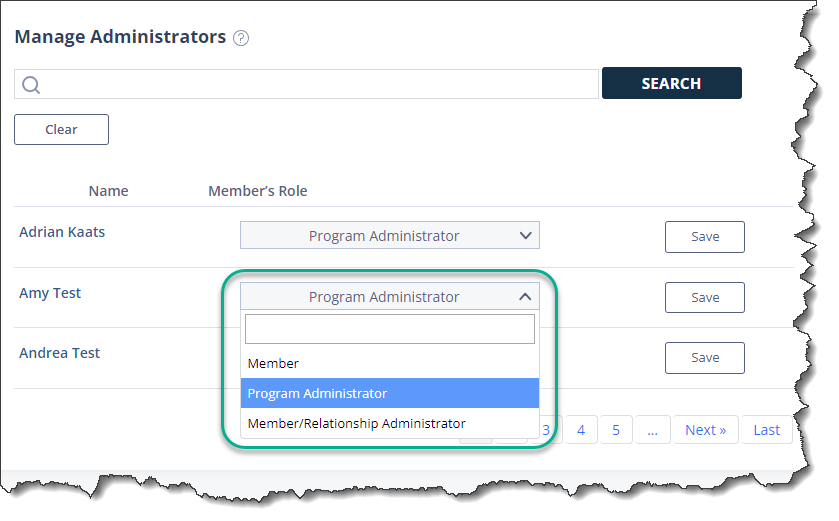
11. Click Save

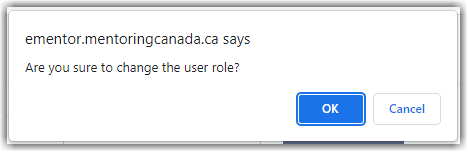
12. This box will come up asking you to confirm the change. Click Ok
Assign Mentors, Mentees and Relationships to a Member/Relationship Administrator
Member/Relationship Administrators can only view and communicate with the mentors, mentees and relationships that have been assigned to them by a program administrator.
Mentors and mentees should be matched by a Program Administrator prior to being assign to a Member/Relationship Administrator. Member/Relationship Administrators do not have access to the matching functionality.
Both the main administrator and the program administrator can assign mentors, mentees and relationships to a Member/Relationship Administrator.
Assign Mentors and Mentees to a Member/Relationship Administrator
1. To assign mentors and mentees to a Member/Relationship Administrator, click on the “Admin” tab on the left-hand side of the page.

2. Click on the "Members" tile located on the second row of the admin dashboard.
3. Find the mentor or mentee that needs to be assigned to a specific Member/Relationship Administrator and scroll to the left until you see the button Member Administrator . You can also reduce your browser's zoom to 75% to gain a full view.
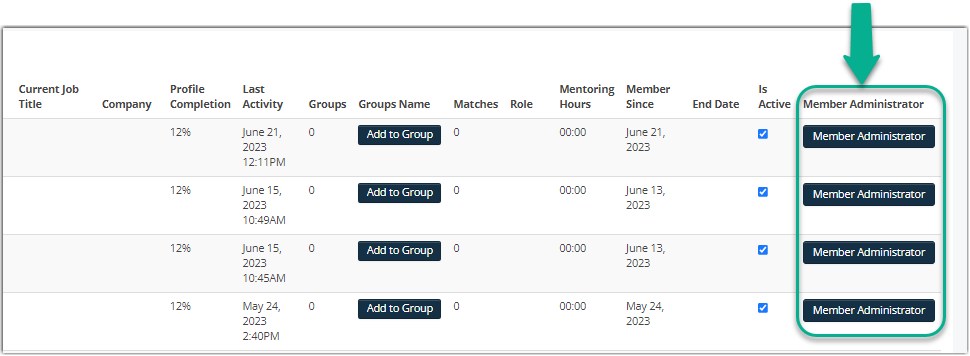
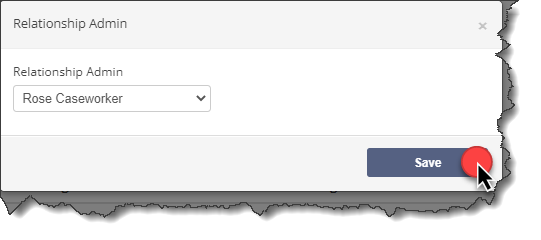
4. Click the Member Administrator button.

5. Click the drop-down menu and select the name of the designated Member/Relationship Administrator.
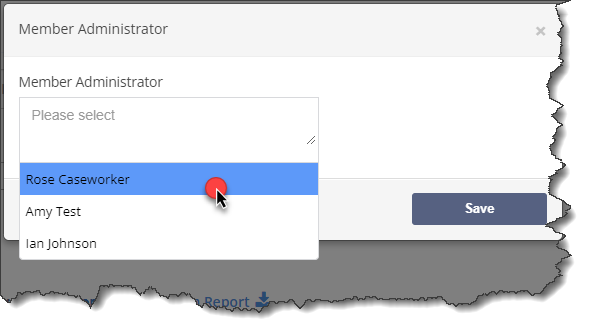
5.1 Please note that it is possible to assign a member to multiple Member/Relationship administrators by making an additional selection.

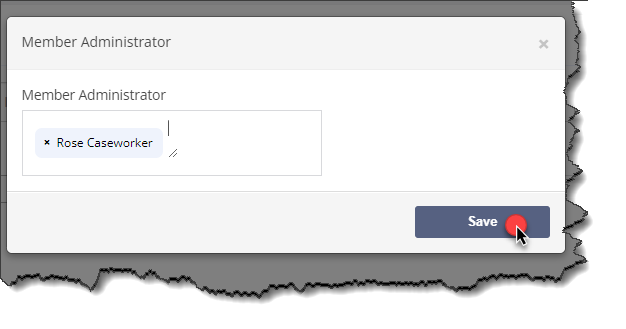
6. Click Save
7. Repeat steps 1-6 until you have assigned all mentors and mentees to the appropriate Member/Relationship Administrator.
Assign Relationships to a Member/Relationship Administrator
This feature allows Member/Relationship Administrators to access relationship information between a mentor and mentee when one of the two member is not assigned to them. For example, mentor Luca is assigned to Member/Relationship Administrator A and mentee Nicholas is assigned to Member/Relationship Administrator B. The relationship would be assigned to Member/Relationship Administrator A and B, so they can view and communicate with the mentorship.
1. To assign a relationship to a Member/Relationship Administrator, click on the “Admin” tab on the left-hand side of the page.

2. Click on the "Relationships" tile located on the second row of the admin dashboard.
3. To locate the relationship that needs to be assigned to a specific Member/Relationship Administrator, please scroll to the left until you find the Relationship Administrator button. In case you encounter any difficulty viewing the button, you can adjust your browser's zoom level to 80% for a complete view.

4. Click the Relationship Administrator button.

5. Click the drop-down menu and select the name of the designated Member/Relationship Administrator.
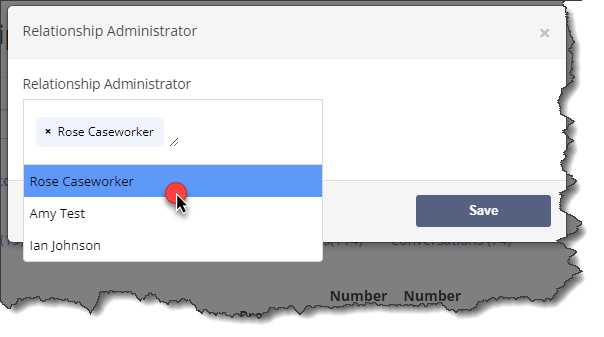
5.1 Similar to assigning a Member to a Member/Relationship administrator, it is possible to assign a relationship to multiple Member/Relationship administrators by making an additional selection.
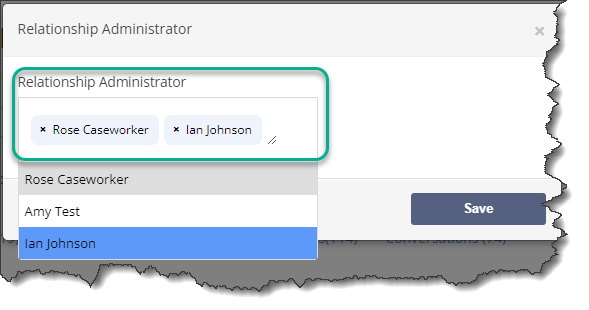
6. Click Save
Engage with Mentors and Mentees as a Member/Relationship Administrator
Member/Relationship Administrators can access data and make profile changes pertaining to the mentors, mentees and relationship that have been assigned to them. They can also communicate with those mentors and mentees.
Access Members and Relationships Data
1. To start viewing data pertaining to assigned mentors, mentees and relationships, click on the “Admin” tab on the left-hand side of the page.

2. The Member's tab is the default tab. From here, you can view the list of mentors and mentees that have been assigned to you.

2.1 This is where you can also activate or deactivate mentors and mentees that have been assigned to you. Deactivating a user will prevent them from login in to the virtual mentoring platform.
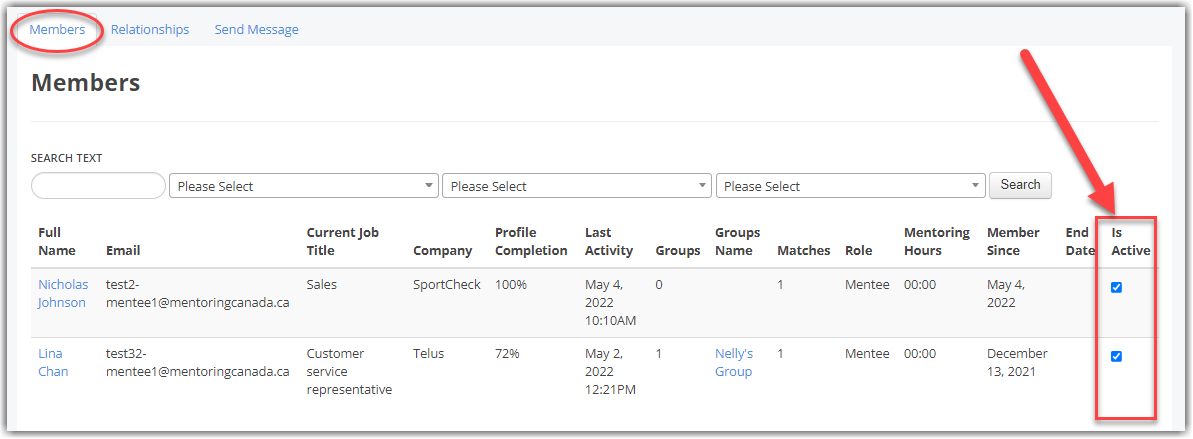
2.2 Click on a name to view additional data, make changes to their profile and communicate with them.

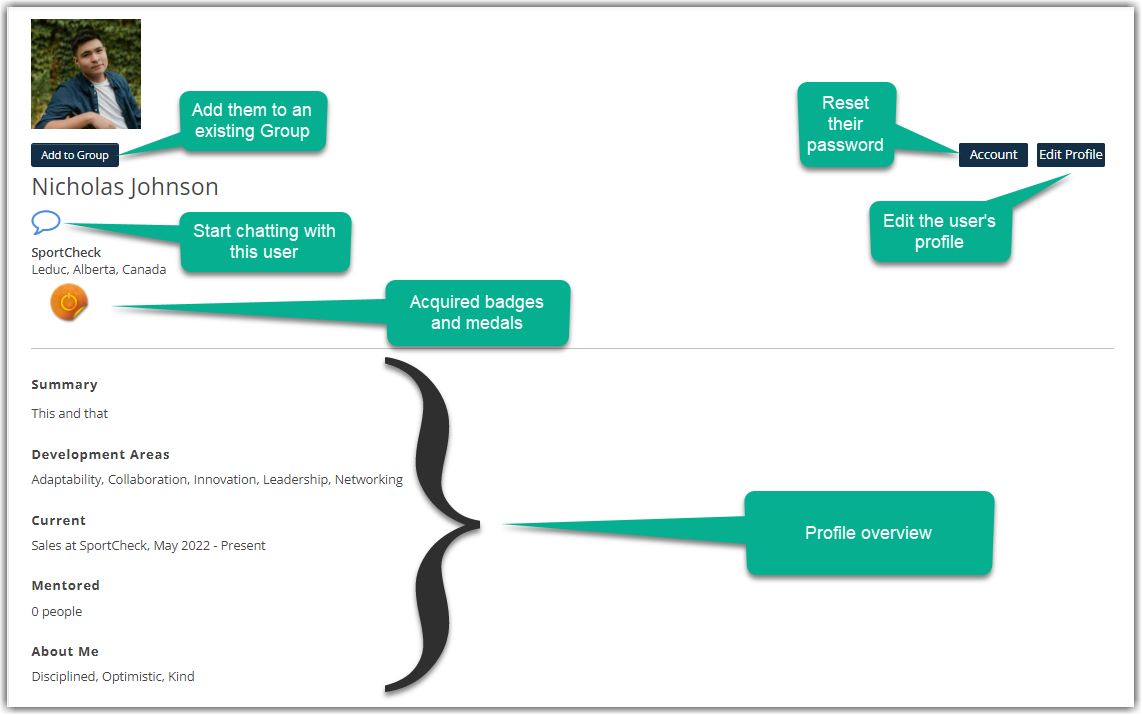
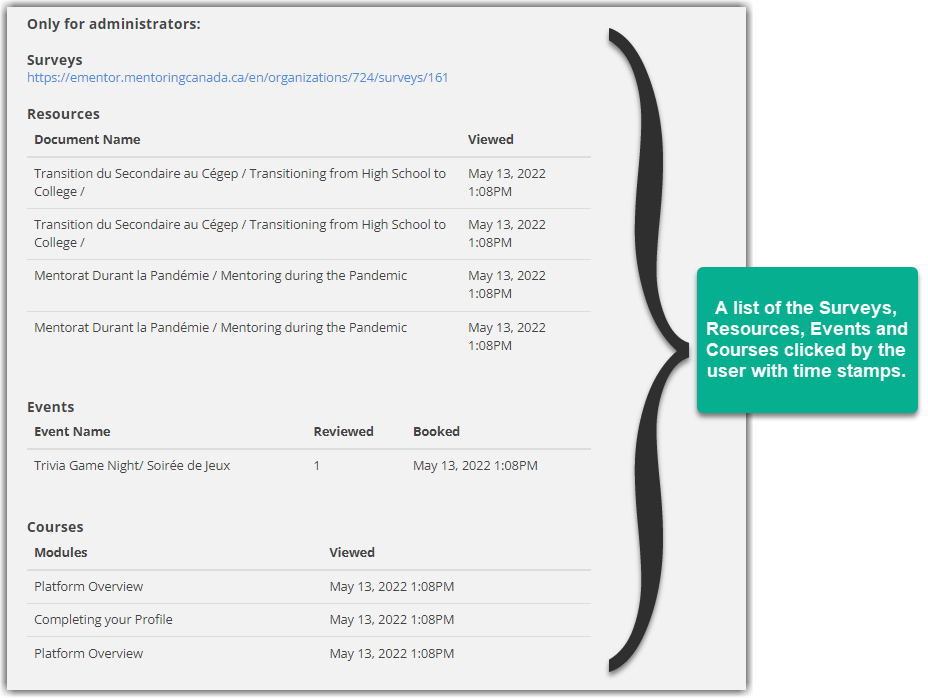
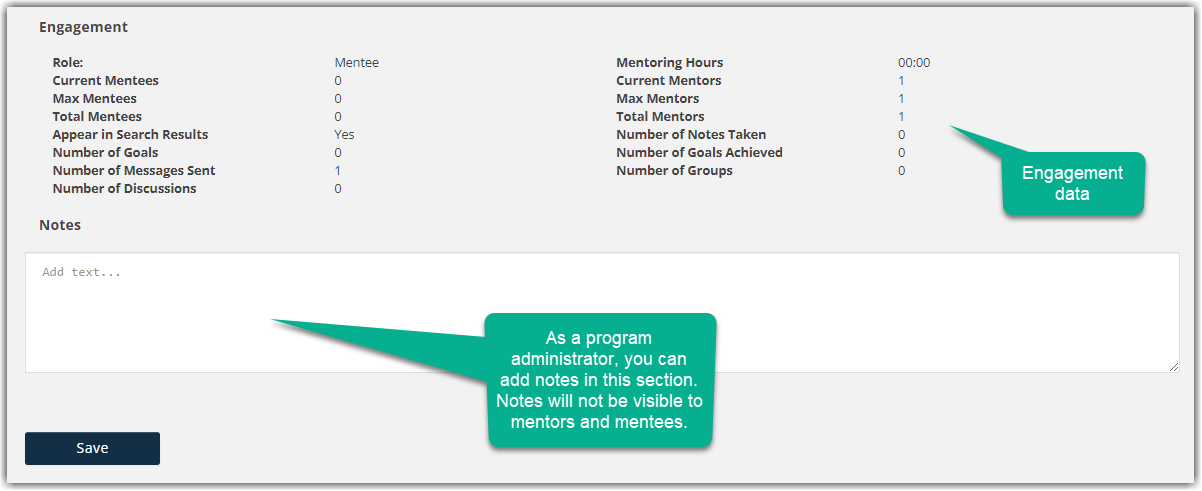
2.3 The following page contains a lot of information about the user. Here is a description of all the available data and actions:

2.4 To return to the previous page, scroll back up and click "Members".

2.5 Click on the "Relationships" tab to view relationships data.
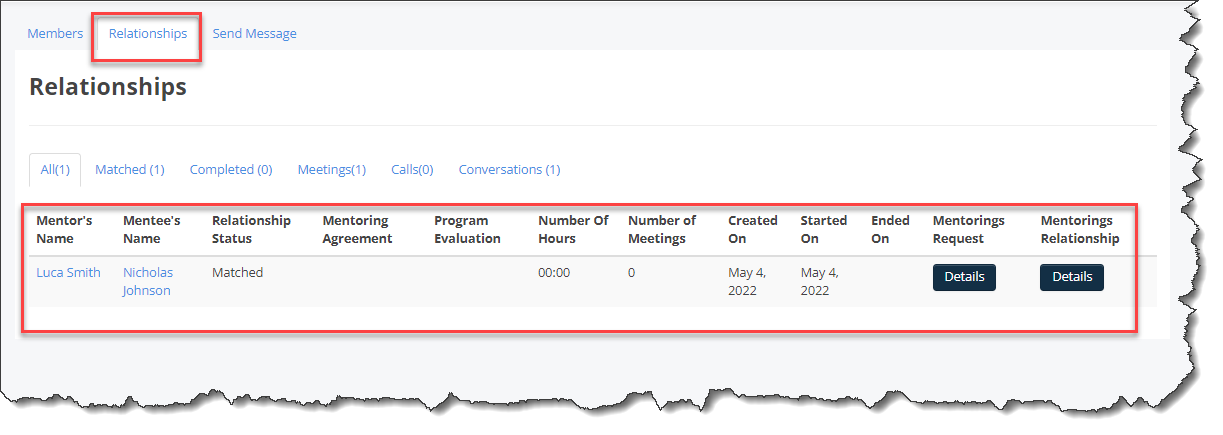
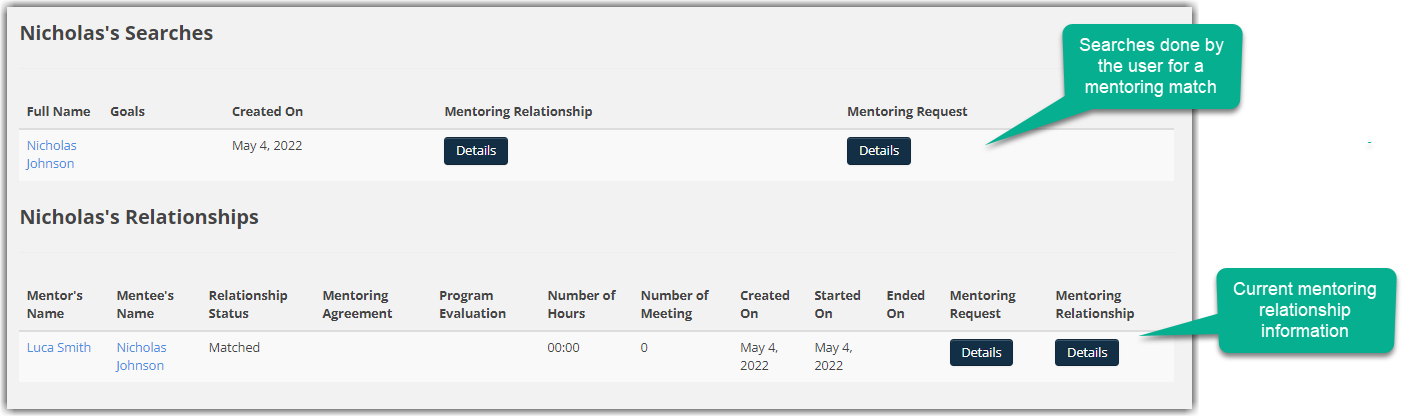
2.6 There will be clickable links in these columns once the mentor and mentee have completed a mentoring agreement and evaluation so that you can review what has been entered in each. In this example, because they have completed a mentoring agreement, the administrator can click on the "Details" link to review it.
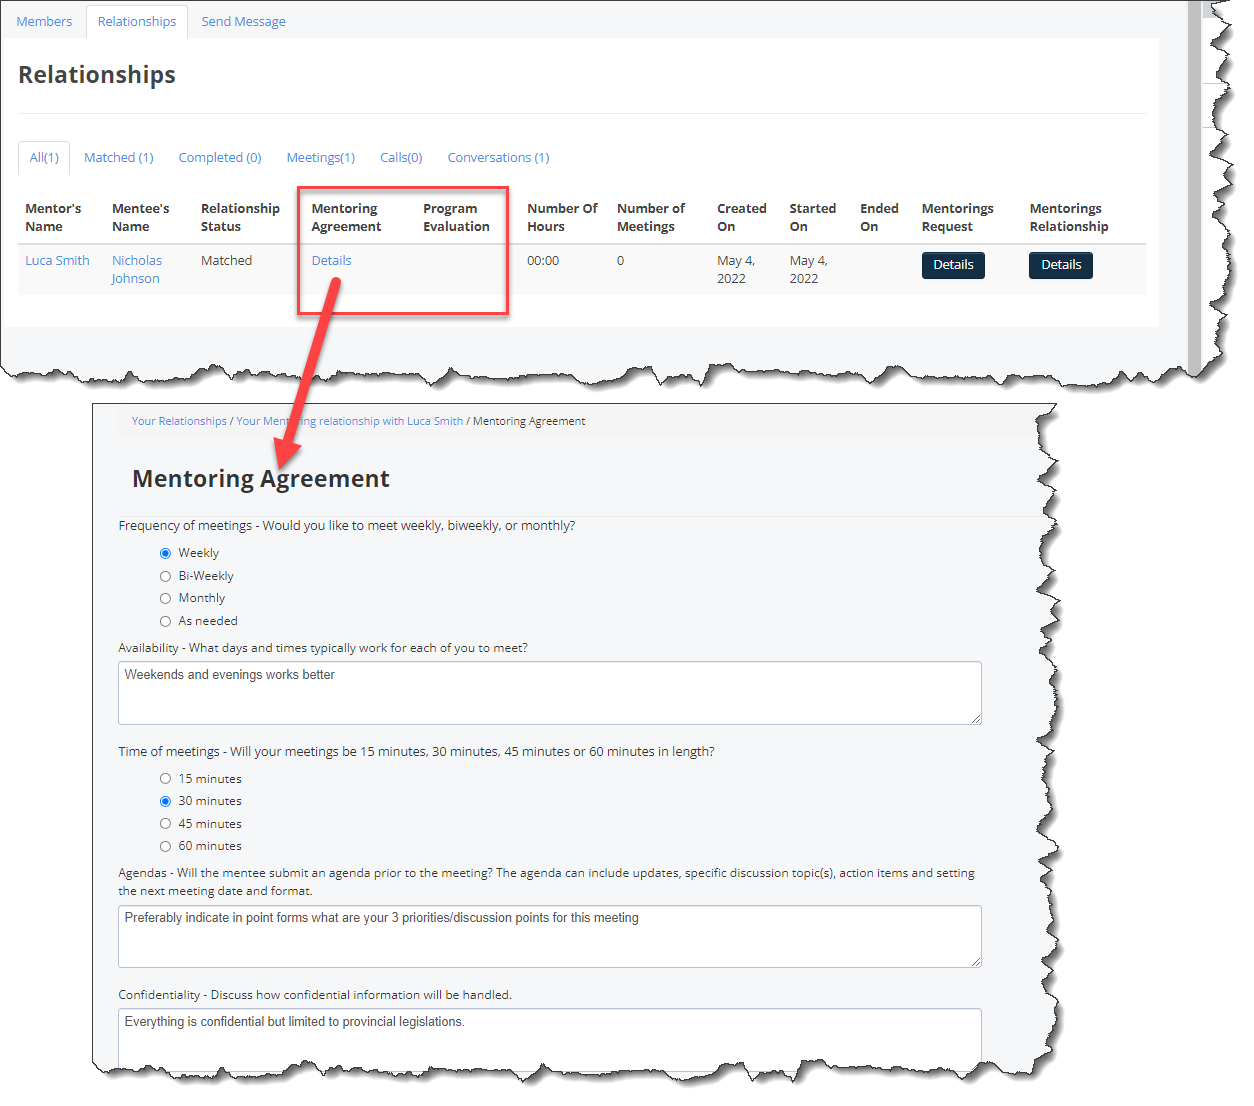
2.7 Click Details under the "Mentoring's Relationship" column to view additional information about this mentorship.

Send Messages to Mentors & Mentees
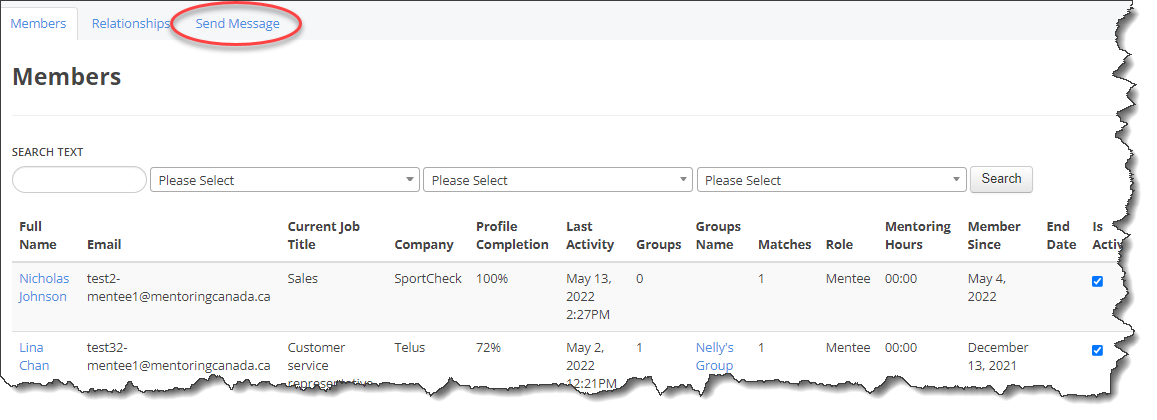
3. To communicate with mentors, mentees and/or relationships assigned to you, click on the “Admin” tab on the left-hand side of the page.

3.1 Click on the "Send Message" tab.
3.2 Indicate to whom this message is intended for, specific roles, relationship status or specific individuals.

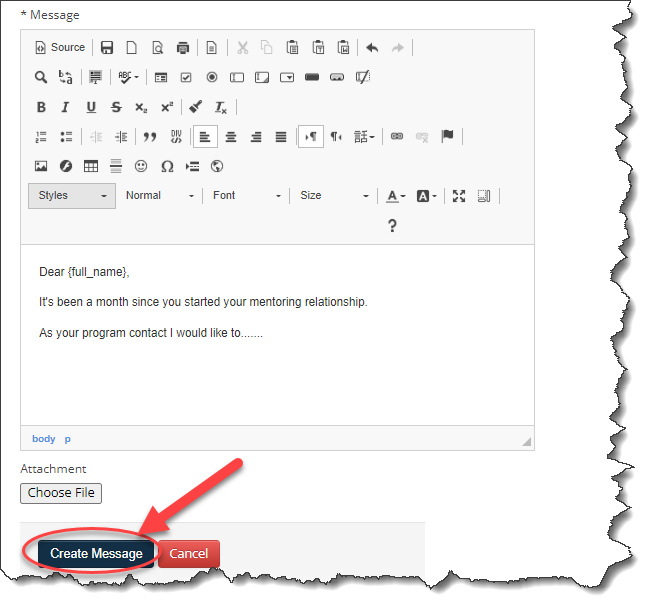
3.3 Enter a subject line, the body of the email and attached a file if required.
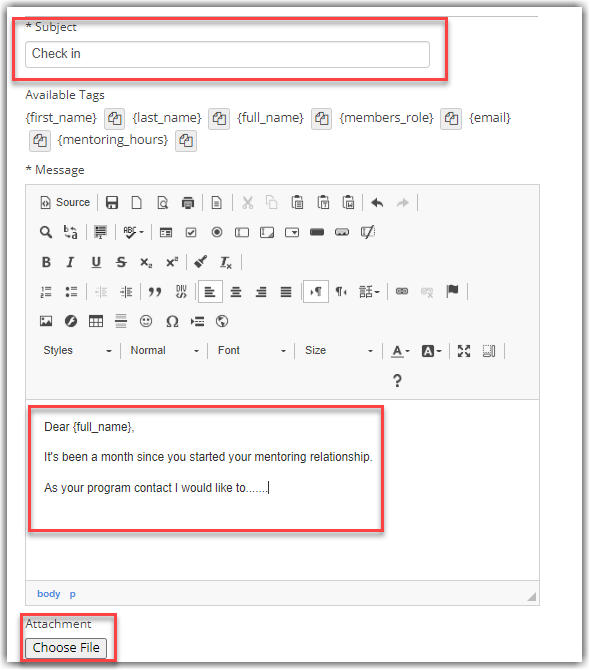

3.4 Click Create Message
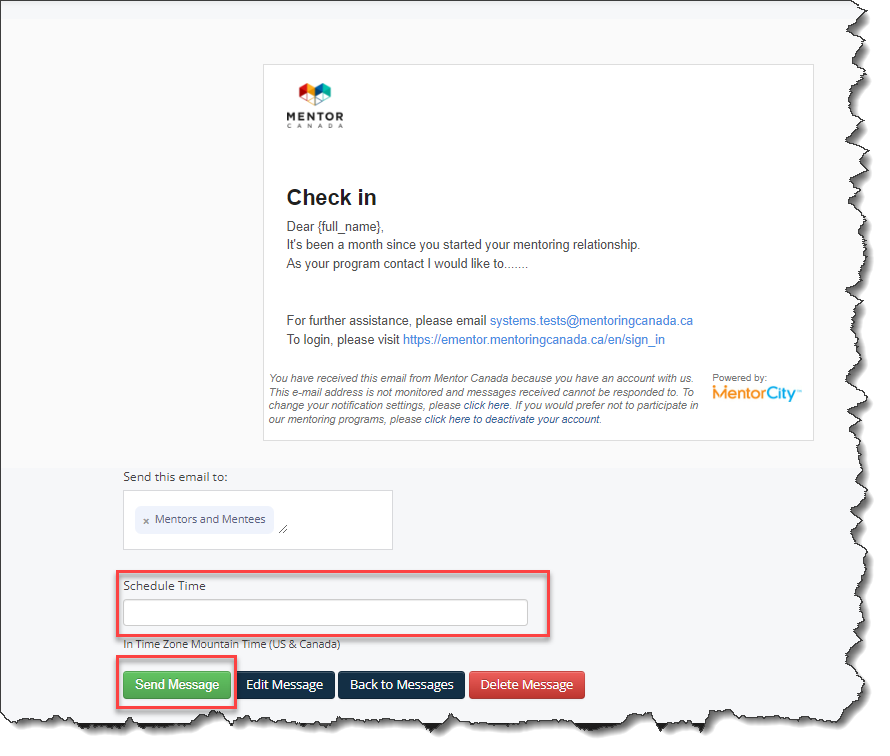
3.5 Review your message from here and if it's ready, click Send Message or click the "Schedule Time" to select a date and time from the calendar and indicate when this message should go out and then click Send Message.
Managing Groups as a Member/Relationship Administrator
Within the virtual mentoring platform, Member/Relationship Administrators have the ability to manage groups and facilitate effective interactions. They can also add their assigned members to specific groups and monitor group dynamics. However, it's important to note that Member/Relationship Administrators do not have the ability to create groups. This privilege rests with the Program Administrator, who establishes the groups, enabling Member/Relationship Administrators to manage them seamlessly.
As a Program Administrator, you possess the authority to create groups, thereby setting the foundation for effective collaboration and engagement. By leveraging this administrative capability, you enable Member/Relationship Administrators to efficiently oversee and nurture the interactions within their assigned groups.
Create a Group
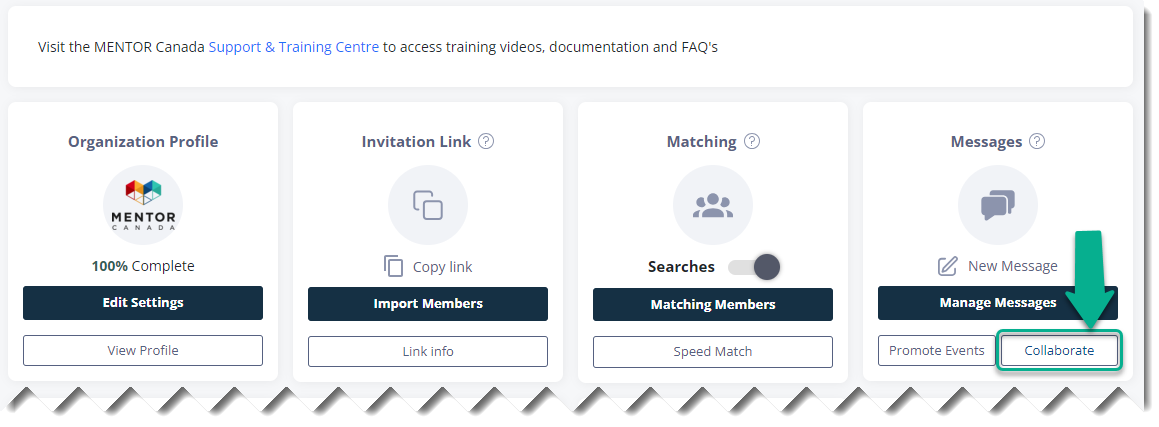
1. The Program Administrator can create a group by clicking on the “Admin” tab on the left-hand side of the page.
1.2 Click "Collaborate" located under the "Messages" tile on the first row of the admin dashboard.
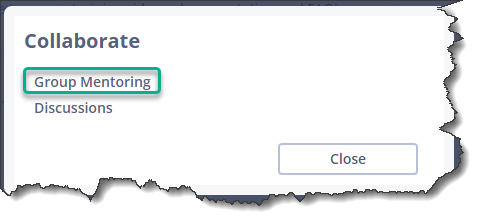
1.2.1 Then click "Group Mentoring".
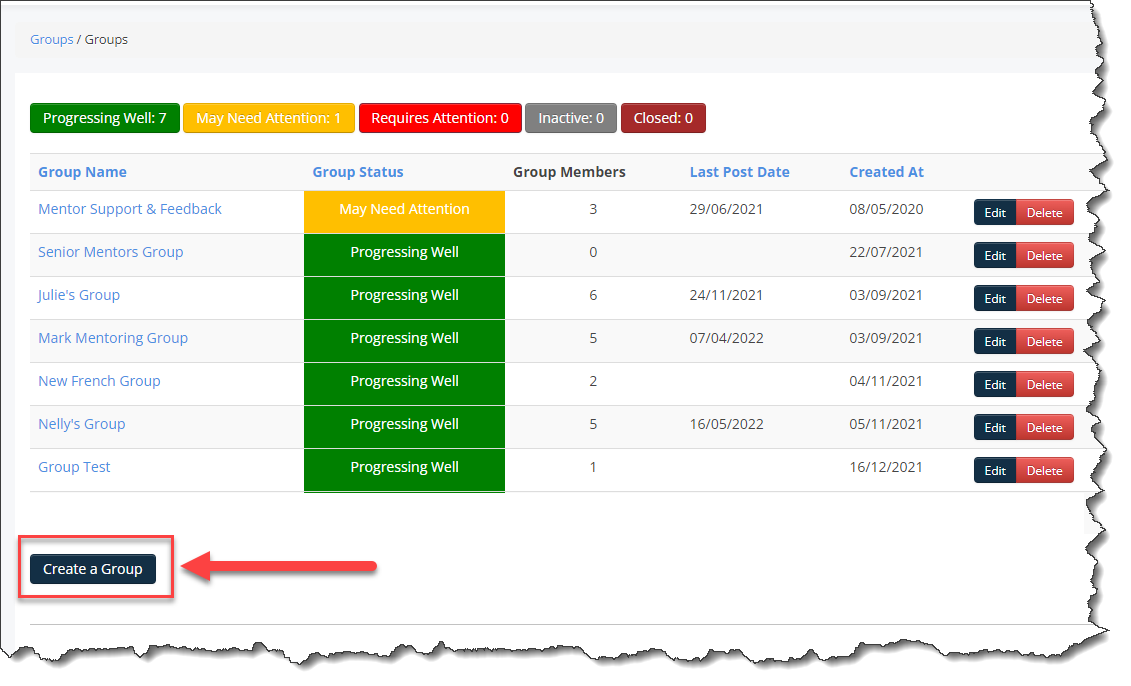
1.3 Click Create Group.
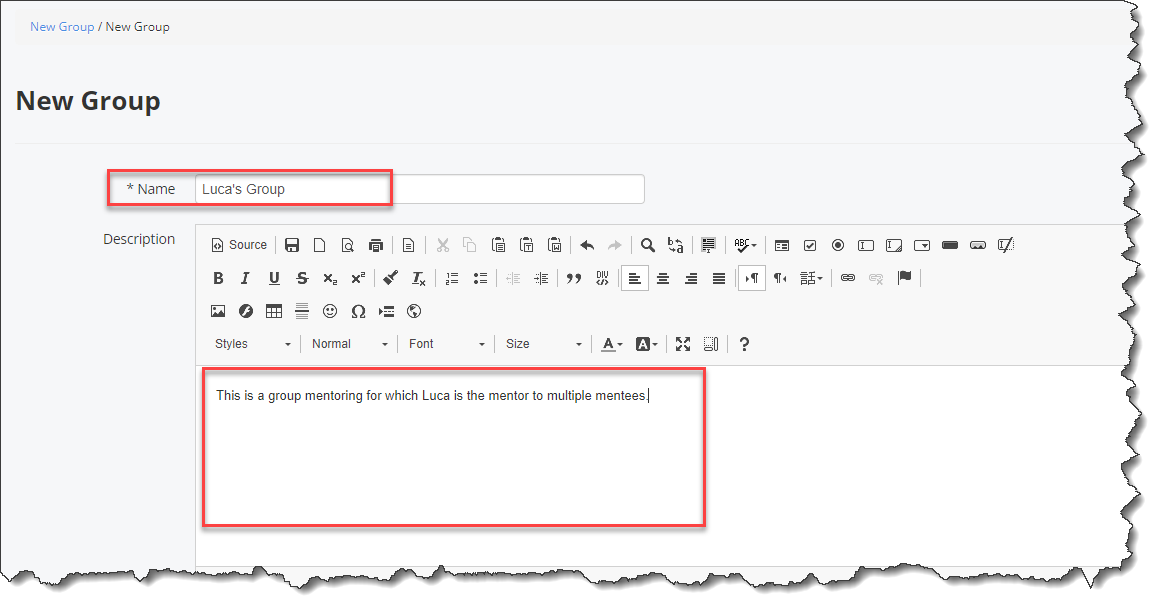
1.4 Give the group a name and a description. In this example, we will use the name of the mentor as the group name.
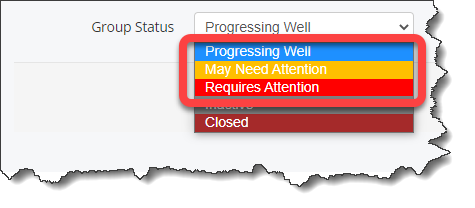
1.5 Select a Group Status. For a brand-new group, based on your internal process, choose a status between the first three statuses listed.
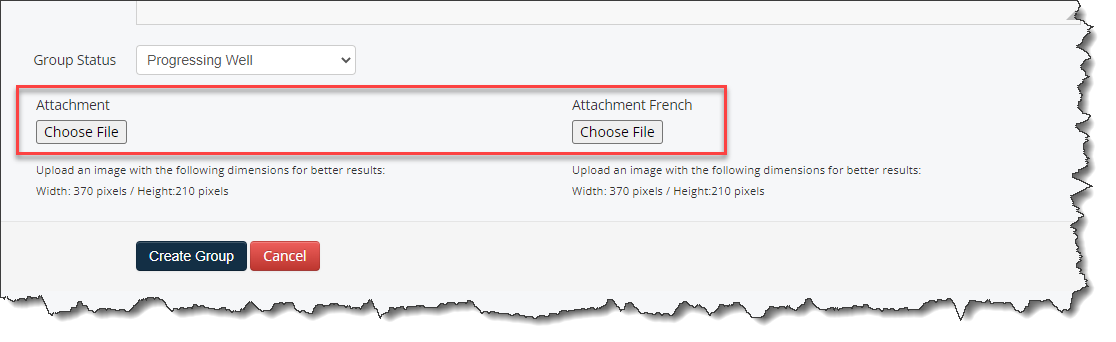
1.6 Optional: Attach a photo that is representative of the group. A different photo can be added based on the language selected on the platform. Make sure to follow the recommended dimensions.
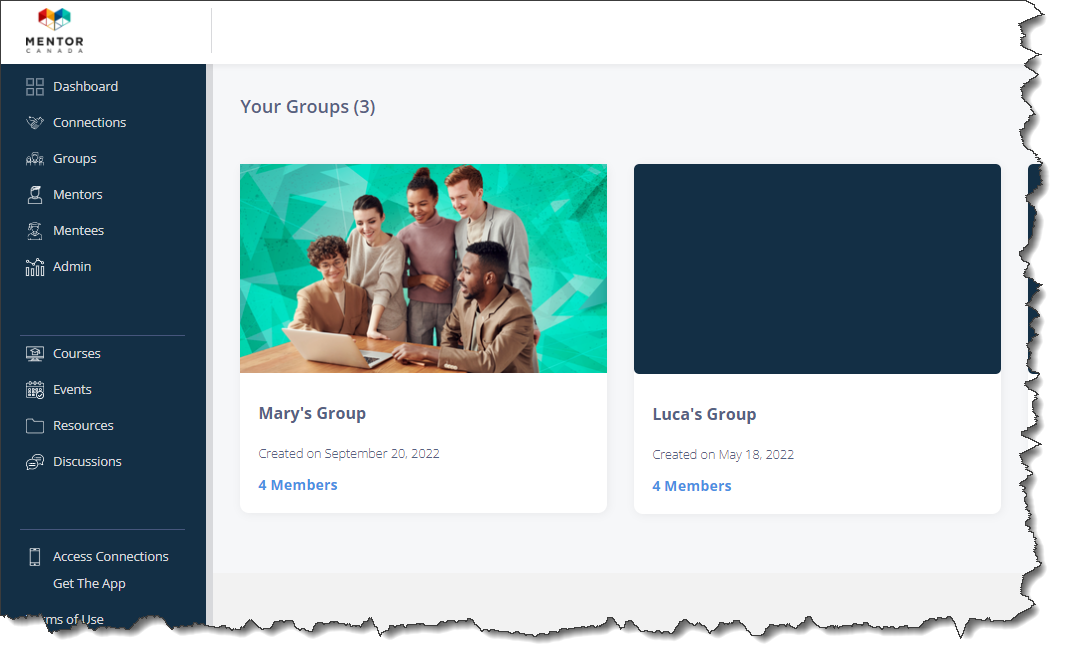
Here is an example of what groups with or without a photo would look like to the end user:
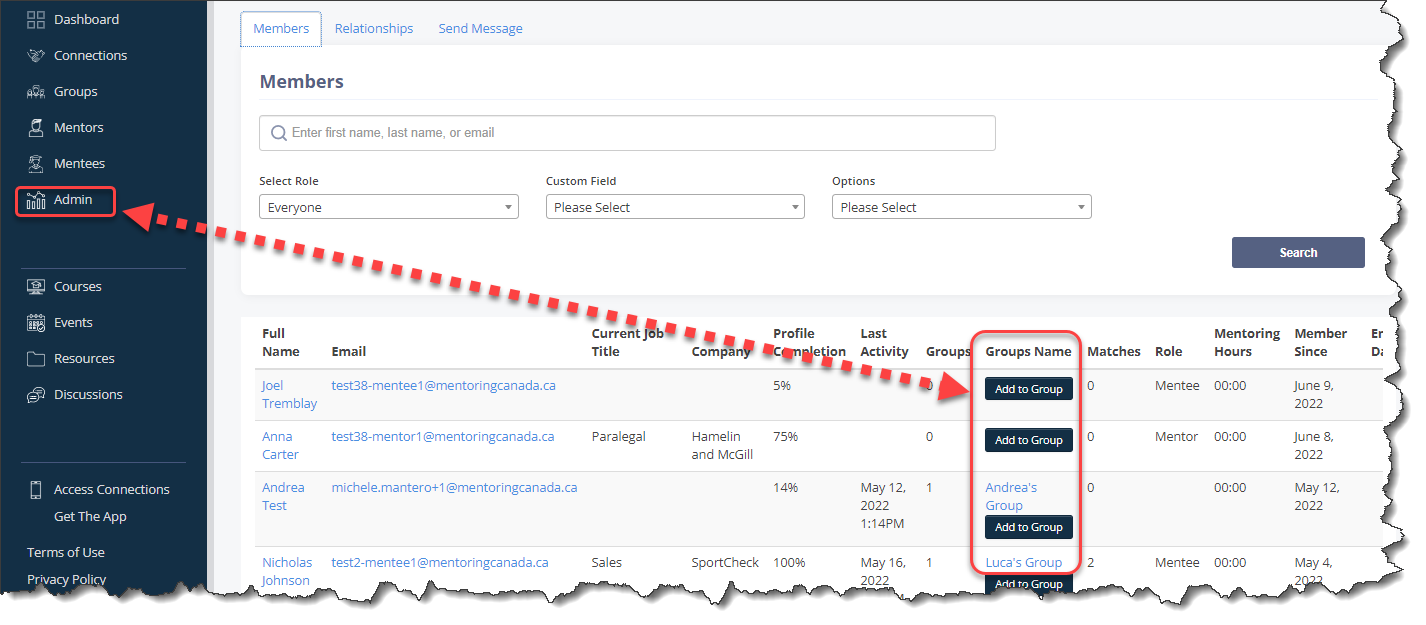
Add Members to a Group
2. Now that a group has been created, the Member/Relationship Administrator can start adding his assigned members to the newly created group. The Member/Relationship Administrator needs to return to the administrator's dashboard.
2.1 Click on "Members".

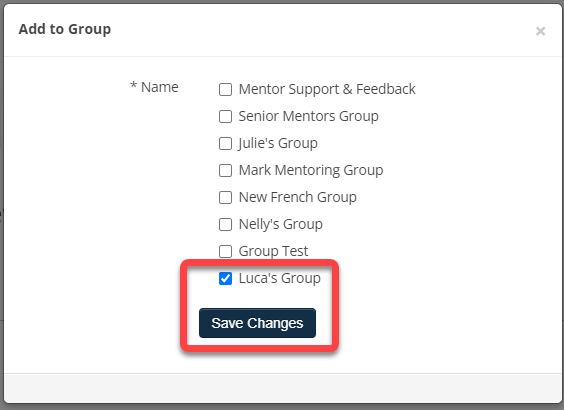
2.2 Click on Add to Group in the row of the mentor/mentee's name.

2.3 Check the box corresponding to the group this mentor/mentee will join and click Save Changes.
2.4 Repeat steps 2.2 to 2.3 for each member that needs to be added to a group.
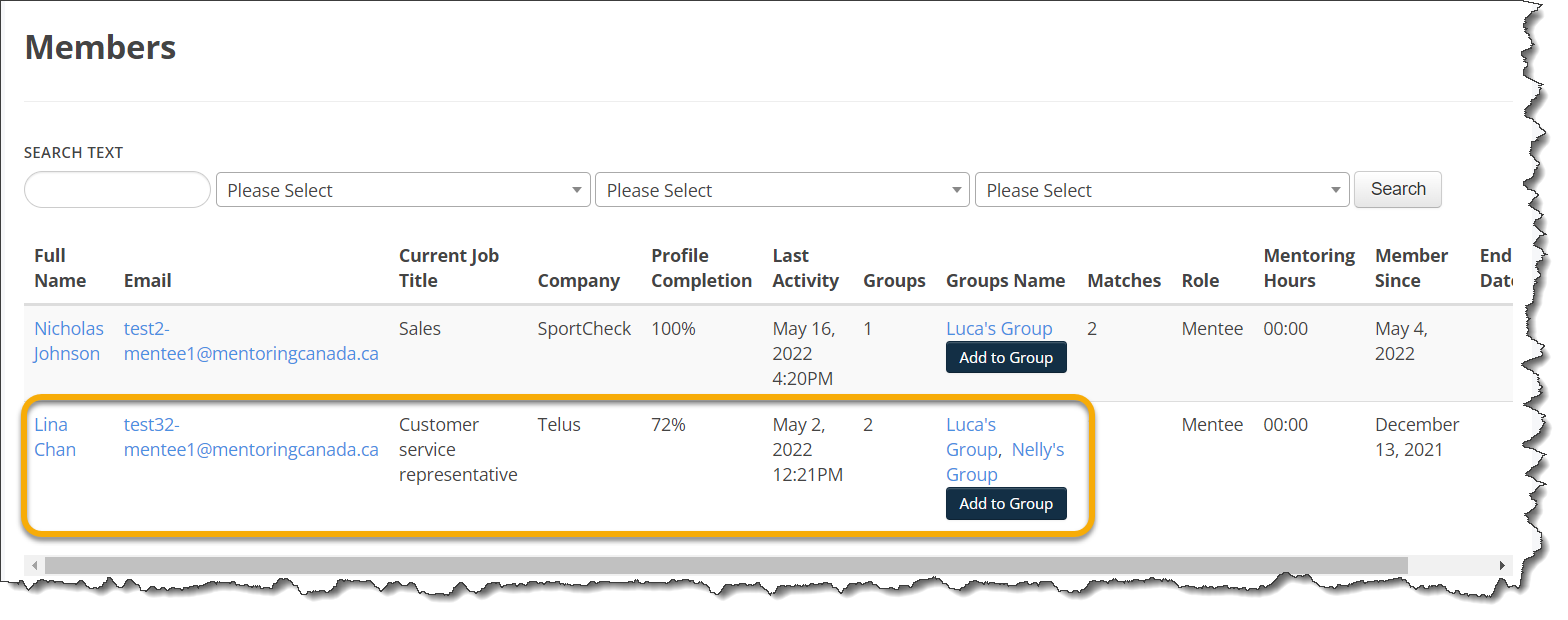
3. The Member/Relationship Administrator can now view and access the Group by:
3.1 Clicking on the "Admin" tab and then clicking on the group name under the "Group Names" column.

3.2 The Member/Relationship Administrator can also view and access any groups that his assigned members have been added to, even if added by a different administrator.
For example, Lina Chan below has been added to Nelly's Group by a Program Administrator. The current logged in Member/Relationship Administrator can click on "Nelly's Group" to view the interactions because Lina is one of their assigned member.
If you have questions or need further support, please contact our Support Team: support@mentoringcanada.ca